Raspberry Pi Not Showing On Laptop Via HDMI? Here’s An Answer
When I first got into Raspberry Pi, I didn’t want to spend any additional money on a display. My thought process was that I already had a computer, so I might as well use its screen.
Because I was new to the hobby at that time, I naively thought I only needed to plug in the micro HDMI end of the cable into my Raspberry Pi and the other end (which was a full HDMI) into the HDMI port on my computer.
That made me wonder: “Why isn’t my Raspberry Pi showing up on my laptop when using HDMI?”
You can’t connect Raspberry Pi directly to your laptop with only the HDMI cable because most of the ports on laptops are HDMI output, just like the Raspberry Pi. Simply put, these devices are sending video and audio outputs, which means they can’t accept outputs from other devices. To resolve this issue, you’ll need to use an HDMI Video Capture Device.
The rest of this article will be dedicated to explaining what an HDMI Video Capture Device is, how you can setup it up, and where you should look for it to get the most bang for your buck.
What Is An HDMI Video Capture Device?
An HDMI (High-Definition Multimedia Interface) Video Capture Device is a hardware tool that connects to your computer and can convert the video and audio signals from your other device into a digital format that your laptop can recognize.
The consumer base that most often use this are video journalists and streamers (meaning video game players on console and dual PCs, which are personal computers).
Regardless, Raspberry Pi users can use it to their advantage and display the output onto their laptop screen.
How Do You Use Raspberry Pi With HDMI Video Capture Device?
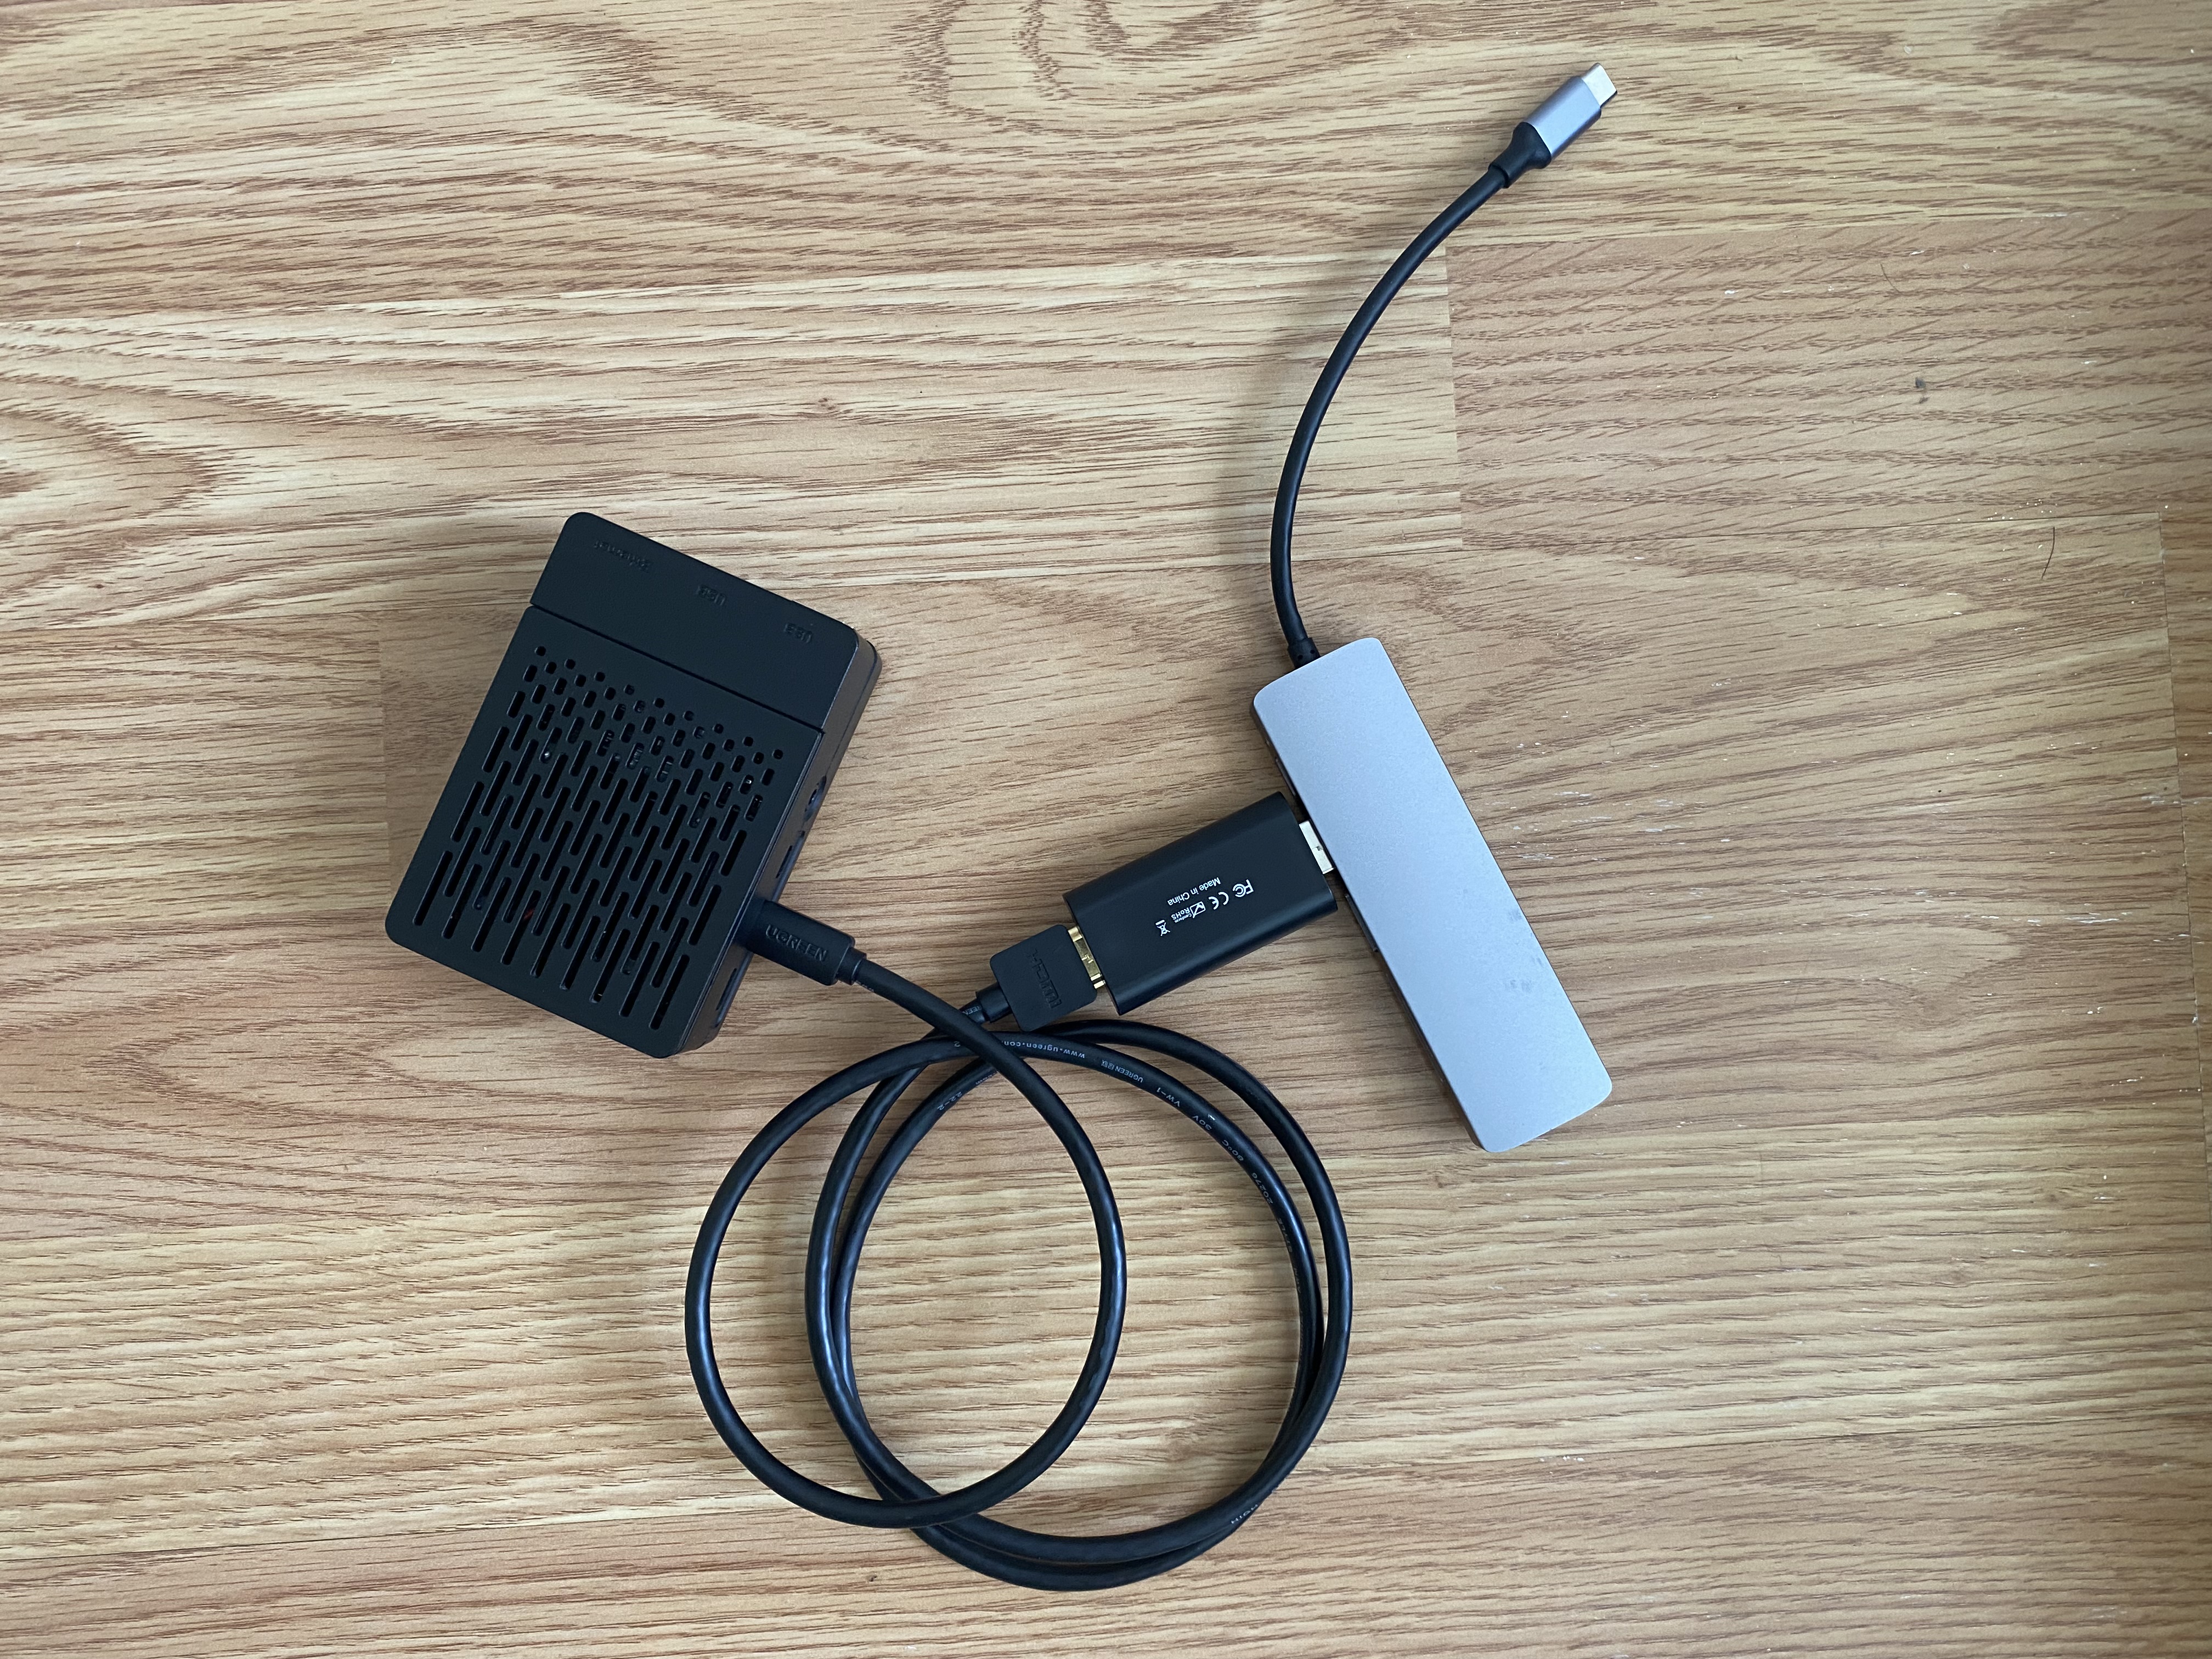
Here are the tools you’ll need before you can get started:
- SOFTWARE:
- OBS (Open Broadcaster Software) software
- To install it, go to this website link and download it according to your operating system (OS).
- OBS (Open Broadcaster Software) software
- HARDWARE:
- Raspberry Pi
- Charging Cable
- HDMI Video Capture Device
- USB to HDMI cable
- Laptop
- Optional: HDMI to USB-C dongle if you have a Macbook or a computer that doesn’t have an HDMI port built-in
The first step is to start your Raspberry Pi and connect it to your laptop through the HDMI port.
Next, open up the OBS application on your computer.
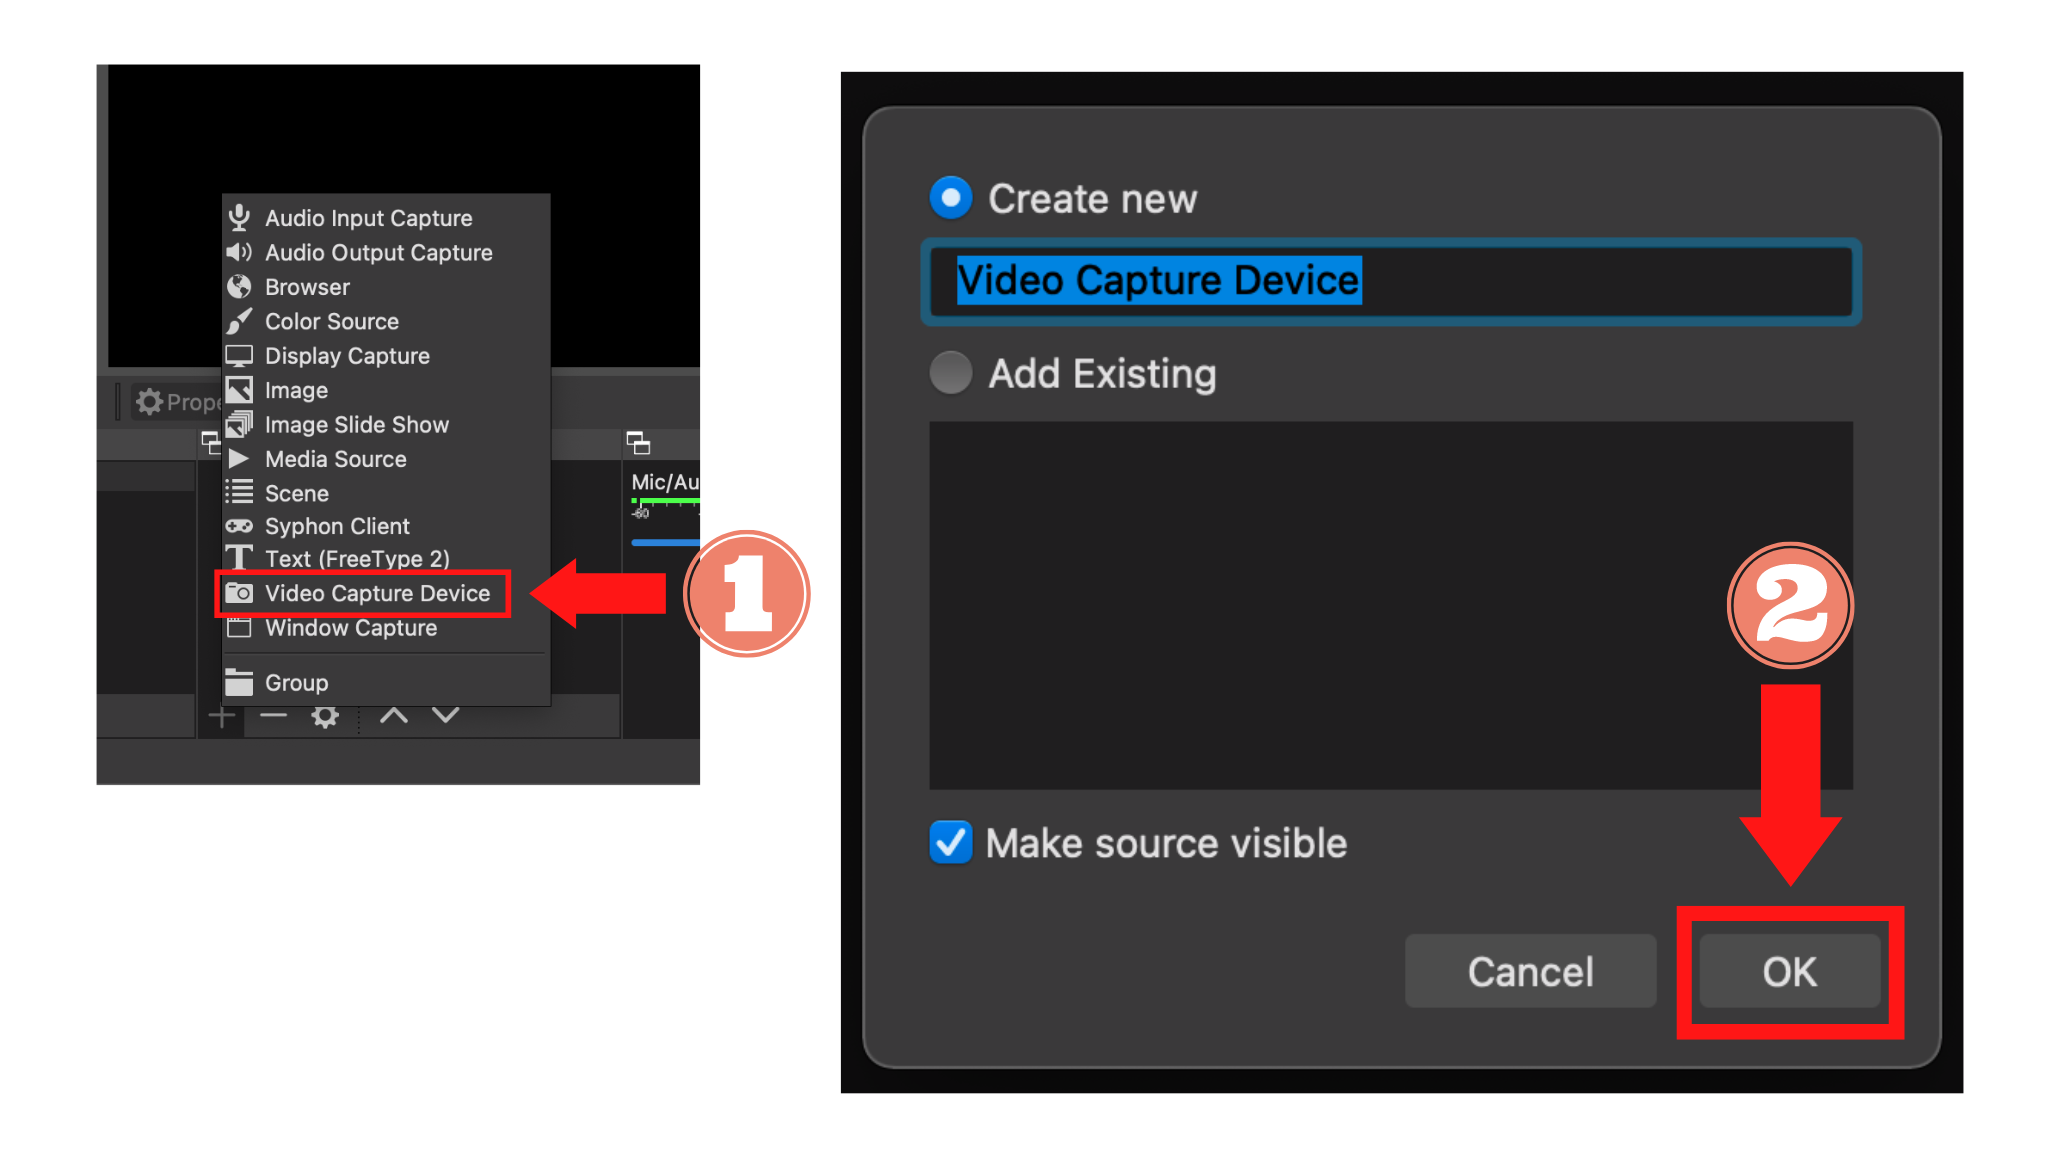
Thirdly, click on the plus sign near the bottom:
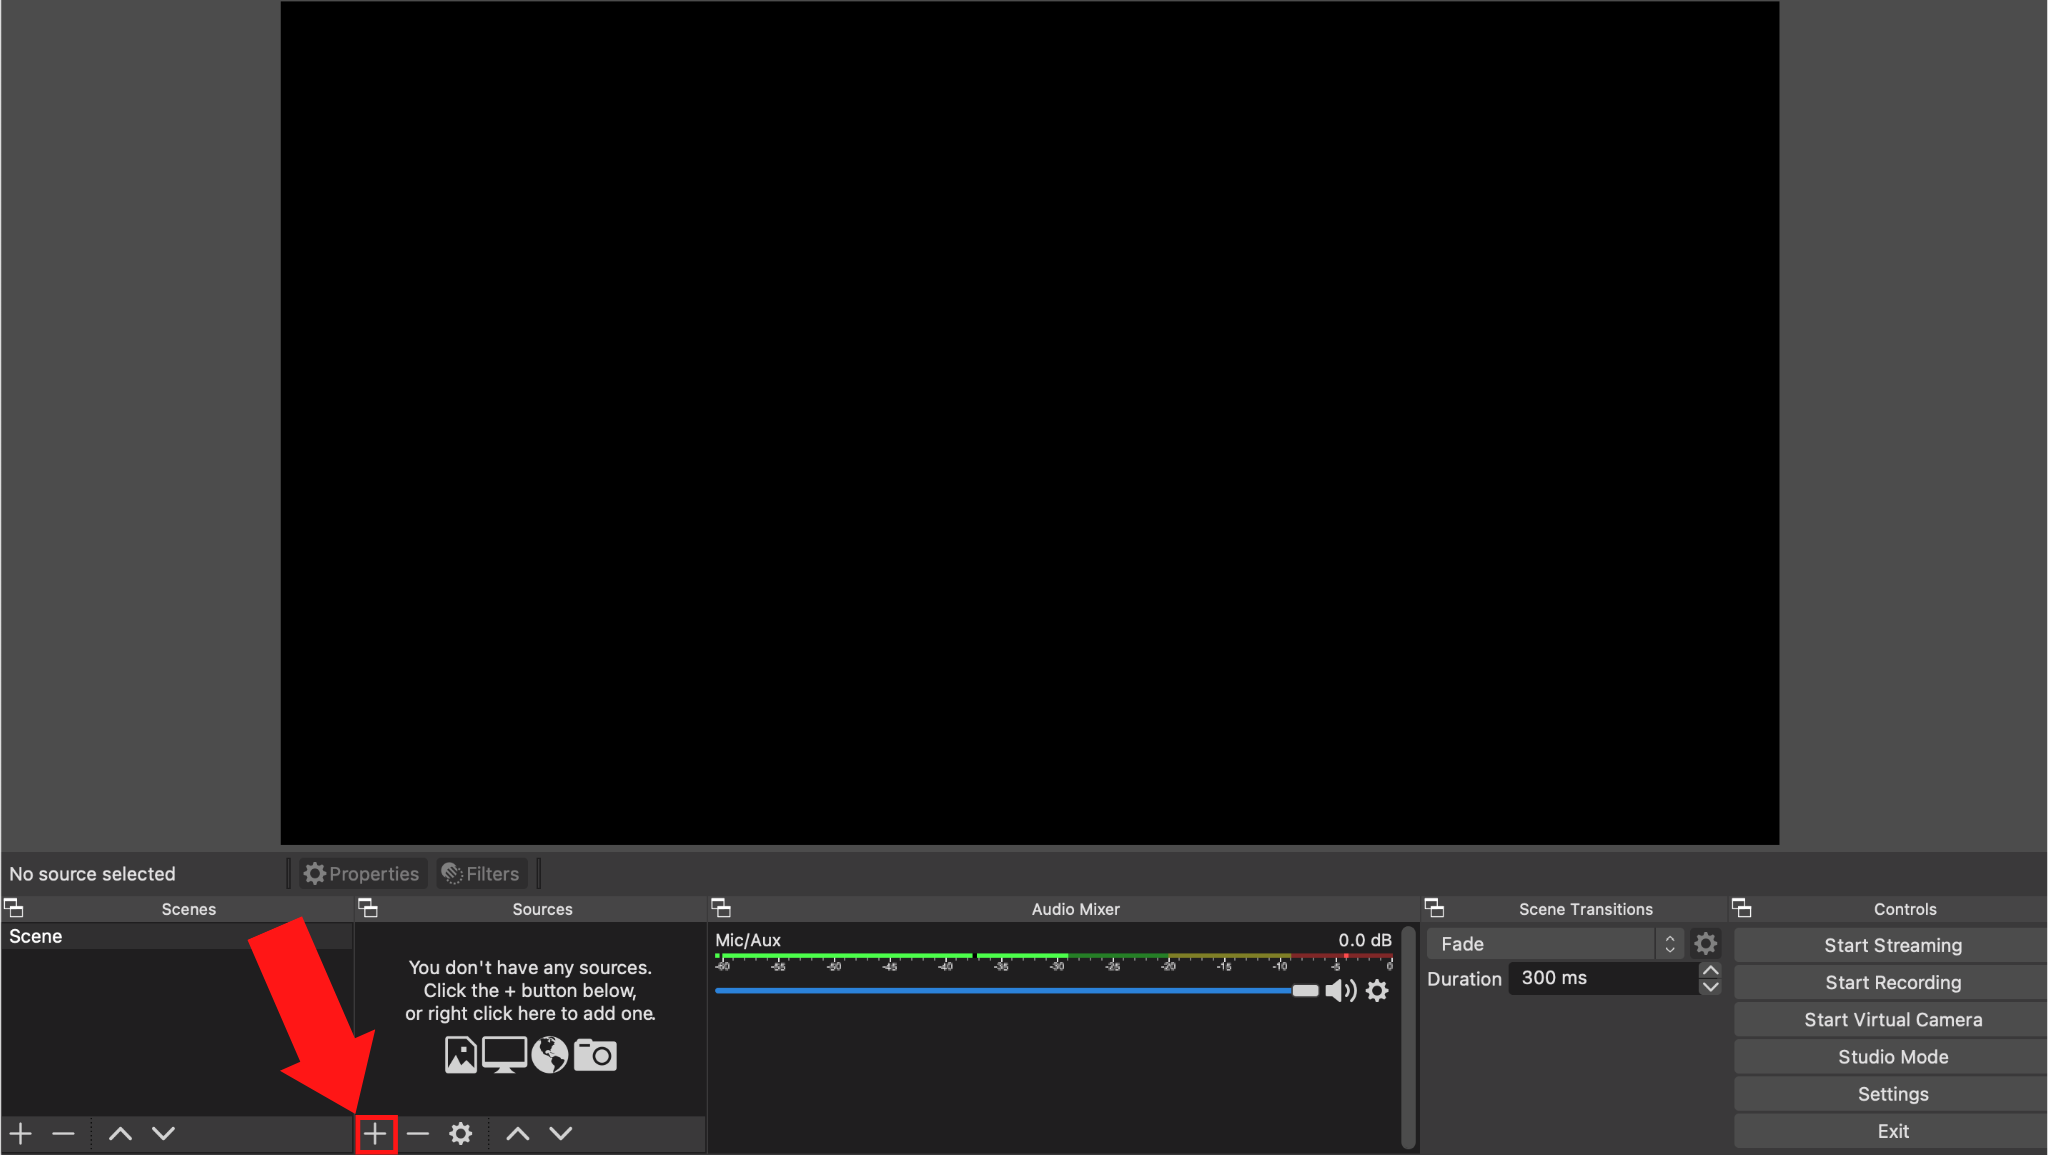
After that, select “Video Capture Device”, choose “Create new”, and press “OK”. Of course, you can name your device, but I left mine the way it was.
Now, you should be able to see your Raspberry Pi in the software. If not, then I’d recommend you powering off and on the Raspberry Pi as well as reconnecting the HDMI cable. Doing this worked for me the first time I started using it.
Where Can You Find HDMI Video Capture Device?
HDMI Video Capture Devices are relatively inexpensive. You can find them in online retailers like Amazon, which can go for anywhere between $15 to $20.
Of course, you can also find them in a brick and mortar store like Walmart, where you can buy them for $10 to $15.
However, if you want the best deals, you can look at eBay or even Facebook marketplace.
On these platforms, you can negotiate with the sellers and you don’t have to pay sales tax. For instance, I got my device for $7 on Facebook marketplace, but I had to pick it up from the seller. Thankfully, the seller was nearby, so I didn’t have to factor in transportation costs.
Still, you need to be careful when buying on these platforms be wary of scams. Here are some things I look out for:
- Make sure the seller is reputable
- For example, read their reviews and peruse other items they’ve sold.
- If they don’t have any products sold or reviews, I’d be a little cautious.
- Only buy what you see. If you don’t see something in the picture, don’t infer that it’s there.
- Be wary of stock photos.
- Pay through a method that can protect you.
- For instance, eBay has a 3-day return policy.
- Another example is that PayPal offers Purchase Protection for buyers if you buy stuff through their Goods and Services, but their stipulations for protection are:
- You were charged for something you didn’t purchase.
- Your order never arrived.
- Your order arrived, but it’s significantly different than it was described.
- For a more in-depth understanding of PayPal’s policy, click this link to go to their site.
Raspberry Pi Display Alternatives
If you don’t want to spend money on HDMI Video Capture Devices at all, you can also turn to these 2 free options: SSH and VNC.
SSH stands for Secure SHell, and it’s a network protocol that allows a user to remotely access the terminal of another device. In essence, this means you can work on your Raspberry Pi from your own computer, but the setup can take a while.
If you want to learn more about how you can use SSH on your Raspberry Pi, consider checking out my guide on it. It contains lots of helpful tips and tried and true methods.
A downside of this alternative is that there is no graphical user interface (GUI). In other words, you will only be able to type commands into the terminal and nothing else.
Consequently, if you want to be able to see the desktop and utilize all of the Raspberry Pi’s feature (and not just its terminal), then the next best, free approach is VNC, which stands for Virtual Network Computing.
This method will transfer the keyboard and mouse inputs from your computer to the Raspberry Pi as well as sending graphical updates from the Raspberry Pi to your laptop screen.
If you want to learn more about how you can set up and use VNC on your Raspberry Pi, then you need to check out my VNC guide.
The only downside to this method is the lag in response time. For instance, the words you type or the cursor of your mouse might take a few seconds to take into effect, so it can be a little annoying getting used to.
That’s why if you do have some money to spare, I’d highly suggest you invest it in an HDMI Video Capture Device. The display will feel more snappy, which means you’ll have a better user experience.
Summary – tl;dr (Too Long; Didn’t Read)
Here are the key takeaway points you should keep in mind after reading this article:
- In order to successfully use your laptop as a display for your Raspberry Pi via HDMI port, you’ll need to use a HDMI Video Capture Device
- If you don’t want to spend money on it, other good alternatives are SSH or VNC
- To setup an HDMI Video Capture Device, perform the following steps:
- Power your Raspberry Pi and connect it to your computer via HDMI port with your HDMI Video Capture Device
- Install and open up the OBS software
- Click the “+” button in the second box near the bottom of the screen
- Pick “Video Capture Device”
- Make sure the pop up window says “Create New” and click “Ok”
Only when you successfully configure your Raspberry Pi with an HDMI Video Capture Device and see the beauty of the display in HD, am I excited for you!