Easiest Way To Set Up Raspberry Pi Without Keyboard, Mouse, & Display (Headless Setup)
Did you know you can use a Raspberry Pi without all the extra accessories and peripherals like a monitor, a mouse, an HDMI cable, and a keyboard? This is also known as a headless setup, and it can only work if you already have a laptop and an SD or microSD card.
What this headless setup does is allow you to use and control your Raspberry Pi from the comfort of your laptop.
I wish I knew this before I got started with Raspberry Pi since it could have saved me a lot of time and money. Still, I did extensive research into this method and came up with a simplified process of getting it all set up.
So, how do you set up a headless Raspberry Pi?
The 7 steps are:
- Install the Raspberry Pi Imager and configure it
- Configure your password, Wi-Fi, and any other additional settings
- Write Raspberry Pi OS to your SD card
- Install VNC viewer on your laptop
- Insert SD card into Raspberry Pi
- Identify your Raspberry Pi’s IP address
- Use VNC To See Your Raspberry Pi
The rest of this article will go more into detail on how you can accomplish these steps. I’ll also include a troubleshooting section that will provide answers to some of the problems you might encounter along the way.
1. Install & Configure Your Raspberry Pi Imager
You will first need to go to the official Raspberry Pi website and download the imager: https://www.raspberrypi.com/software/. This will largely depend on the operating system (OS) your computer is running. For instance, I have a Macbook, so I will download the version suited for macOS.
The reason we need to have this installed is so that we can install the Raspberry Pi OS onto your SD card (or microSD card), which is later needed by your Raspberry Pi.
Once you have installed it, you can open it up.
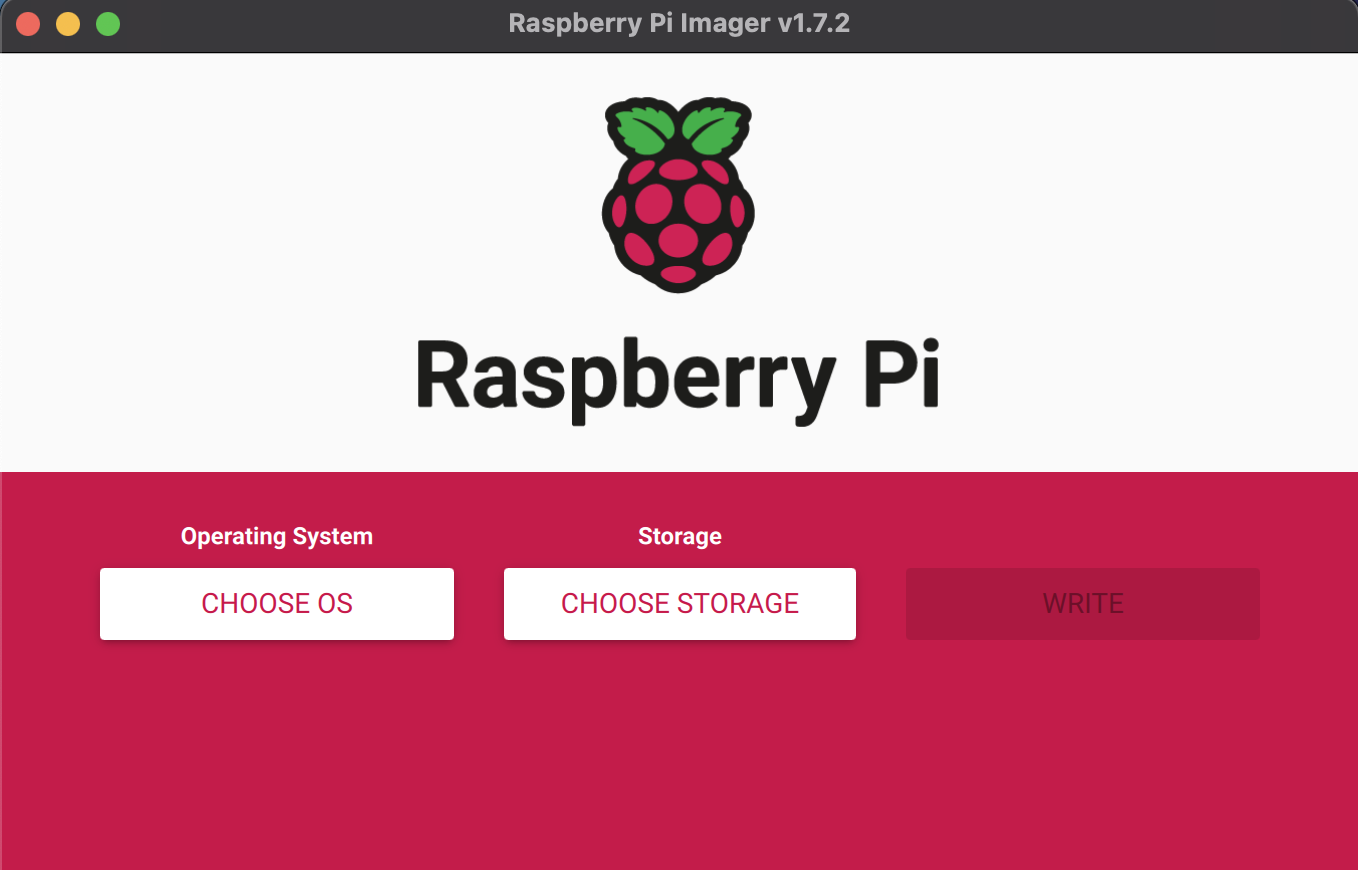
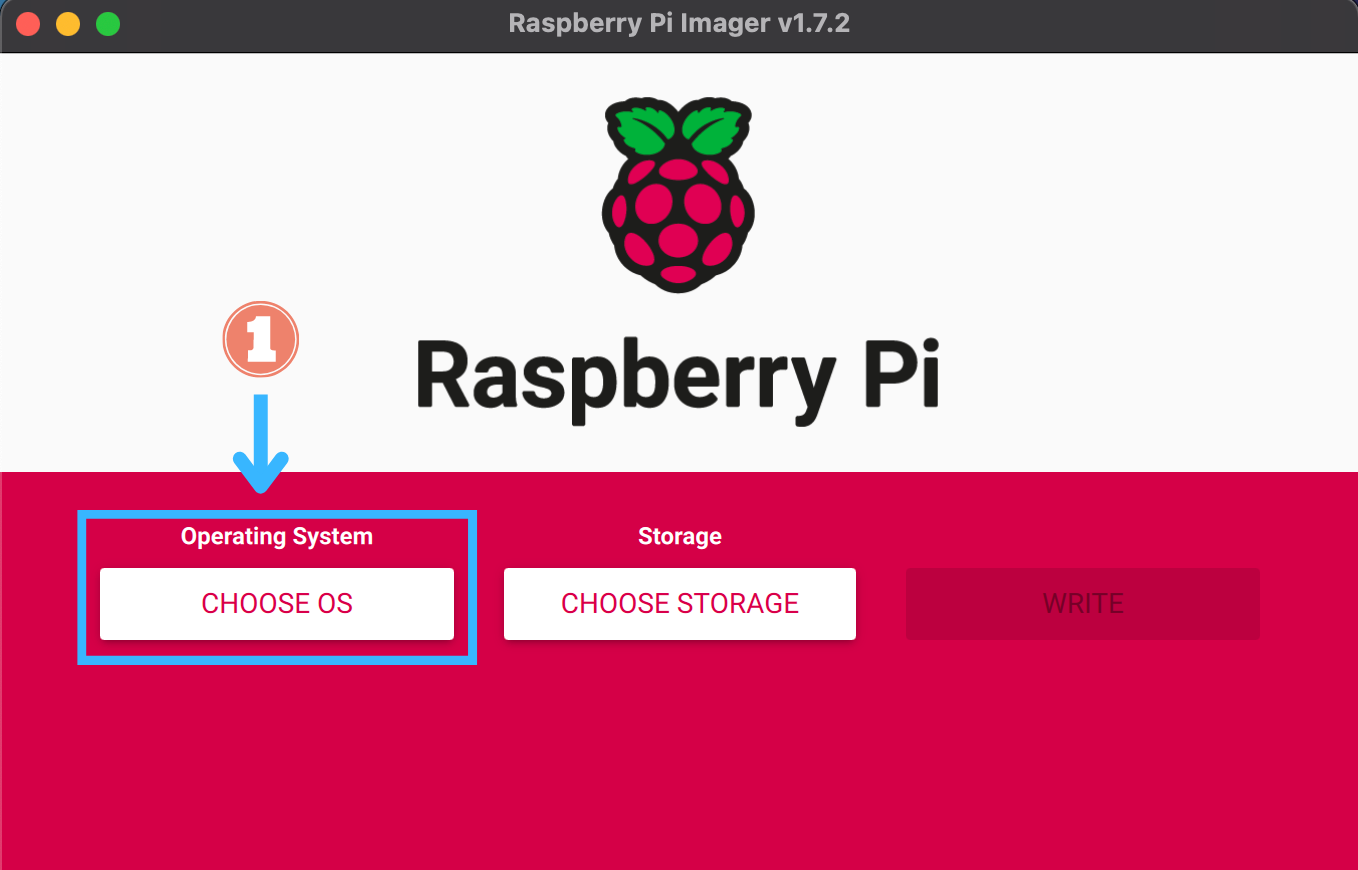
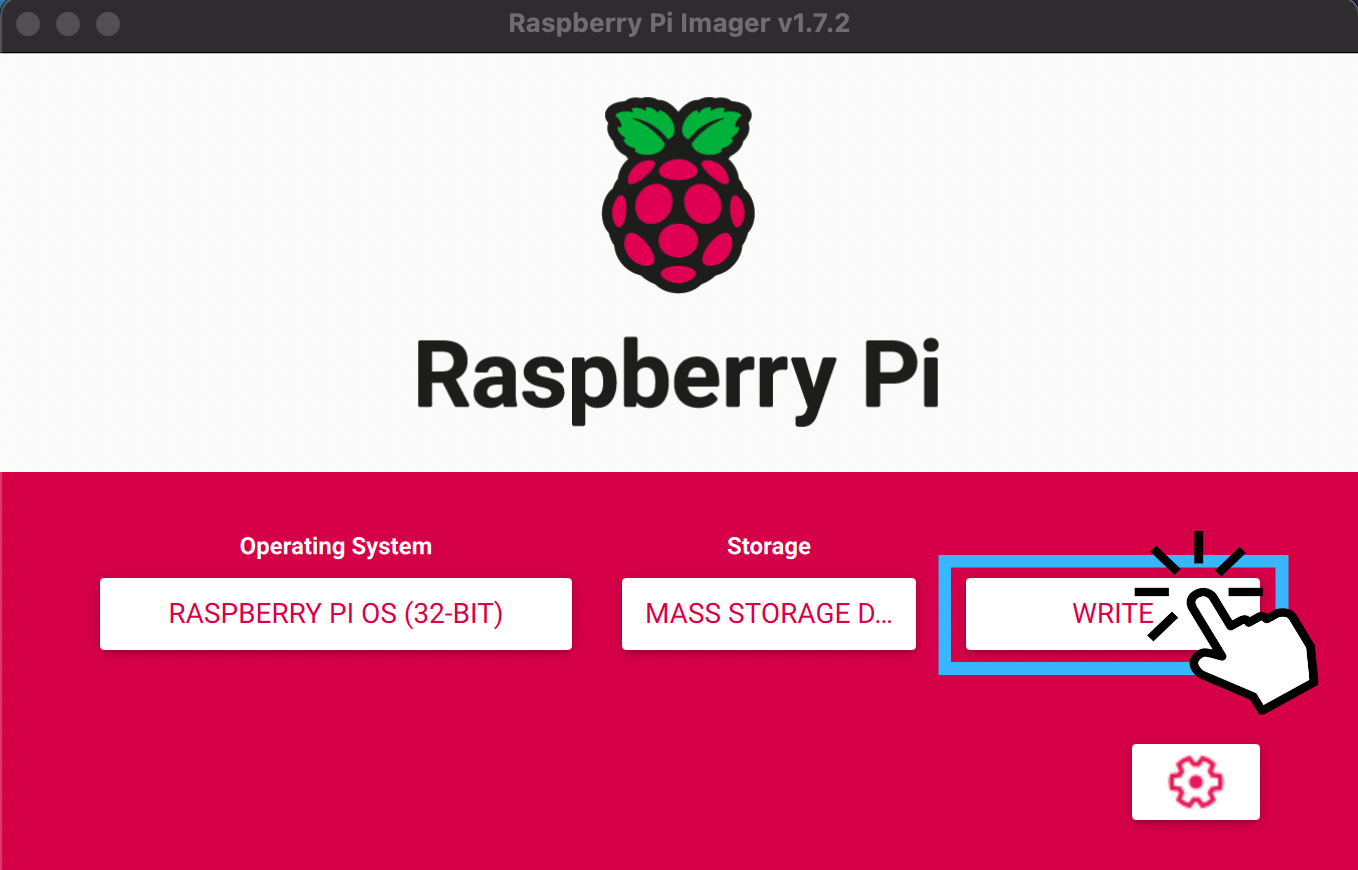
Next, you’ll need to choose an operating system, so click on “Choose OS”. The one you will need for this setup is called Raspberry Pi OS (32-bit), and it is the first one you will see.
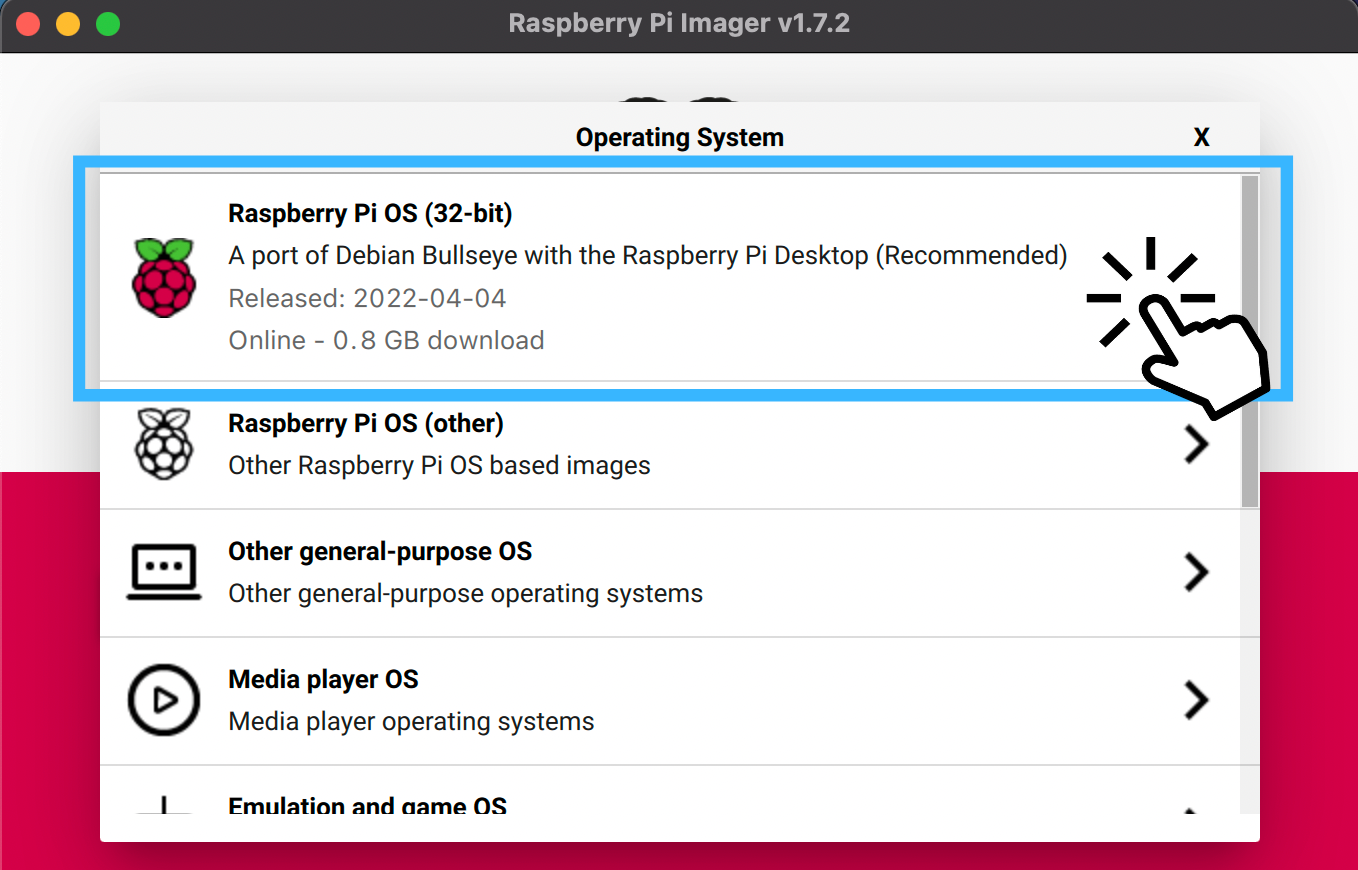
If you don’t see this as an option, then click on “Raspberry Pi OS (other)” and then select “Raspberry Pi OS Full (32-bit)”.
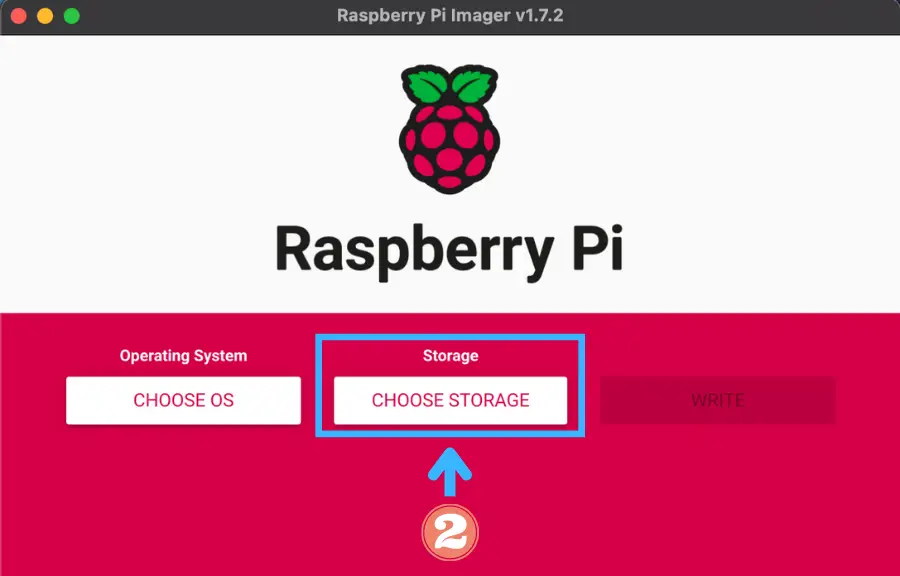
After that, you will need to pick a storage location so that the Raspberry Pi Imager knows where to write to. Thus, you will need to click on “Choose Storage” and the name of your SD card (or microSD card). Make sure you have your SD card plugged in before choosing it.
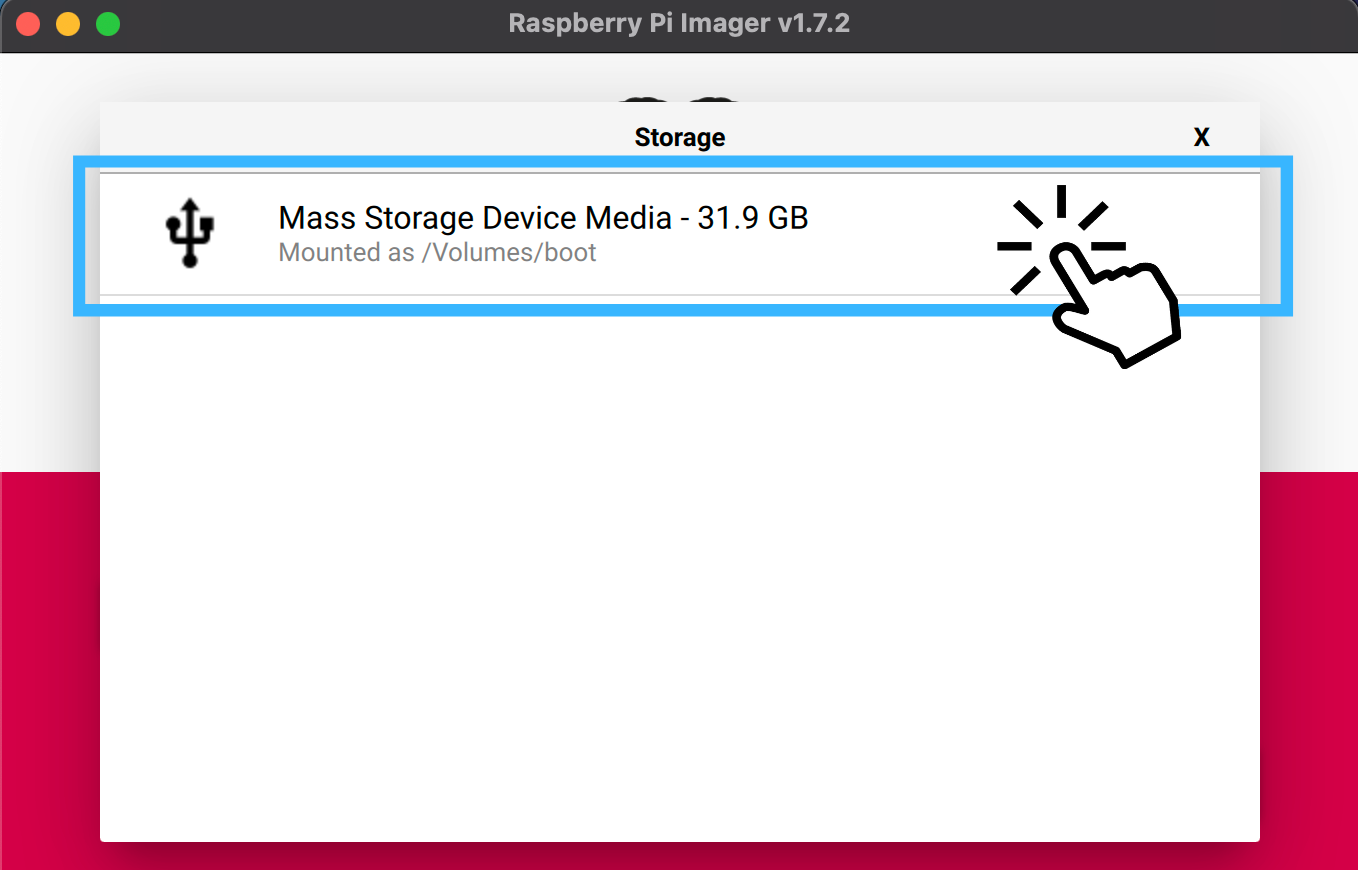
Now, before you click the “Write” button, you’ll first need to make some adjustments in your settings. This is where the second step comes in.
2. Configure Password, Wi-Fi, & Additional Settings
The most important part of this step is enabling Wi-Fi and Secure Shell (SSH).
The reason we need Wi-Fi enabled is that we are going to connect the Raspberry Pi to your laptop with the Internet Protocol (IP) address, which identifies the device that is connected to the Internet. This can only be identified if the Raspberry Pi has Wi-Fi enabled.
The IP address will be used for SSH and remotely connect to your Raspberry Pi using VNC in the later steps.
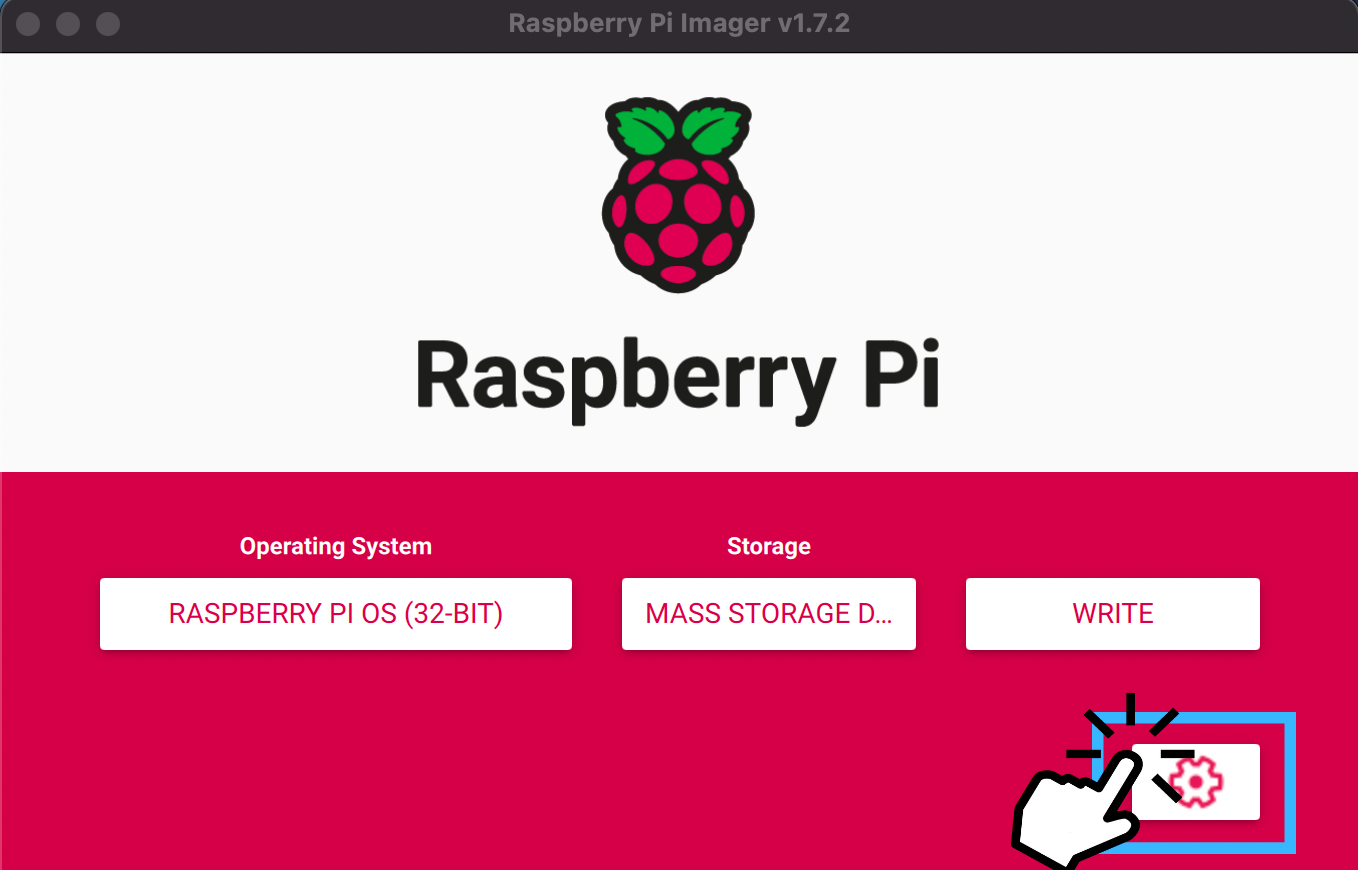
First, you’ll need to click on the gear tool near the bottom right corner of the Raspberry Pi Imager.
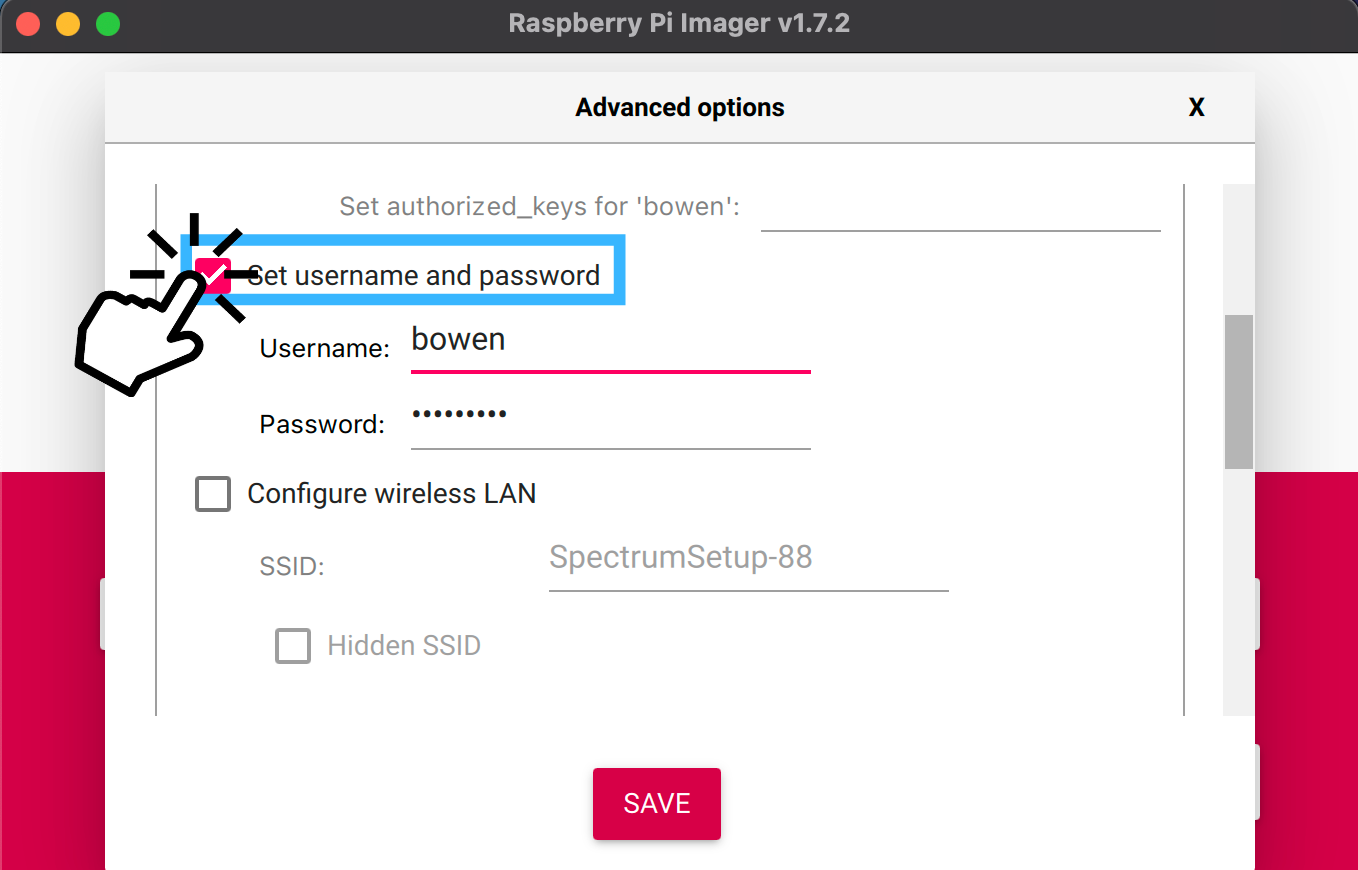
Then, you can scroll through the settings, and enable other features as well. For instance, besides setting up the Wi-Fi connection, you can also set up your username, password, and time zone.

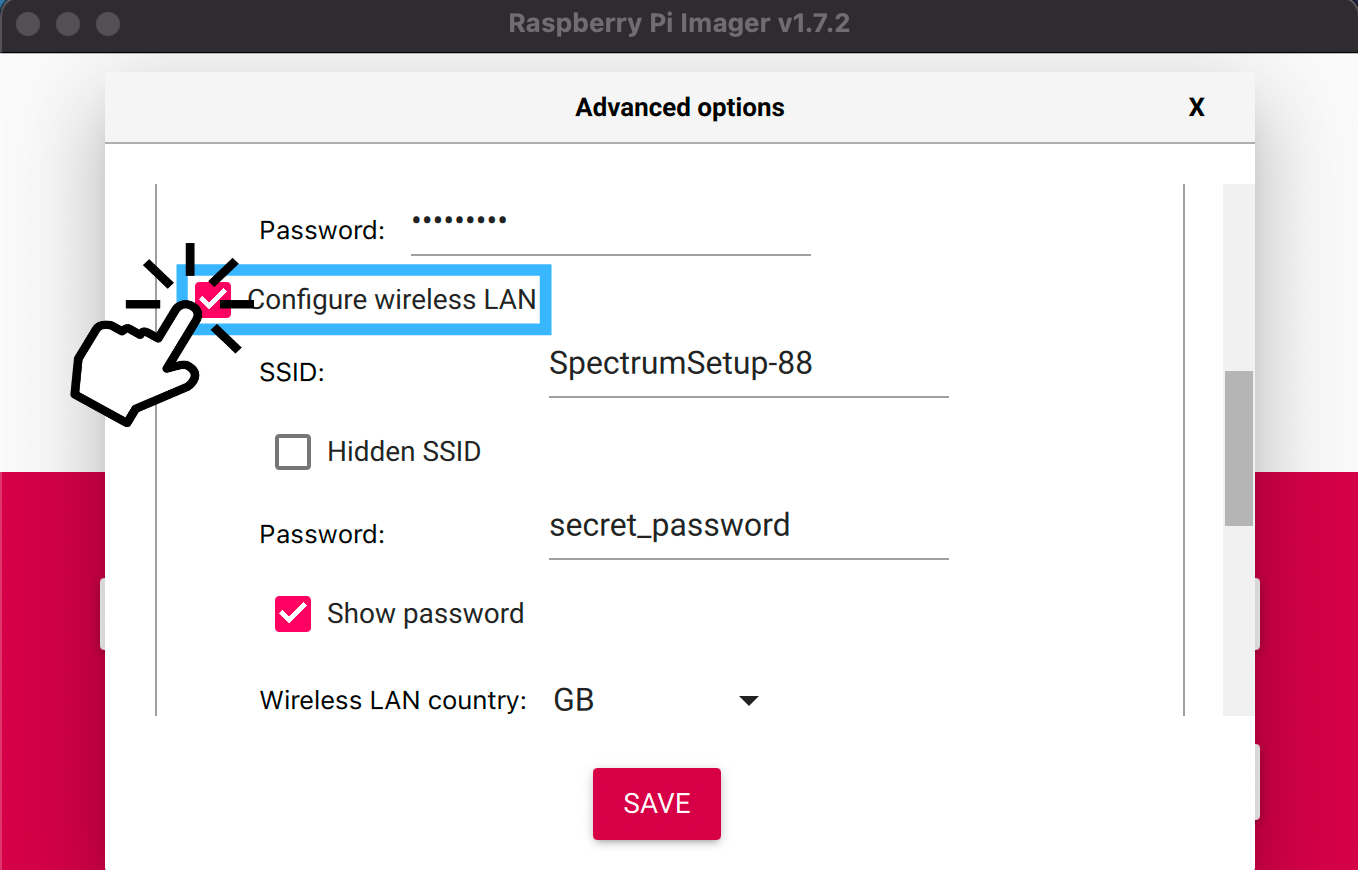
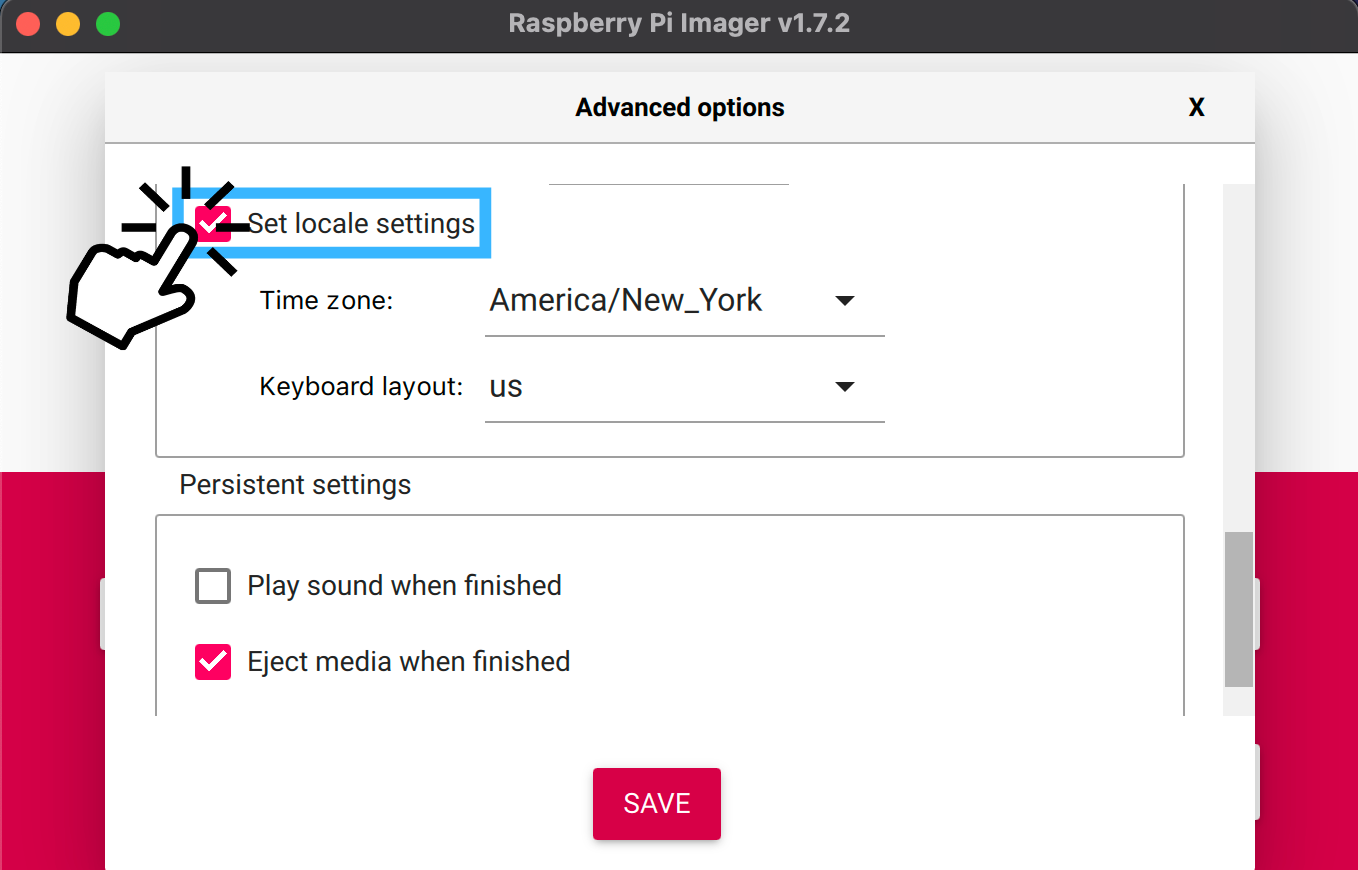
Now, you can click “Save” (which is the red button near the bottom center of your screen).
3. Write Raspberry Pi OS to SD Card
After all your hard work, you can now click the “Write” button and wait anywhere between 10-20 minutes for the imager to finish.
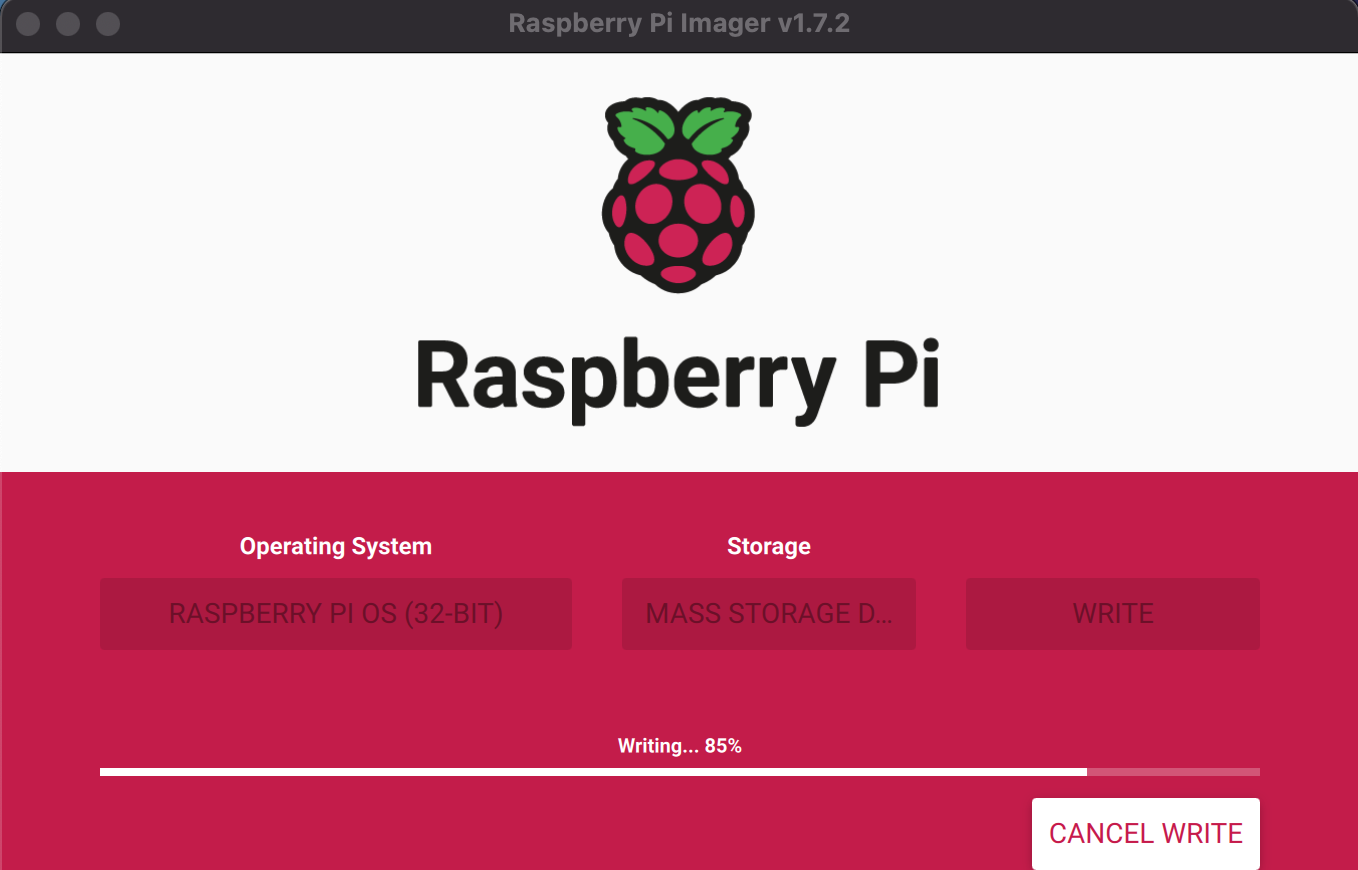
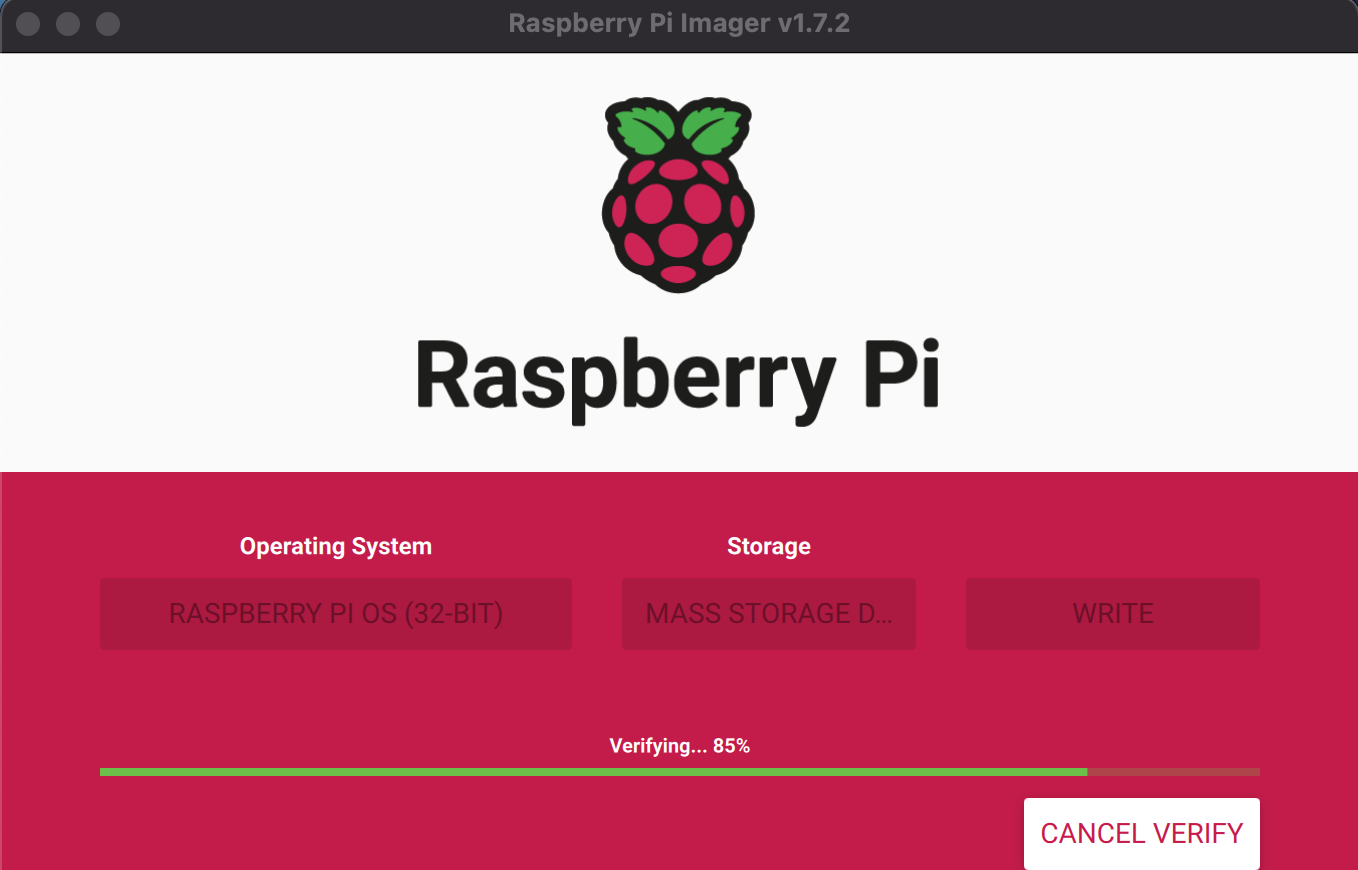
The imager will first write to your disk device and then verify it. Since this process will take a while, we can move on to the next step to make the most of our time.
If you somehow encounter an error writing to your SD (or microSD) card, check out my Troubleshooting section to see how you can resolve it.
4. Install VNC Viewer On Your Laptop
All you need to do is go to the VNC Viewer website and install the software that is compatible with your laptop’s OS: https://www.realvnc.com/en/connect/download/vnc.
This tool will let us SSH into the Raspberry Pi more easily.
5. Insert SD Card Into Raspberry Pi
By now, you should hopefully get an approval window in the imager that says it is done writing to your disk device.
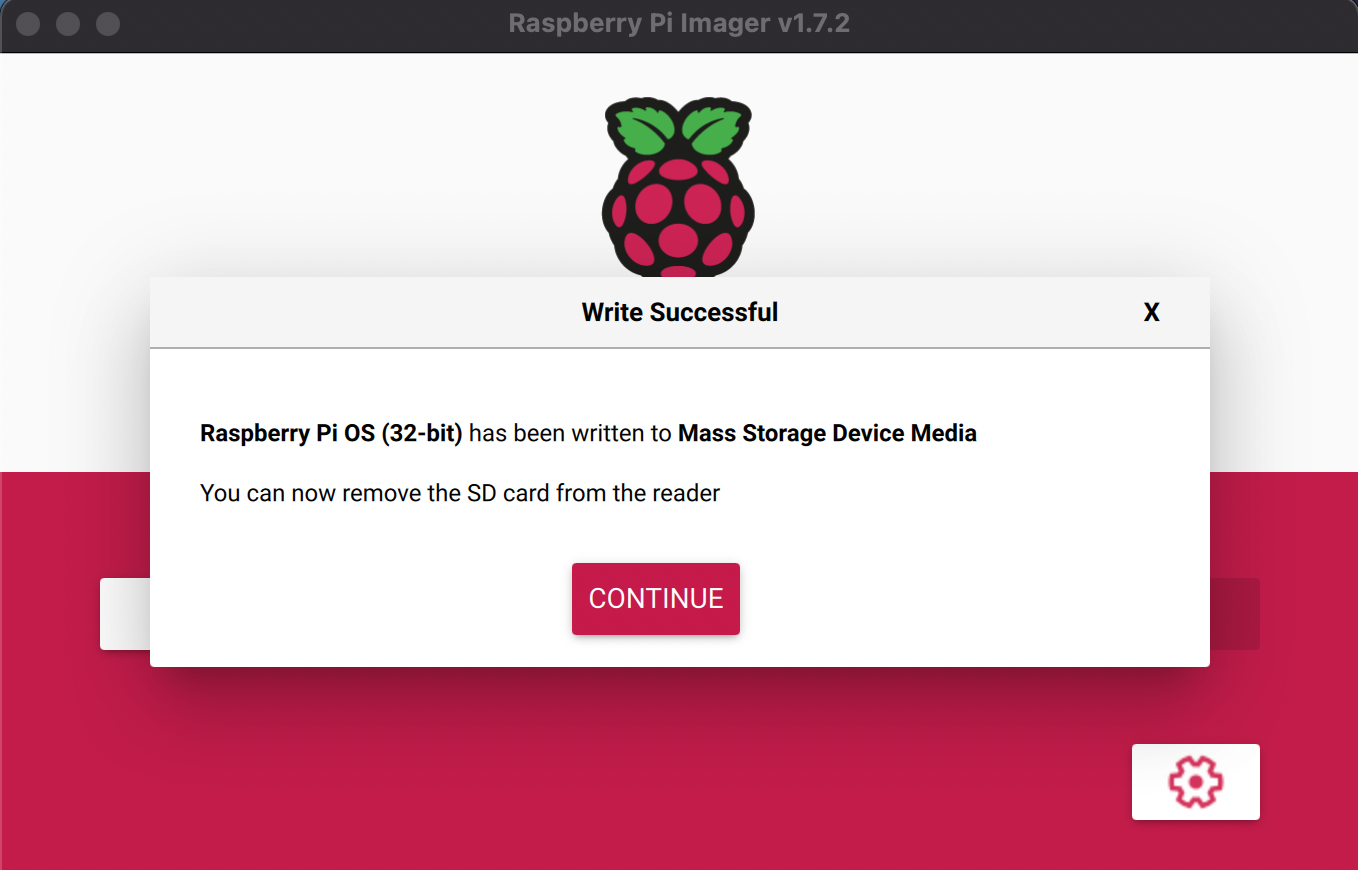
Before you remove your SD or microSD card, you should also make sure you ejected the card before inserting it into your Raspberry Pi. Doing so can avoid your SD card getting corrupted.
You can skip the rest of this step if you get an approval message like the one I have shown in the image above. This means the system already ejected the SD card, so it’s safe for you to remove it.
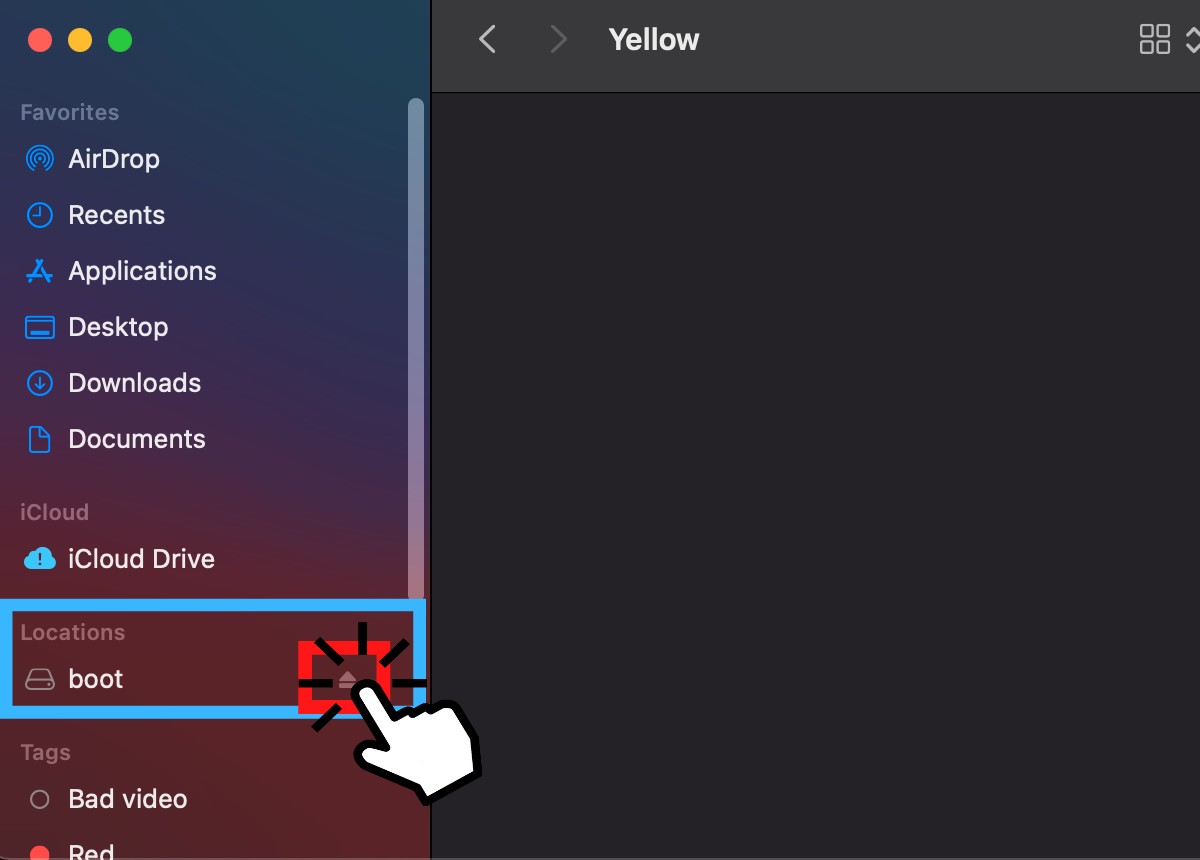
For Macbook users, you can go to your Finder and look on the left column to find your disk device. To get to Finder, you can use the keyboard shortcut “Command + Spacebar” and then type in “Finder”.
If you’re a Windows user, you can go to this website to learn how to safely eject your SD or microSD card from your laptop.
6. Identify Raspberry Pi’s IP Address
Before we head to the final step, we need to find the IP address of your Raspberry Pi. Other sites may require you to install different software to do this, but I found one simple command to be the most effective and efficient.
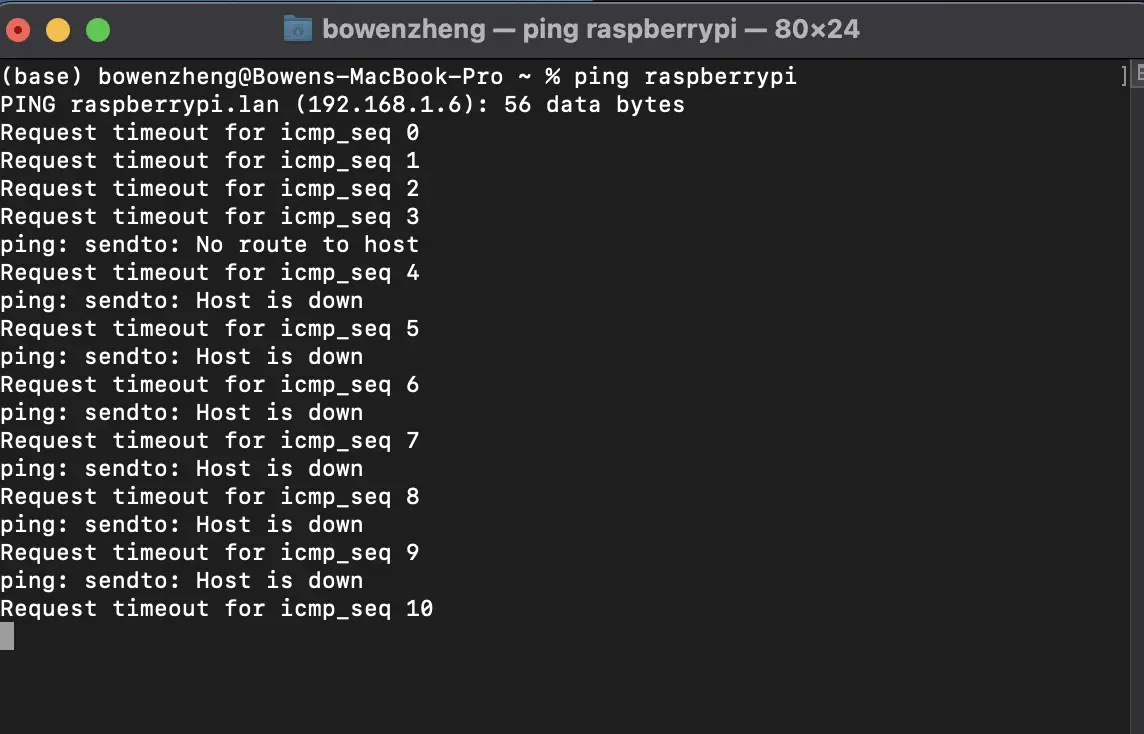
Open up the terminal on your laptop and type in the following command:
ping raspberrypi
As you can see, my IP address for my Raspberry Pi (which is 192.168.1.109 in this instance) is first found in the second line.
To use this successfully, you will need to make sure your Raspberry Pi is powered on and running. Moreover, you will have to wait a few minutes after turning on your Raspberry Pi before running this command, or else it will look like this command doesn’t work.
If this doesn’t work for you, then it’s likely you’re either using a Windows computer or your hostname isn’t raspberrypi.
If it’s the former reason, then you can use this code to ‘ping’ the IP address instead:
nslookup raspberrypiIf it’s the latter reason, then you can easily substitute it out for your own. Your hostname should be the name that comes after the @ symbol.
If you are still running into an issue with this command, check out my Troubleshooting section below.
7. Use VNC To See Your Raspberry Pi
Before we can see the Raspberry Pi with the VNC software, we will need to first configure the Raspberry Pi so that it accepts the VNC connection.
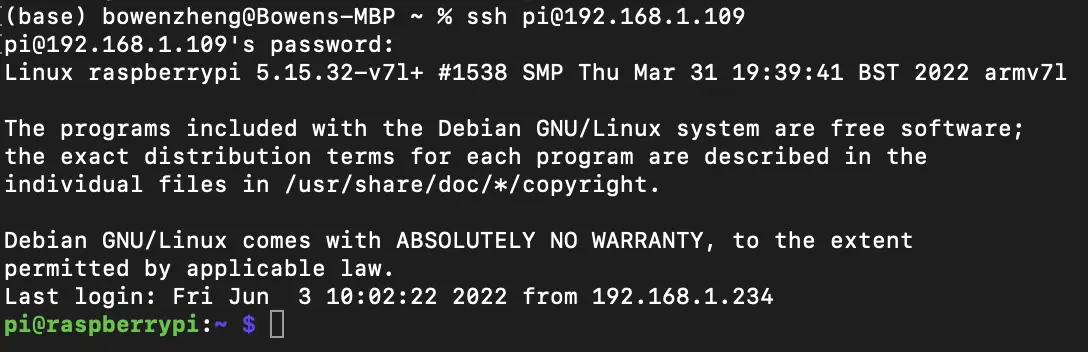
Because we enabled SSH in step 2, we can SSH from the terminal. Once again, you should head to your terminal and type in the following command:
ssh pi@IPYou should replace “IP” with the IP address you obtained in step 6. You will also be prompted to type in your password. Type in the password you set in step 2. If you didn’t set a password, then the default password is “raspberry”.
When you have finished, you should notice that the primary prompt string (or the text you see to the left of your blinking cursor) changed to a different text and color.
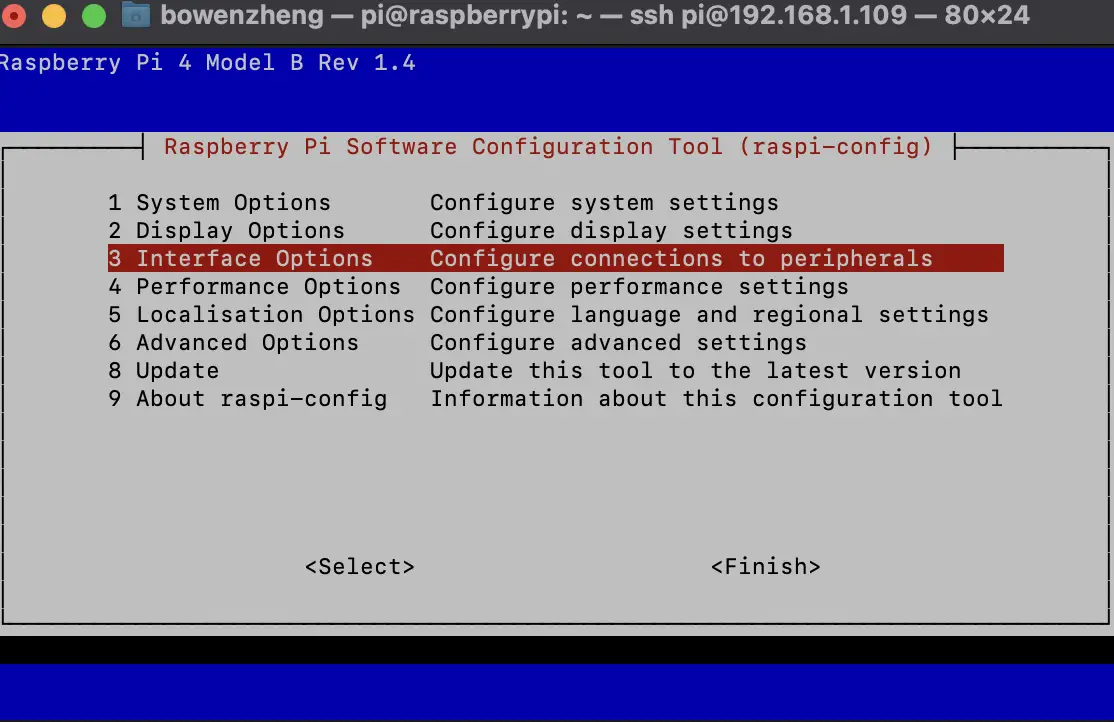
Now, that you are in your Raspberry Pi’s terminal, you can go ahead and type in the following command:
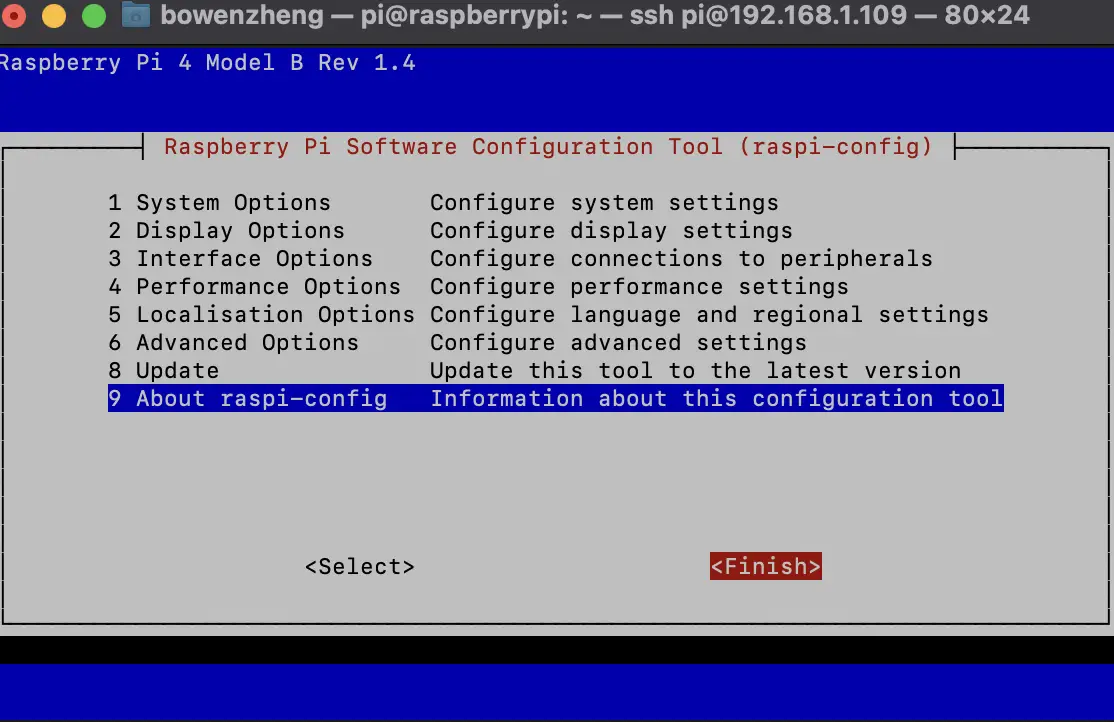
sudo raspi-configYou should now be aware that you can only use your arrow keys to move around rather than your mouse.
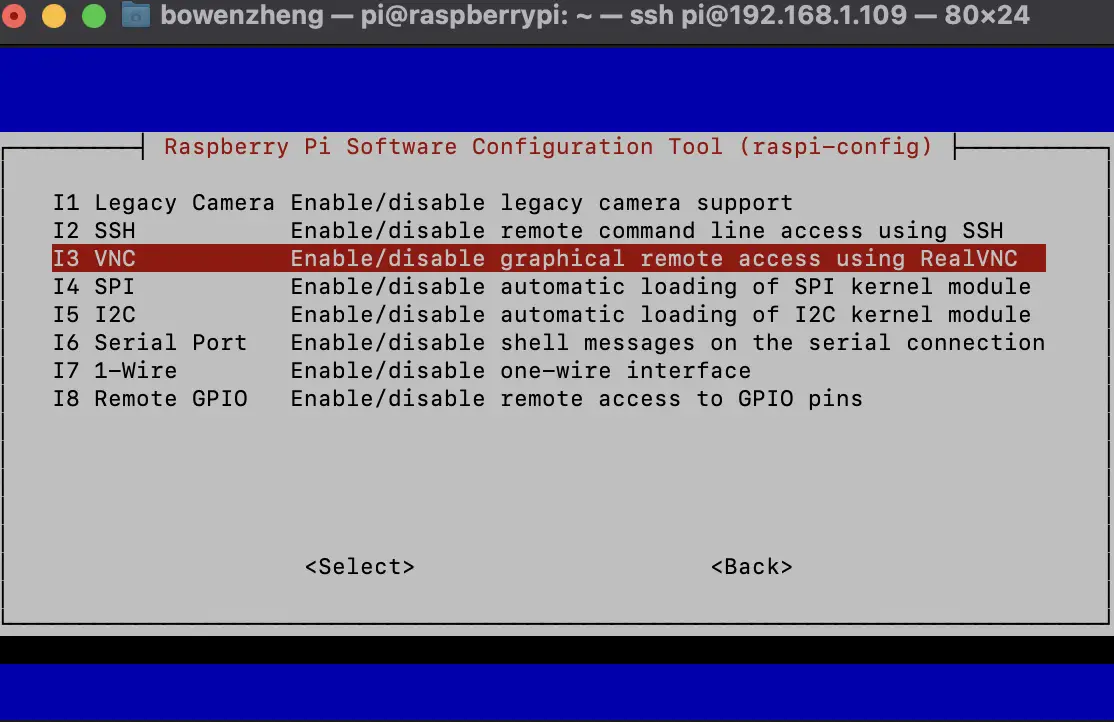
First, you will need to pick “3 Interface Options”. To do that, hit your down arrow key twice and the “Enter” key once.
Next, you should choose the option “I3 VNC …”. To do so, hit the down arrow key twice and the “Enter” key once.
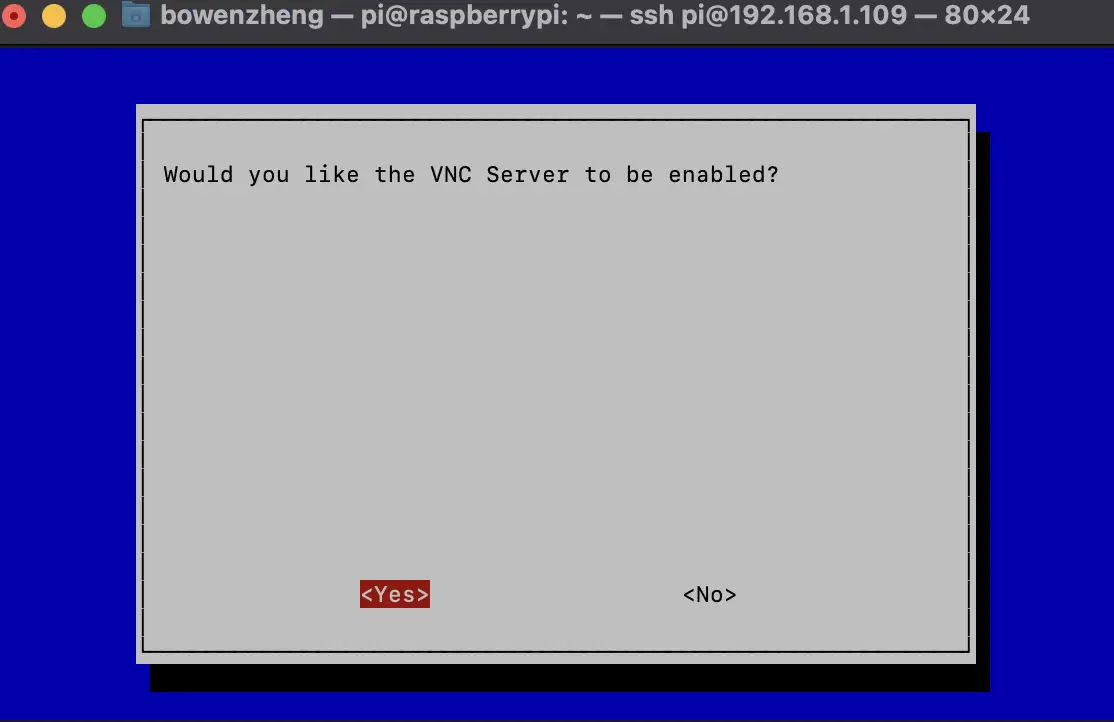
Then, you will be prompted whether you would like the VNC Server enabled. If your red highlighter isn’t already on the “Yes” option, use your left arrow key to choose “Yes” and hit the “Enter” key.
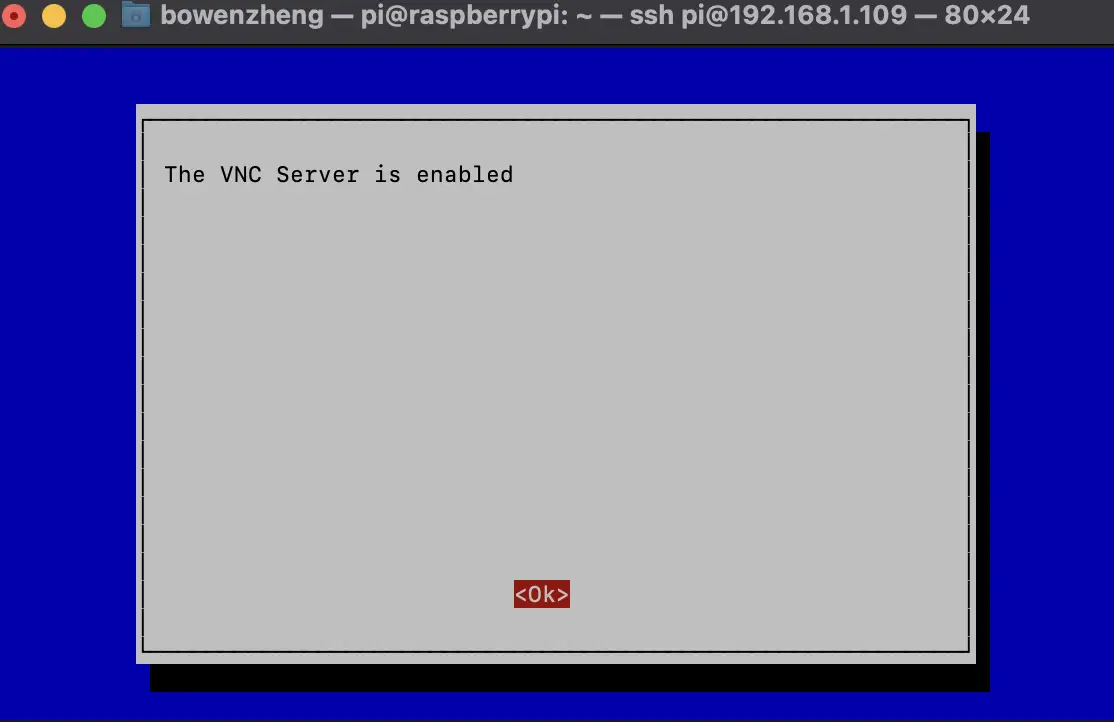
After that, you will see an approval window letting you know that the VNC Server is enabled. You can hit the “Enter” key to escape.
Finally, to escape the raspi-config window, you should hit the right arrow key twice and hit “Enter”.
Finally, you can open up your VNC Server on your laptop and type in your IP address to connect.
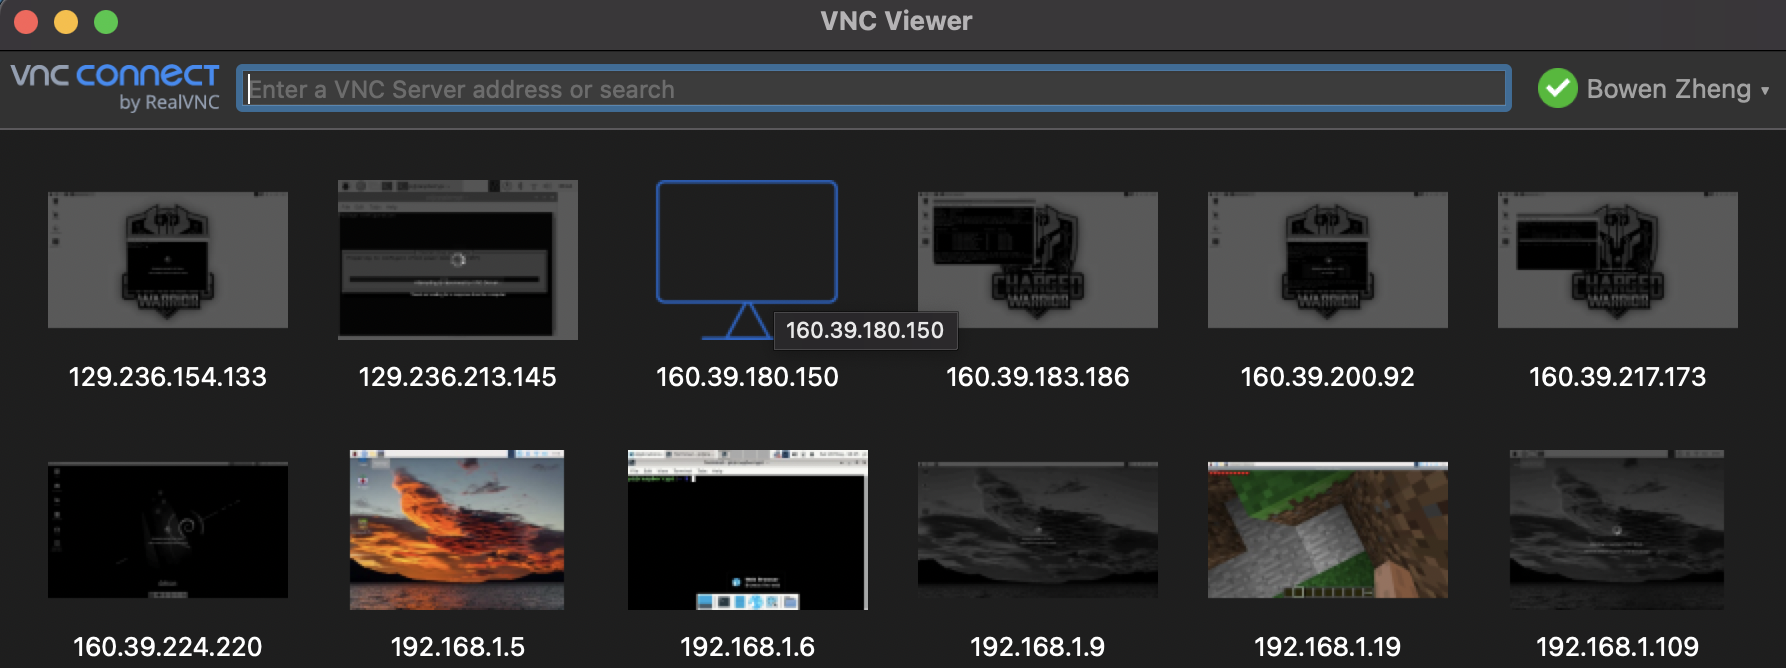
Once again, you’ll need to type in your username and password. This can be what you set in step 2. If you didn’t make a username or password, then the default username would be “pi” and your password would be “raspberry”.
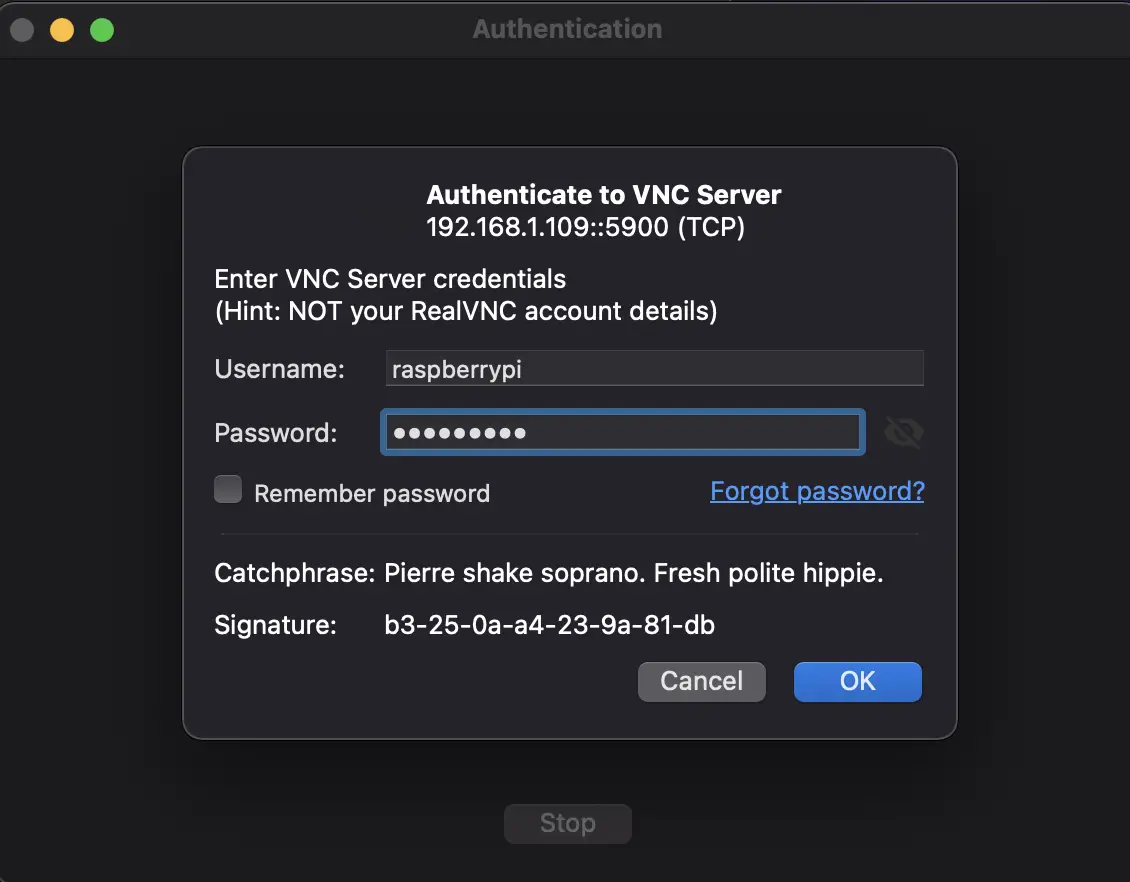
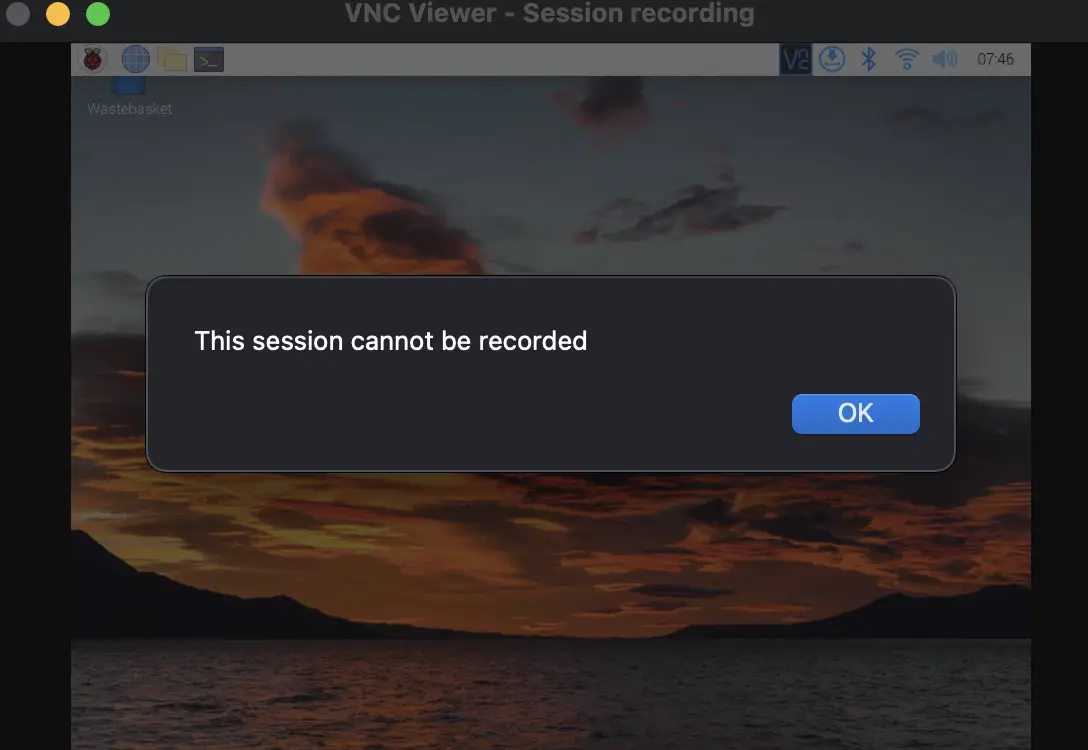
Finally, you can click “Ok” or “Continue” for the few windows that may pop up.
After that, you have successfully logged into your Raspberry Pi from your laptop!
Troubleshooting
As easy as I made have made it seem in the previous steps, I did encounter a lot of problems along the way. Consequently, I created this section to help you resolve any potential issues. If you don’t see your problem in the following list, please contact me at bz.chargedwarrior@gmail.com so I can help you resolve it and add it to this list!
Here are some problems you may encounter:
1. “Error running authopen to gain access to disk device …”
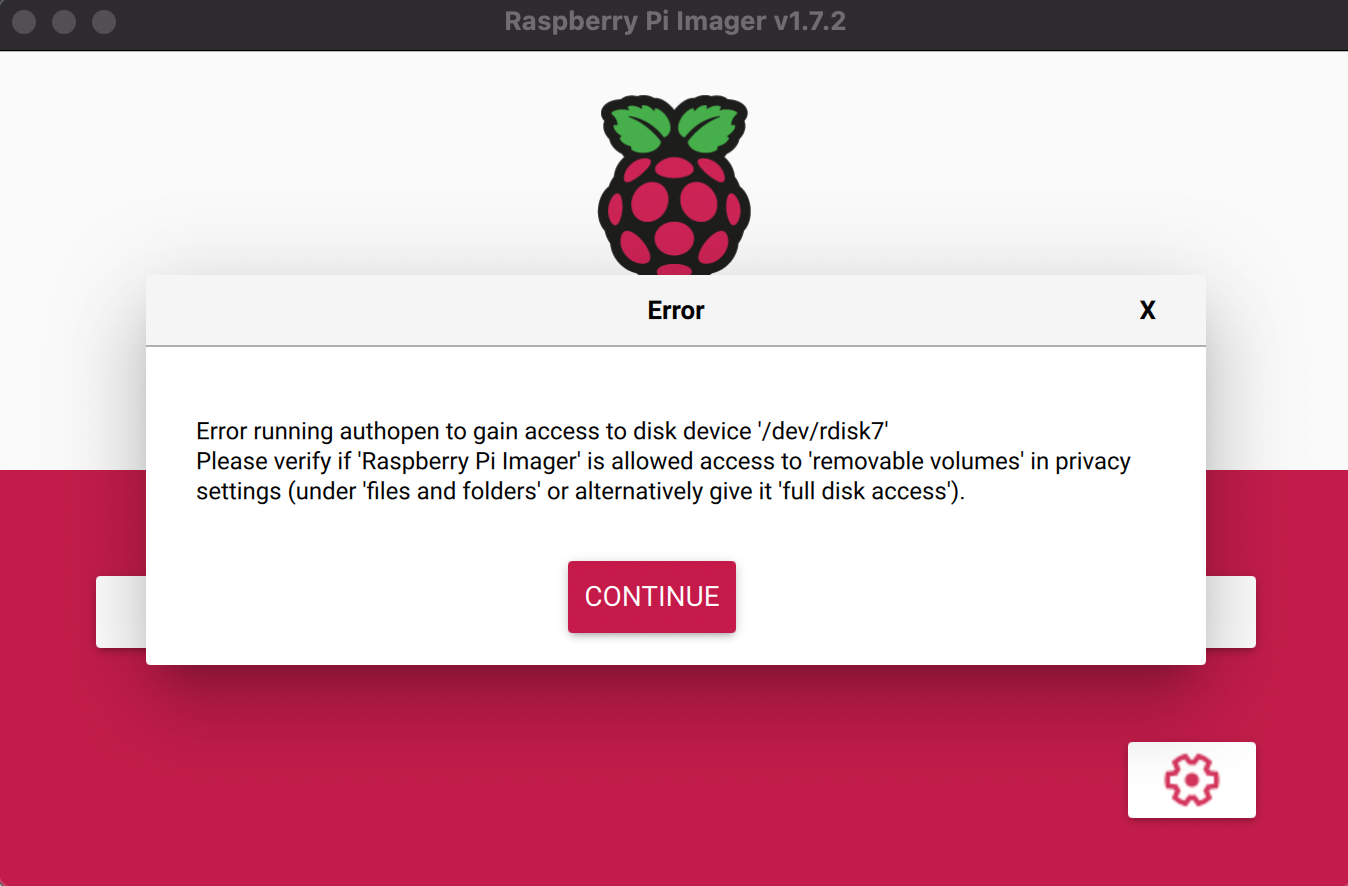
This most likely occurred because you tried to erase your SD card on your laptop.
The solution is to use the Raspberry Pi imager to erase your disk device so that it has permission to make future changes.
First, you’ll need to open up the imager, click “Choose OS”, and scroll all the way down.
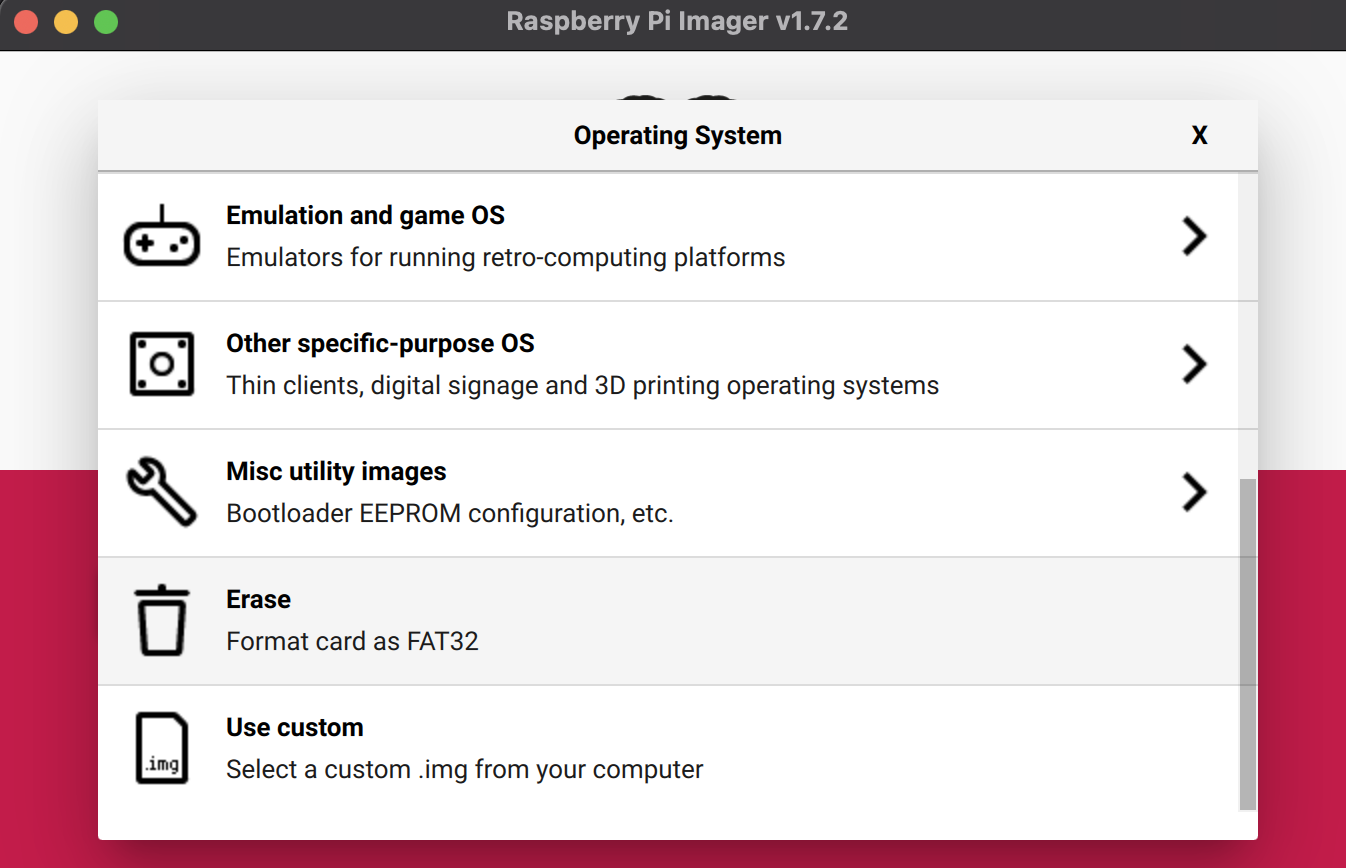
The “Erase” option (also known as formatting the card as FAT32) should be the second to last option. Click on it, and now you can write to it!
To my best understanding, this error occurs because only the laptop itself has the power to write to the SD card and prevents other software from doing so. I observed this happening when I found that I can drag multiple different files in my Macbook into the SD card, and it worked successfully.
In the future, if you want to start again and rewrite the SD card, you don’t not have to erase it to prepare it for the imager. In fact, the imager will prompt you to give it permission to erase the data that exists on it.
If this doesn’t work for you still, then it’s highly likely that your SD card is corrupted. To fix this, check out my article on what corrupted SD cards are, how to prevent them from being corrupted in the first place, and how you can fix them.
2. IP Address Not Working
Another error you may encounter is that the IP address doesn’t work when you try to SSH into your terminal or through VNC Viewer.
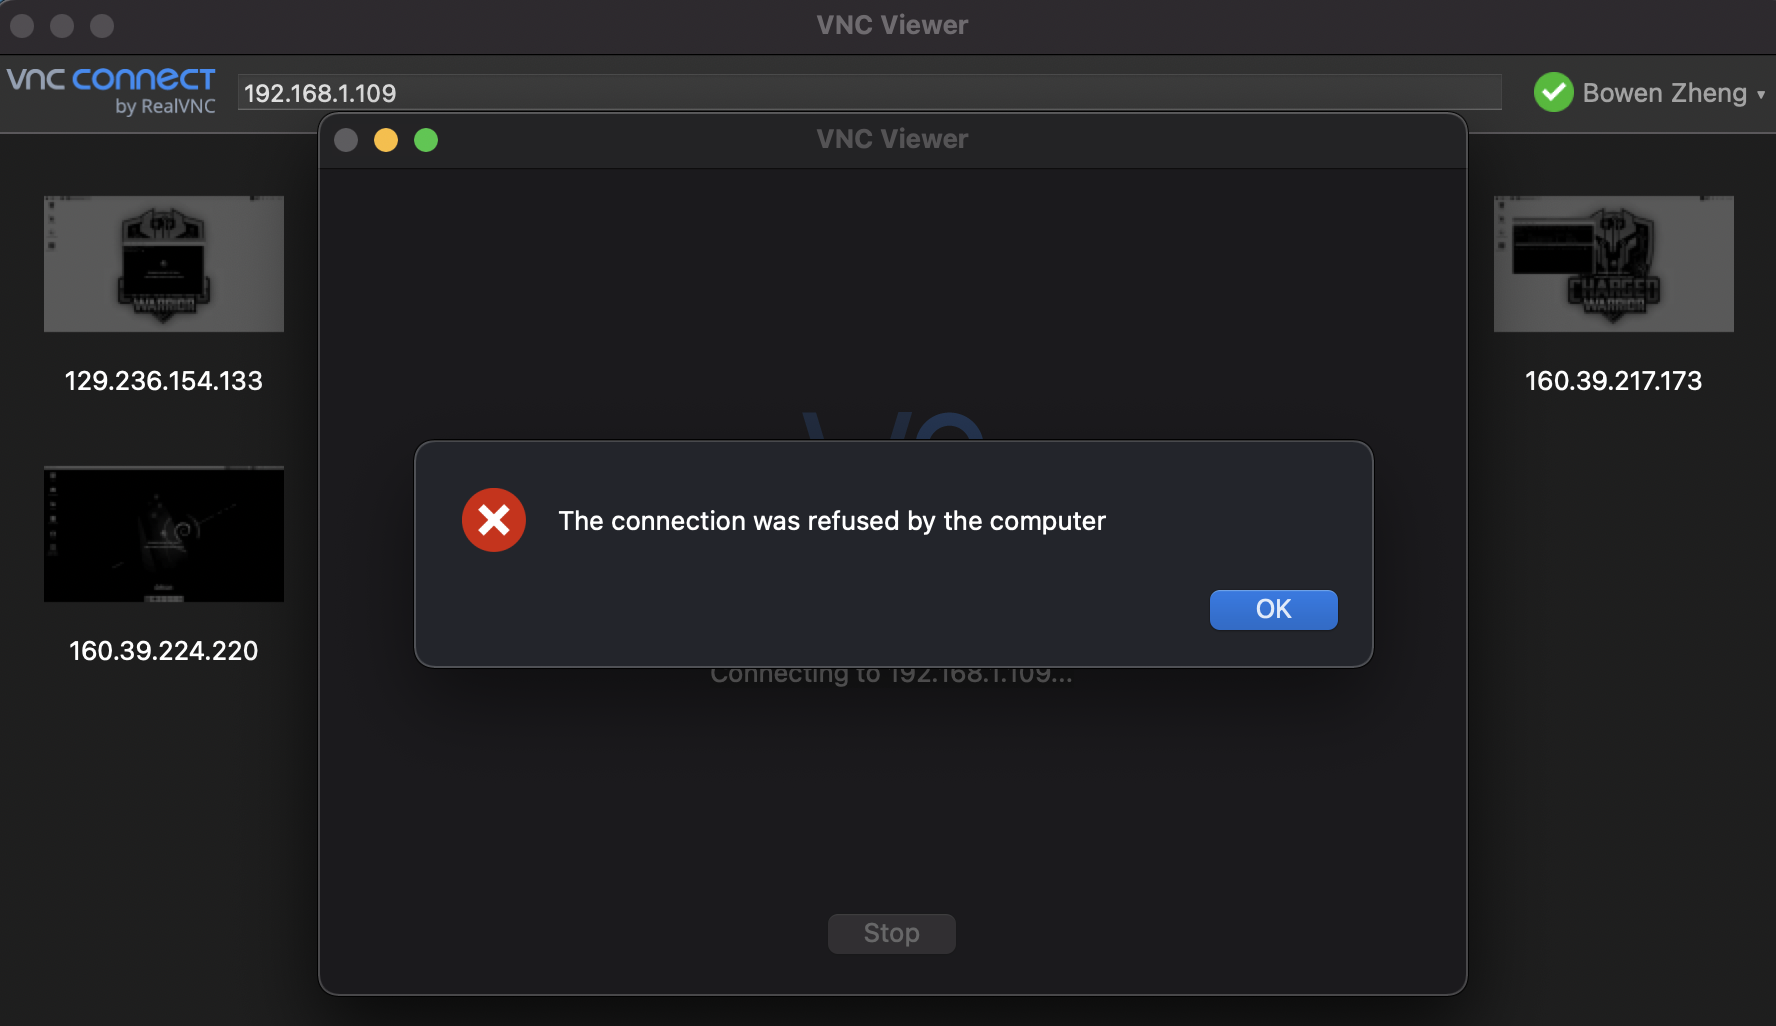
Alternatively, you may also be getting some unusual messages with the “ping raspberrypi” command, which should already alert you that there’s an issue with the IP address.
Either way, this problem most likely stems from you not enabling the Wi-Fi in the Raspberry Pi Imager in step 1 or you might have messed up the SSID name or password.
Regardless, we can fix it by inputting a wpa_supplicant.conf file onto your Raspberry Pi SD card. Here are the following steps to do so:
1. Insert your SD card (or microSD card) back into your laptop.
2. Create a blank .txt file.
Helpful Tip!
For Macbook users, you can use the keyboard shortcut “Command + Spacebar” and type in “TextEdit”
3. Type in the following code in the blank file:
country=US # Your 2-digit country code
ctrl_interface=DIR=/var/run/wpa_supplicant GROUP=netdev
network={
    ssid="INSERT NAME OF YOUR NETWORK HERE"
    psk="INSERT YOUR PASSWORD HERE"
    key_mgmt=WPA-PSK
}
If your network doesn’t require a password, type in the following:
country=US # Your 2-digit country code
ctrl_interface=DIR=/var/run/wpa_supplicant GROUP=netdev # Include this line for Stretch
network={
ssid="INSERT NAME OF YOUR NETWORK HERE"
key_mgmt=NONE
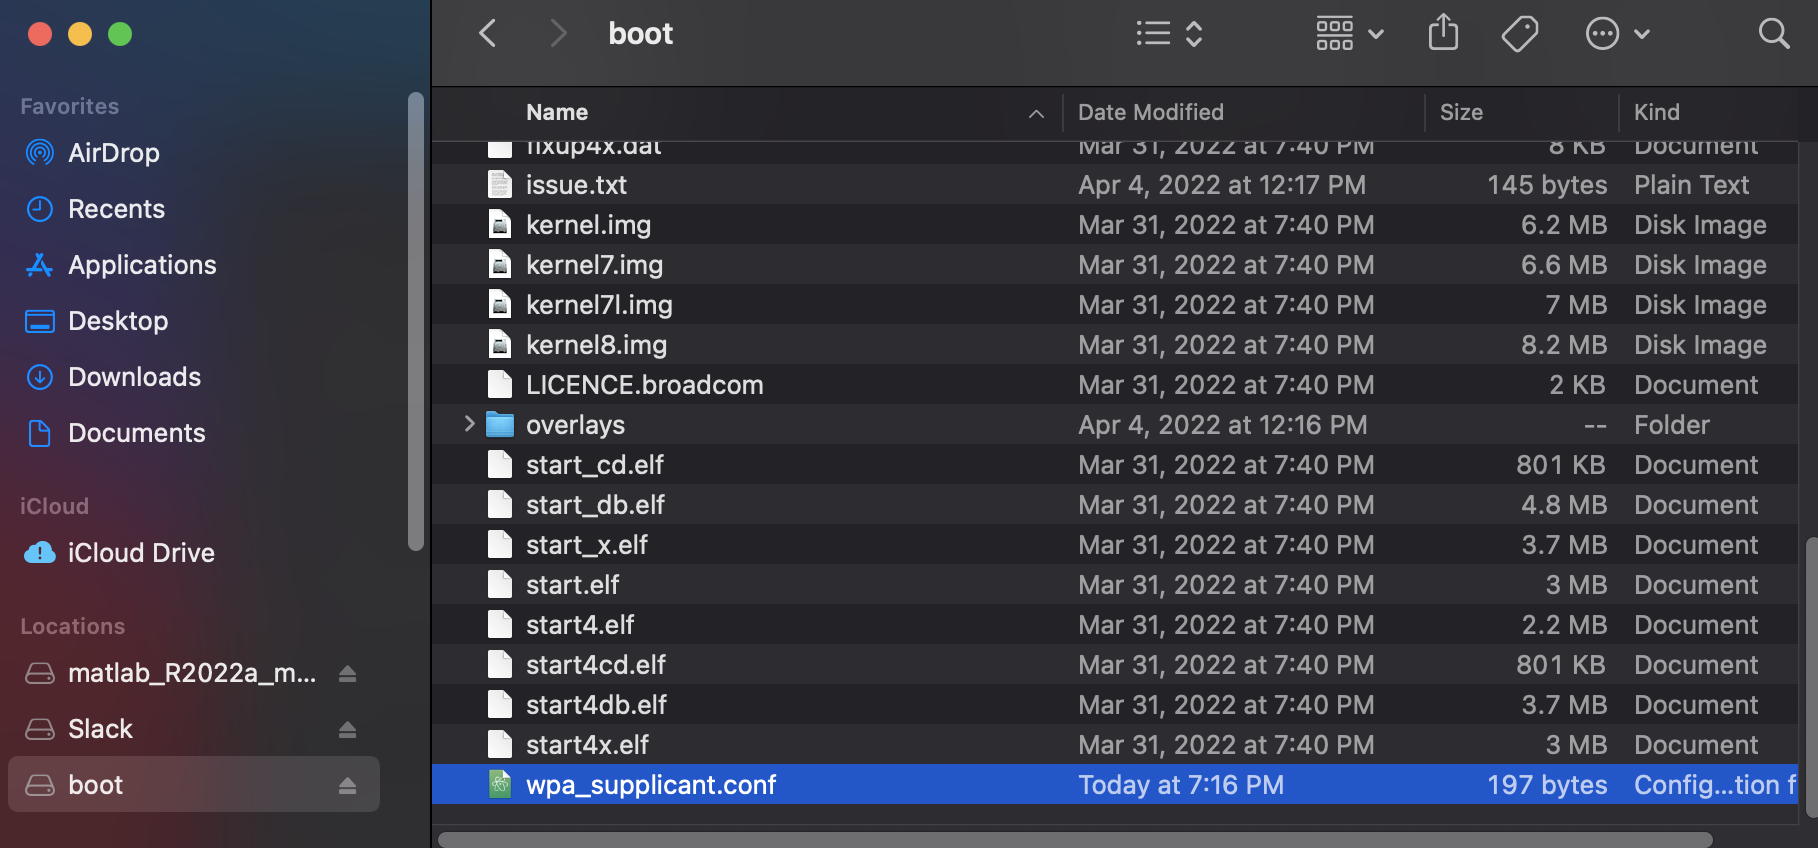
}4. Rename the file to wpa_supplicant.conf (and make sure the file type is in .conf and not .txt)
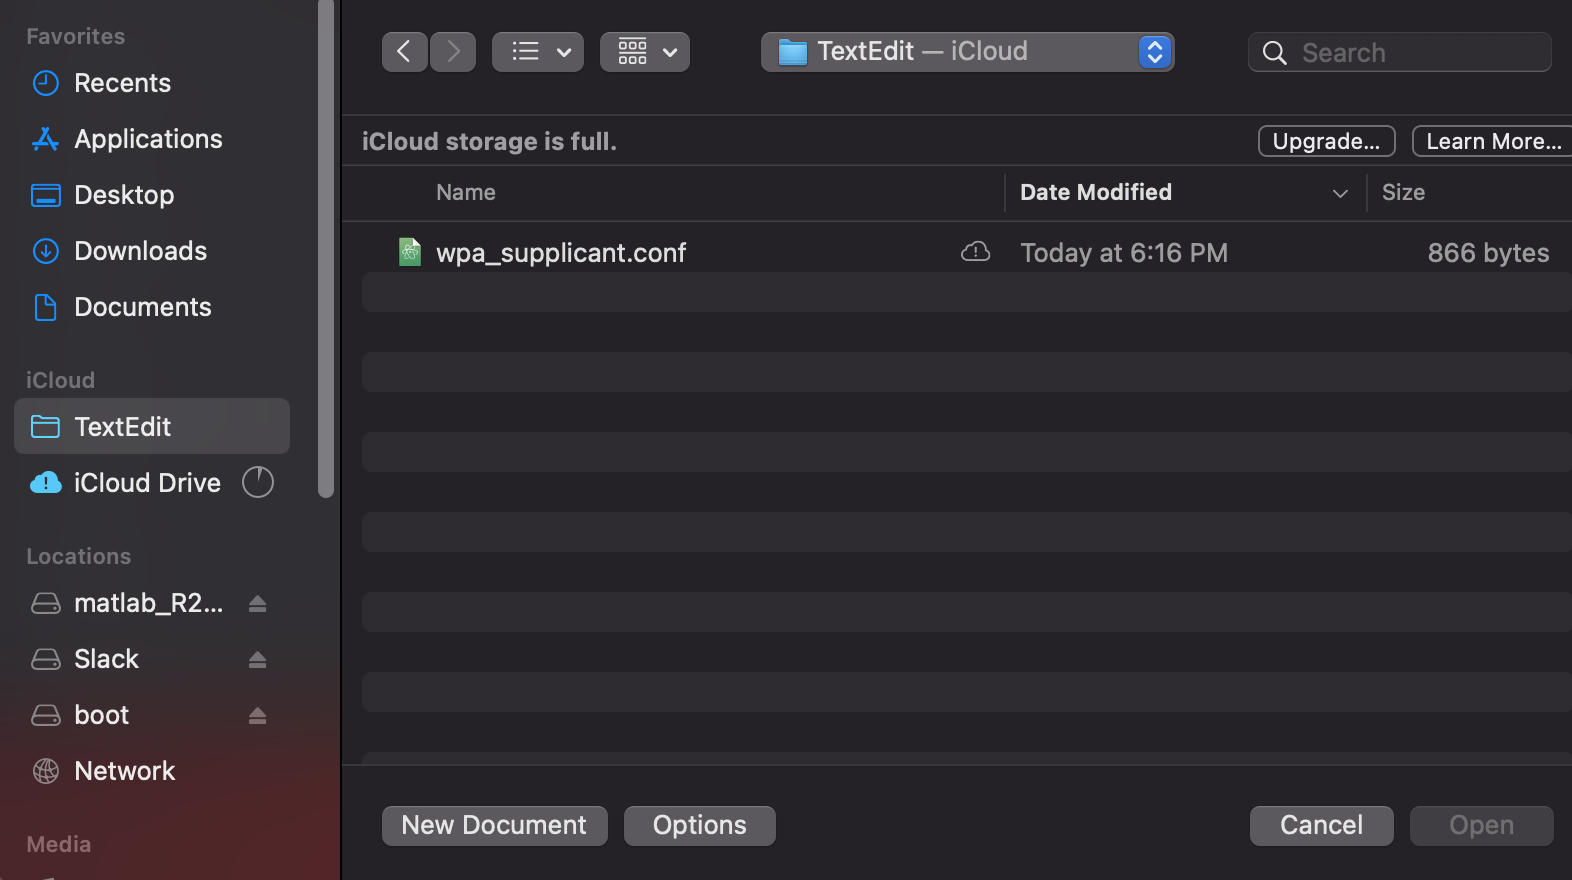
5. Drag the file into your SD card. Or you can copy and paste the file into your SD card.
6. Eject your SD card safely before removing it
7. Insert it back into your Raspberry Pi and try the “ping raspberrypi” command again
3. Can’t Use SSH
There is a possibility you might encounter this error if you tried using SSH.

Although the text may be daunting, you don’t need to worry. Instead, focus on the line: “Offending ECDSA key in …”.
This tells you exactly where the error is. All you need to do is go to that file and remove the line that’s causing you an error. For me, it’s line 14, which is in the /Users/bowenzheng/.ssh/known_hosts file.
Here is the steps I took to fix it:
- Open the file
- In my Macbook, I have vim (which is a text editor) installed
- If you want to follow along with the rest of the steps, you can install vim on your machine at this site: https://www.vim.org/download.php
- You should copy and paste the name of the file you want to open after the vim command. For example:
vim /Users/bowenzheng/.ssh/known_hosts- Enter last line mode by typing a colon (:)
- Enable line numbers by typing:
set nu- Go into insert mode by hitting the esc key and pressing the ‘i’ key
- Delete that line
- Go into last line mode again. Press the esc key and type a colon
- Press enter after typing this command to save and exit:
wq!Now you can run your SSH command again. This time it should work because you removed the offending line.
Future Uses
Whenever you want to get back onto your Raspberry Pi through your laptop, all you need to do is use the “ping raspberrypi” command to locate the IP address and type that into the VNC server.
However, if you’re traveling, you’ll have to create and add a wpa_supplicant.conf file to your SD card because the Raspberry Pi will be using a different network.
To learn how to add this file, you can read the above section again.
Summary – tl;dr (Too Long; Didn’t Read)
Here are the key takeaway points you should keep in mind after reading this article:
- A headless Raspberry Pi means you can work on your Raspberry Pi remotely from your laptop. That means you won’t need to buy and set up a mouse, keyboard, display, or HDMI cable.
- However, the equipment and software you do need for this are a laptop, a Raspberry Pi, a microSD card, a power adapter (for your Raspberry Pi), Raspberry Pi Imager, and VNC Server.
- There are 7 steps to setting up a headless Raspberry Pi:
- Install the Raspberry Pi Imager and configure it
- Configure your password, Wi-Fi, and any other additional settings
- Write Raspberry Pi OS to your SD card
- Install VNC viewer on your laptop
- Insert SD card into Raspberry Pi
- Identify your Raspberry Pi’s IP address
- Use VNC To See Your Raspberry PiSome issues you may encounter are:
- Imager not being able to write to your SD card
- This is most likely due to permission issues, so you’ll need to erase your SD card with the imager.
- Otherwise, your SD card may be corrupted.
- IP address not working
- This is most likely due to your Raspberry Pi not connecting to the Internet. The simple fix is to add a wpa_supplicant.conf file to your SD card.
- SSH can’t be used
- You’ll need to find and remove the offending line before you can use SSH again.
In the end, I hope this guide wasn’t too complicated and that you didn’t lose your head over the process.