How To SSH Into Raspberry Pi (With Tips and Tricks)
When I first started getting into Raspberry Pi, I didn’t always feel like setting up everything to start using it. If you didn’t know already, the Raspberry Pi needs to be hooked up to a display, a mouse, a keyboard, etc. before you can start using it.
Sometimes, I would only need to use the terminal, so I started wondering: “How do I SSH into my Raspberry Pi?”
In order to SSH into your Raspberry Pi, you’ll need to follow 5 easy steps:
- Enable SSH on your Raspberry Pi
- Identify the IP address on your Raspberry PI
- Open up the terminal on your host computer
- Type in the following command in the terminal on your host computer:
ssh <username on your Raspberry Pi>@<the IP address found on your Raspberry PI>Here’s an example of what I would type into my Macbook terminal:
ssh pi@192.168.1.9- Type in the password associated with your Raspberry Pi
If you’re still confused on how to do it, the rest of this article is going to dissect each step, and I’ll include pictures along the way. Moreover, I’ll include other ways you can SSH into your Raspberry Pi as well as some cool tips and tricks you can use!
But first, to make sure we’re on the same page, let’s define:
What Is SSH?
SSH stands for Secure SHell, and it allows you to access the terminal of another device. For example, I can SSH into Raspberry Pi from the terminal on my Macbook.
SSH is cool because it’s a great way to work on your Raspberry Pi without having to hook it up to a screen and other peripherals (like a mouse or keyboard) when using it.
Granted, this is only good if you only plan to work in the terminal of your Raspberry Pi. For instance, you might want to install applications and software on your Raspberry Pi or you want an easy way to copy and paste commands into the terminal.
How To SSH Into Raspberry Pi
1. Enable SSH on Raspberry PI
In order to enable SSH, you’ll need to do the following steps:
- Open your applications menu on your Raspberry Pi
- To open it, click on the first icon (which looks like the Raspberry Pi logo) on your taskbar. This is usually located on the top left corner of your screen

- Click on Preferences
- Click on Raspberry Configurations

- After that, you’ll need to click on the “Interfaces” tab and enable SSH
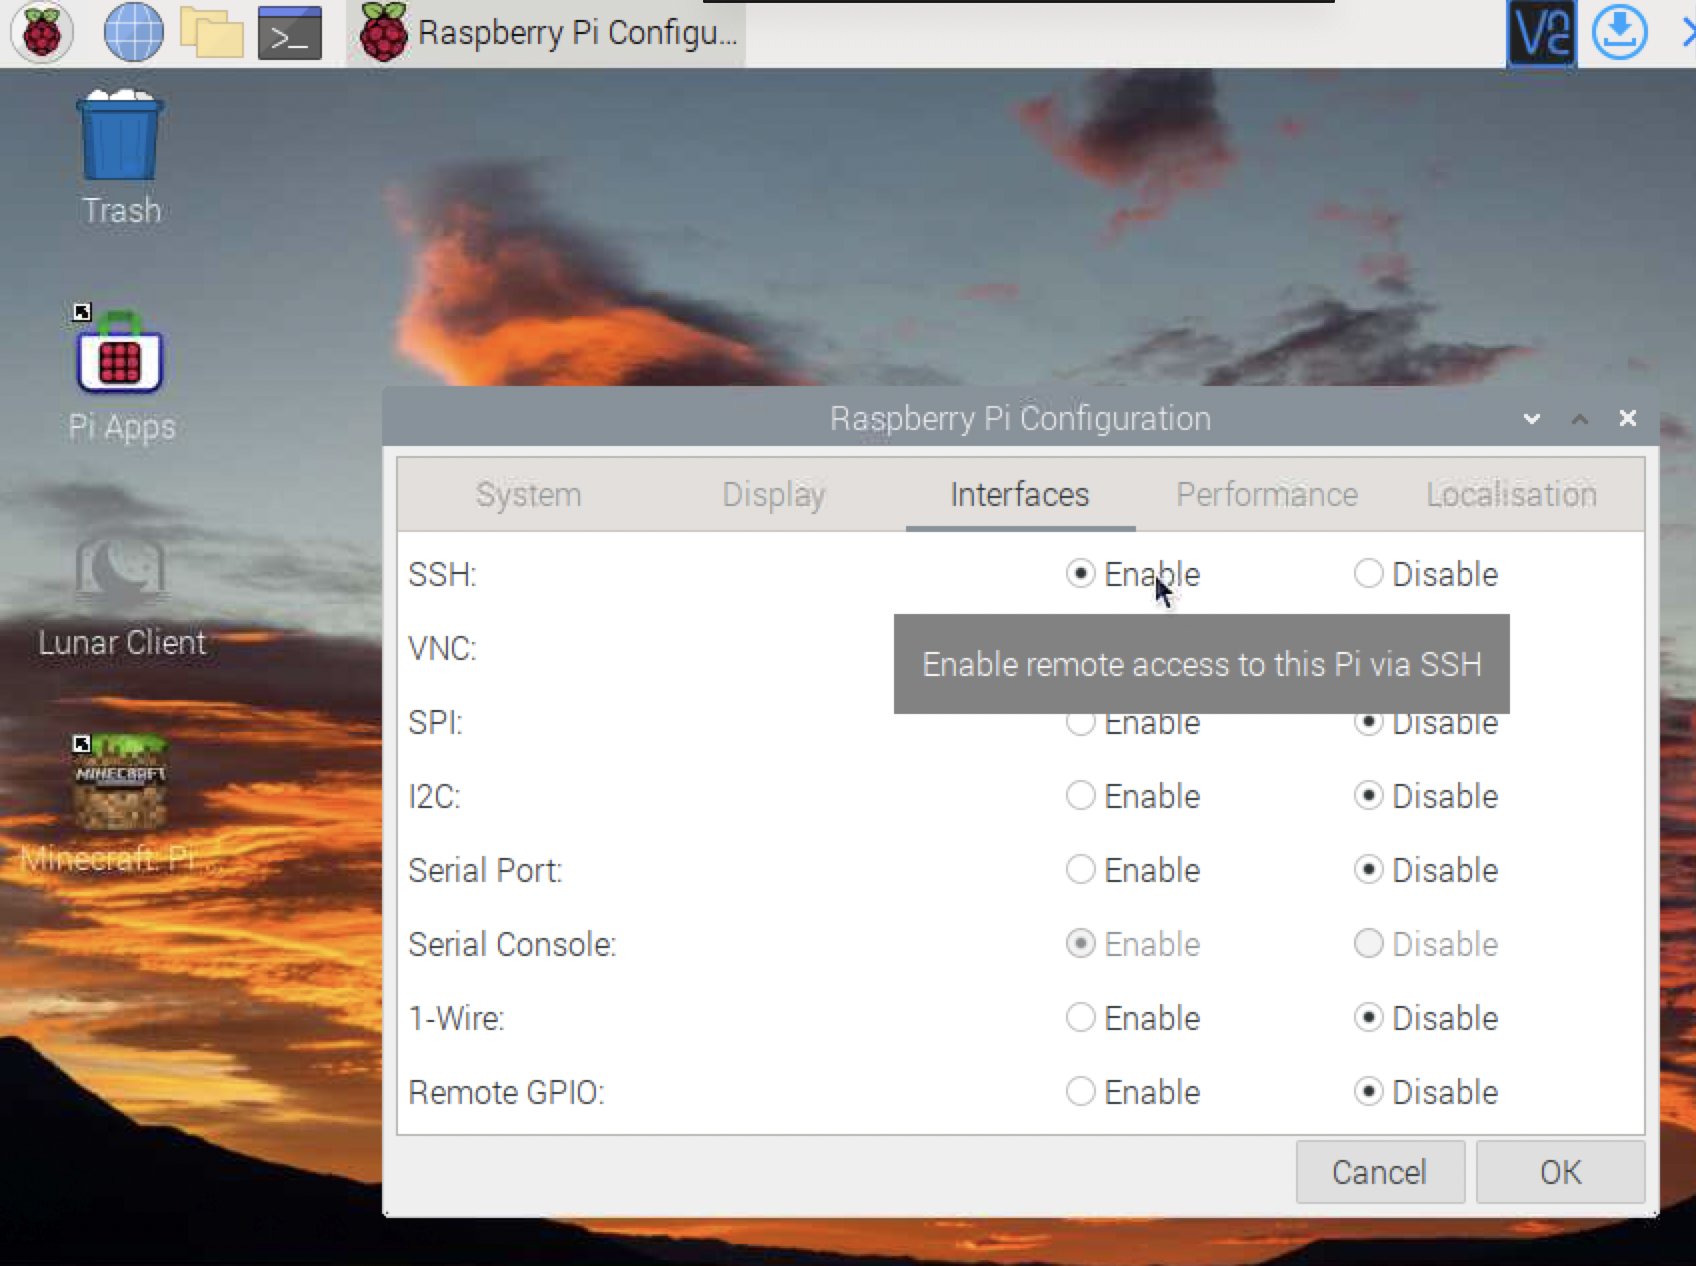
2. Identify the Raspberry Pi’s IP address
To identify the IP address, you’ll need to follow this simple process:
- Open the terminal on your Raspberry Pi
- You can do this by using the keyboard shortcut: CTRL + ALT + T
- Type in the following command in the terminal:
ifconfig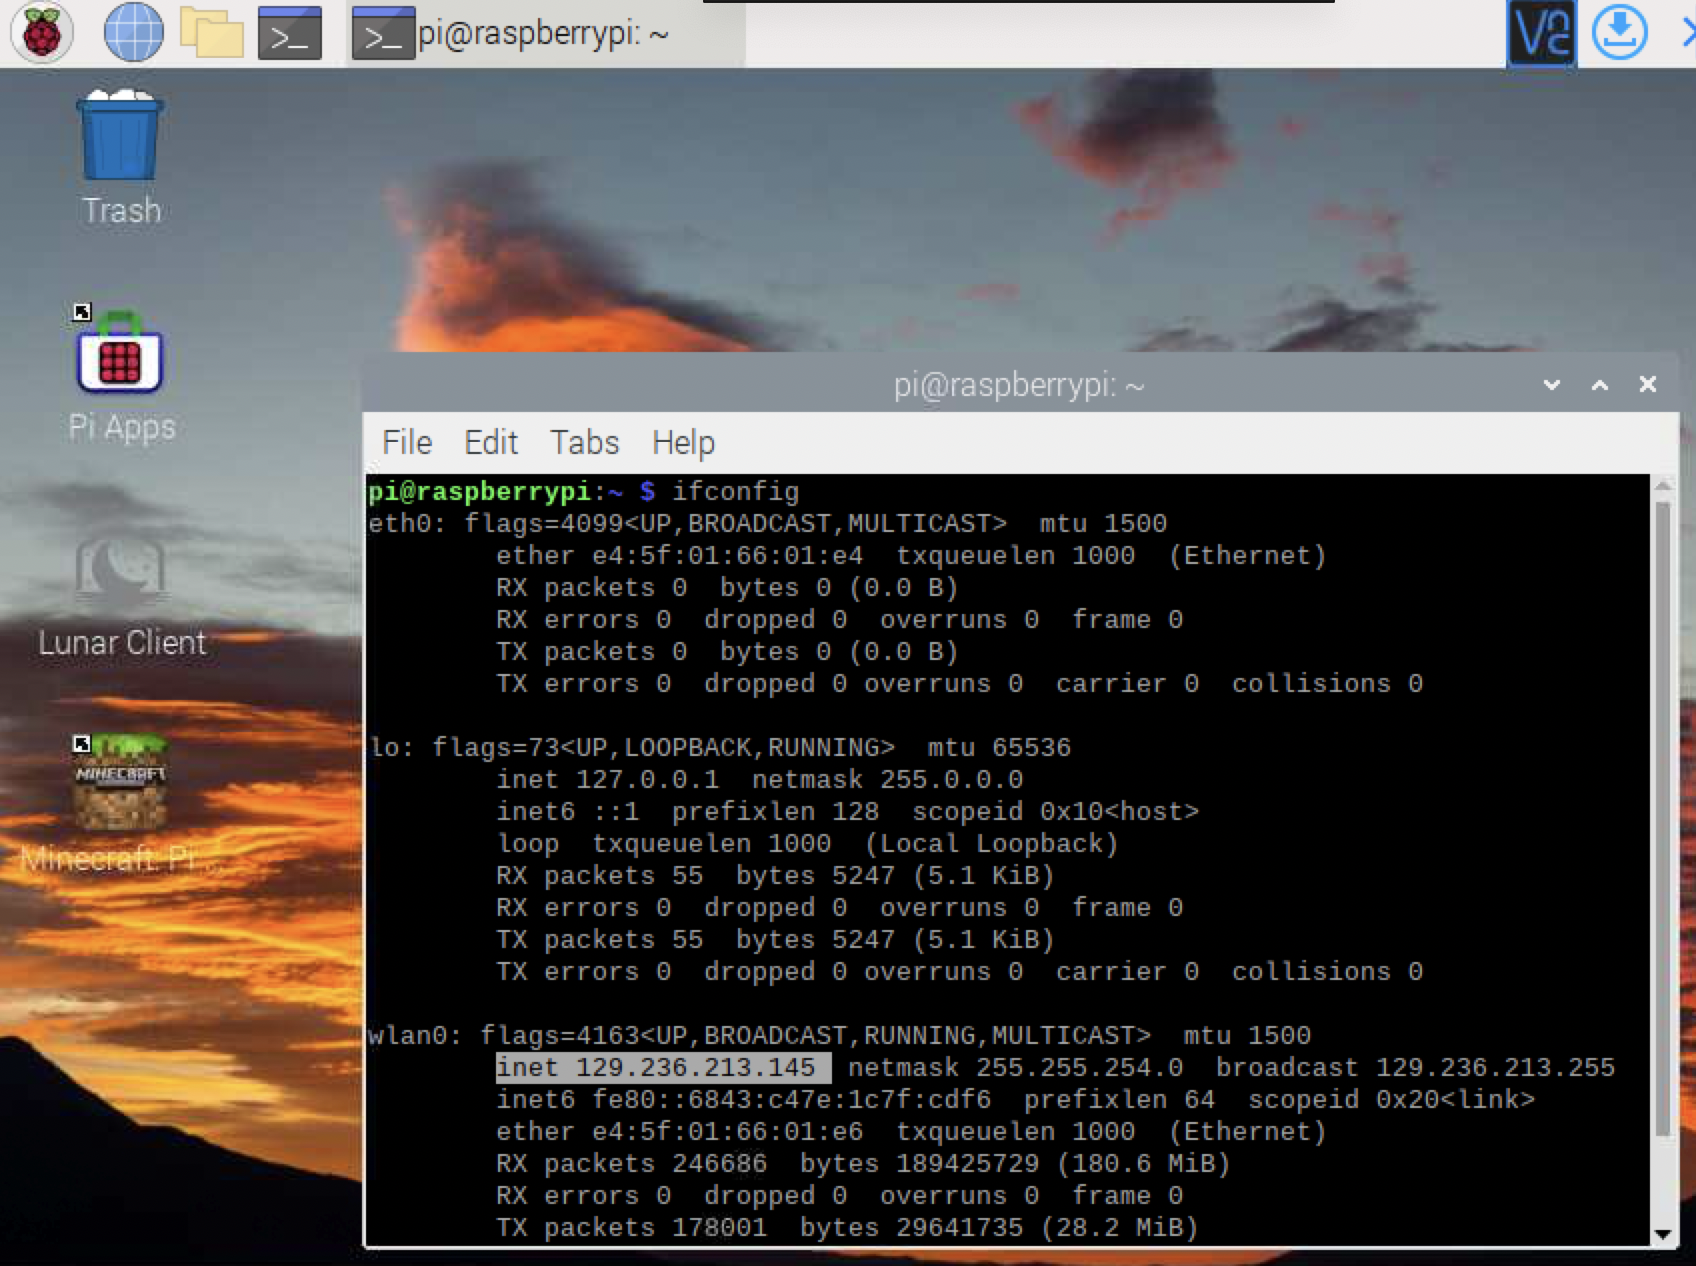
Now, you should see the IP address. You’ll need to remember that or write it down somewhere for step 4.
3. Open up the terminal on your host computer
- If you have a Macbook, here’s a way to find your terminal:
- Use the keyboard shortcut COMMAND + SPACEBAR. Next, type in the word ‘terminal’ and it should pop up for you.
- If you have a Windows laptops, use the search bar in the bottom left corner of your device and type in the word ‘terminal’. You should now see the terminal application
4. Type in the following command in the terminal on your host computer:
ssh <username on your Raspberry Pi>@<the IP address found on your Raspberry PI>Note: If you don’t know your Raspberry Pi username, you should look at the terminal in your Raspberry Pi. The username is the word before the @ symbol.
5. Type in the password associated with your Raspberry Pi
If you didn’t change your password, you should type in the default password that all Raspberry Pis come with: raspberry.
If you forgot your Raspberry Pi password, consider checking out my guide on resetting Raspberry Pi password. It contains 2 great and easy ways to change your password!
Helpful Hint!
You should change your password to something different than the default one to improve your security and to reduce the chances of your Raspberry Pi getting infected by a virus.
SSH Tricks For Raspberry Pi
In this section, I’ll be going over some handy commands you can use when you SSH into your Raspberry Pi:
1. Stopping your Raspberry Pi
To power off your Raspberry Pi, you can use one of the five following commands:
sudo haltThis command will halt your Raspberry Pi
sudo poweroffAs you can see, this command will power off your Raspberry Pi
sudo shutdown nowThis command will shutdown your Raspberry Pi the moment you press enter
sudo shutdownThis command will shutdown your Raspberry Pi after 1 minute
sudo shutdown 05:00This command will shutdown your Raspberry Pi at 5 am. You can modify it by changing the “05:00”. Remember, the terminal follows the 24-hour clock system, so if you wanted to shutdown down your Raspberry pi at 11 pm, you’ll need to replace “05:00” with “23:00”.
As an added bonus, if you’re in the midst of shutting down your Raspberry and changed your mind, you can use this command
sudo shutdown -cThis command will cancel the shutdown
2. Working With Files
You can easily access the content of a file by using the command:
cat <the name of the file you want to access>You can copy the contents of your file to another by using the command:
cp <name of the file you want to copy from> <name of the file you want to copy to>You can also move the contents of one file to another by using the command:
mv <name of the file you want to move from> <name of the file you want to move to>3. Working With Text Editors
If you want to edit text files in your terminal, you can easily use one of the built in text editors in your terminal. To access a text editor, you can either type in the command:
vimor the command:
nanoThey’re both great text editors, and it’s up to you to decide which one you want to use!
Summary – tl;dr (Too Long; Didn’t Read)
Here are the key points you should remember after reading this article:
- SSH stands for Secure SHell and it lets you access the terminal of another device from one device.
- You can easily do this on your Raspberry Pi by following the 5 easy steps:
- Enable SSH on your Raspberry Pi
- Identify the IP address on your Raspberry PI
- Open up the terminal on your host computer
- Type in the following command in the terminal on your host computer:
ssh <username on your Raspberry Pi>@<the IP address found on your Raspberry PI>- Type in the password associated with your Raspberry Pi
- Here are some things you should know when working with terminals:
- You can access a built-in text editor by typing in either one of the following commands:
- nano
- vim
- You can power off your Raspberry Pi by using one of the following five commands:
- sudo shutdown now
- sudo halt
- sudo poweroff
- sudo shutdown
- sudo shutdown 05:00
- You can cancel a shutdown by using the command: sudo shutdown -c
- You can work with files with either of the three commands:
- cat <the name of the file you want to access>
- cp <name of the file you want to copy from> <name of the file you want to copy to>
- mv <name of the file you want to move from> <name of the file you want to move to>
- You can access a built-in text editor by typing in either one of the following commands:
In the end, I hope this article had some good shell-ing points that makes you want to use SSH and your Raspberry Pi even more!