Why Pick Arduino? 5 Advantages of Arduino Over Raspberry Pi
I’ve been working with Raspberry Pi for a while now since it’s all part of my master plan of learning and working with STEM-related hobbies. Since I have experience with Arduino and (some with) Raspberry Pi, I’ve decided to do a little comparison. This guide will be focused on answering the question:
“Why should you pick Arduino over Raspberry Pi?”
You should choose Arduino over Raspberry Pi because it’s:
- Easier to set up
- Cheaper
- Easier to learn
- Has a better design
- Has simpler hardware access
The rest of the article will be focused on breaking these categories down.
1. Easier To Set Up
I put this point first over the price because I personally feel more invested in learning something new if it isn’t too complicated. That doesn’t mean I won’t do anything challenging, but it does mean that I enjoy straightforward things.
With that said, Arduino are very straightforward when using for the first time compared to a Raspberry Pi.
For example, when I first got started with my Arduino, I could program it to do something very basic instantly. All that was required was nothing other than the board itself, a USB (Universal Serial Bus) cable, and a computer.
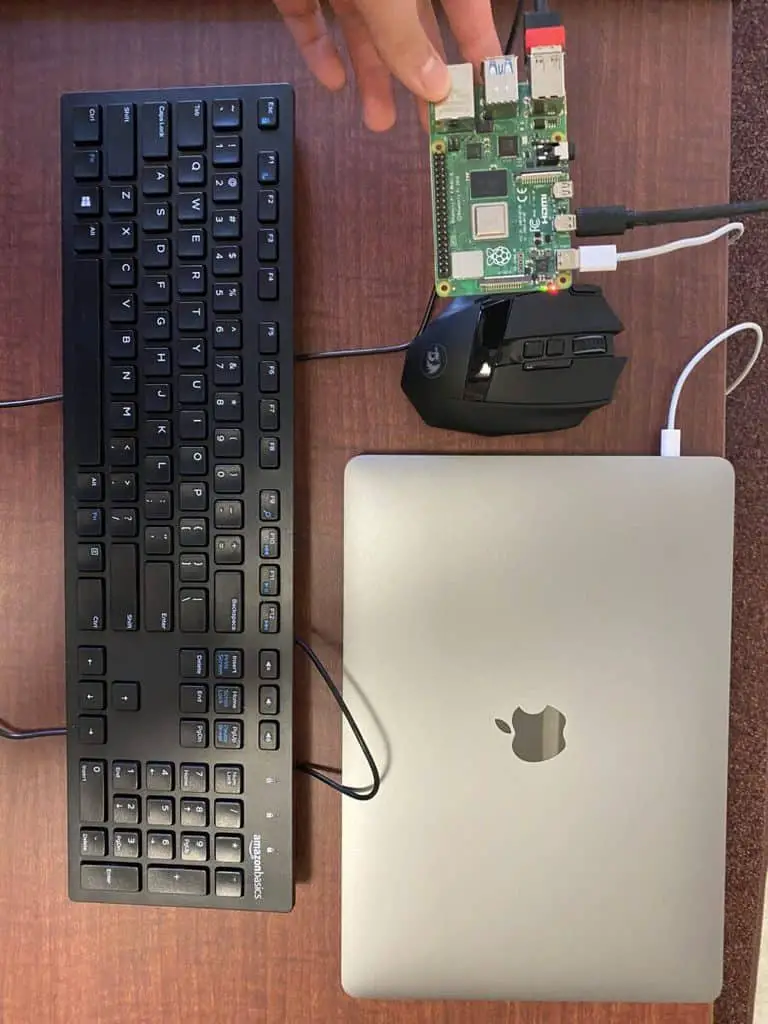
Yet, when I started working with Raspberry Pi, I felt like there were too many wires (ie USB cable, HDMI cable, etc.) and peripherals (ie keyboard, mouse, etc.) to keep track of. I had to be extra cautious so that I wouldn’t tangle up everything.
In all fairness, there are accessories and components you’ll need to purchase to actually make something cool and maximize your enjoyment, such as jumper wires, breadboards, resistors, diodes, and other essentials. In addition, you would also purchase sensors if you wanted to measure something and analyze it.
2. Cheaper
This is another main sticking point when it comes to deciding between Arduinos and Raspberry Pis. If money is an issue for you, Arduino is a cheaper investment for you in terms of buying the board itself and the components you’ll need in addition to it.
For instance, a popular Arduino board called the Arduino Uno Rev 3 costs around $23 (at the time of writing). Of course, you can get it for cheaper if you go to an off-brand company like Adafruit or Elegoo. The design and functionalities are practically the same. You’re basically paying extra for the brand name like you would for an Apple iPhone.
Anyways, you can get an Arduino board for as cheap as $13 (ie the Arduino Nano Every) and other models would be in the price range of $30 to $100.
Besides the board, you’ll most likely need extra components, which would cost you another $10 to $50.
If you go the Raspberry Pi route, you’ll need to pay around $35 for the latest and most popular model (the Raspberry Pi 4). Just like with Arduino boards, you can buy cheaper ones from other companies like Adafruit.
Of course, you can get a Raspberry Pi for as cheap as $10. If you want to actually use, you’ll need to purchase other accessories and components (like you would with an Arduino) between $10 to $60. These parts may be a mouse, a keyboard, motors, or even an SD card.
If you really can’t (or don’t) want to even invest in an Arduino, I would highly recommend working with an online Arduino simulator. This may not actually simulate all the joys you may have with an actual Arduino board, but it will give you experience and help you decide whether you really want an Arduino or not.
If you want to learn more about Arduino simulators, consider reading my guide on working with Arduino simulators. I go over two popular softwares, how you can use it, and some additional cool tips.
3. Easier To Learn
Learning and using Arduinos require no advanced knowledge of programming or circuitry. For instance, when I first started my Arduino journey, I had some programming experience, but no experience with circuitry. After a few weeks, I managed to understand a lot about Arduino (but not enough to truly master it).
On the other hand, Raspberry Pi requires you to have a more advanced knowledge of the programming language C++ and understanding how programs and operating systems communicate and work with each other.
Personally, Raspberry Pi took about the same amount of time for me to grasp the basic concepts of. That’s most likely due to my previous experience with programming languages.
4. Better Design
If you want to prototype something, Arduino is the way to go. That’s because Arduino brings the best of two worlds: hardware/circuitry and programming.
Because it’s easier to learn and use, applying Arduinos to real world applications should also be fairly simple. The prototyping process with Arduino I follow is:
- Sketch out your prototype design: It doesn’t have to look good; your only goal is to lay down your ideas.
- Make a list: Create a list of all the components you need. Focus on the basic functionalities first before adding new features to it.
- Create the build online: Use an Arduino simulator to quickly locate the initial problems and visualize the design.
- Write pseudocode: To get started on your code, write down what you want your project to do.
- Build a physical prototype: It doesn’t have to be perfect, but you want to introduce your idea to the real world.
- Test your code and hardware: Everyone makes mistakes; you just need to test your prototype and locate them.
- Fix your code and hardware: Now that you know the sources of your errors, you’ll need to fix them!
- Polish up your code and hardware: Add comments or new cool features to improve on your initial design!
- Celebrate your success: You’ve worked hard and your prototype works! Share it with everyone and be proud of yourself!
If you want to learn more about prototyping with Arduinos, consider reading my Arduino prototyping guide! It contains helpful tips and insights for when you’re trying to make a prototype with an Arduino.
On the other hand, Raspberry Pi can be a little overbearing since you have to deal with intricate integrated circuits and deciding which peripherals you should be using. There’s so many decisions you have to make and it can be fatiguing.
5. Simpler Hardware Access
When you’re working with Arduino, everything is ready to go with a snap of a finger. For instance, my process for using the hardware in my project is:
- Initialize the pins and sensors in the IDE
- Installing a library if I need it for a particular sensor
- Add functionalities to my pin and sensors by writing code
On the other hand, Raspberry Pi involves a lot of work to gain access to its hardware. For instance, I’d have to:
- Updating the operating system (if it’s not already updated
- Setting up the proper permissions to use a program
- Incorporating a library
- Initializing the pins
- Writing code to add functionalities to the pins
As you can see, both require some work, but Raspberry Pi may require a little more out of you. This extra hassle is because Raspberry Pi utilizes a fully established operating system (think of macOS or Windows) whereas the Arduino does not.
Thanks to the operating system, you’ll have a little more security with Raspberry Pi, but it also means that you’ll have to deal with those pesky security features.
Summary/tl;dr (Too Long; Didn’t Read)
Here are the main points after reading this article:
- Arduino is easier to use and setup since it has less parts and peripherals compared to Raspberry Pi
- It’s cheaper than Raspberry Pi
- It’s easier for people to learn since it’s designed with the beginner in mind
- That means you don’t need a lot of experience with programming and circuitry to use it
- It has a better design, which is very useful for prototyping
- It’s easier to access the hardware on an Arduino since it lacks an operating system, which can slow you down a little.
In the end, I hope you have found this guide to be in your advantage during your read!

