How To Stop Raspberry Pi From Sleeping (Best Tricks and Tips)
I remember the first time my Raspberry Pi went to sleep. I was doing a major installation on my Raspberry Pi, and it was taking a while. After some periods of inactivity, the screen suddenly went black. I grew worried until I realized it was sleeping. Consequently, I started wondering: “How do you stop Raspberry Pi from sleeping?”
One way you can disable screen blanking (“sleep-mode”) on your Raspberry Pi is by going into Raspberry Configurations, clicking on the “Display” tab, and clicking on the disable button next to the line “Screen Blanking”.
If you still aren’t sure what to do, I’ll talk about it more in depth in the next section, and I’ll include some pictures to help guide you.
How To Turn Off Screen Blanking
1. Using Desktop GUI
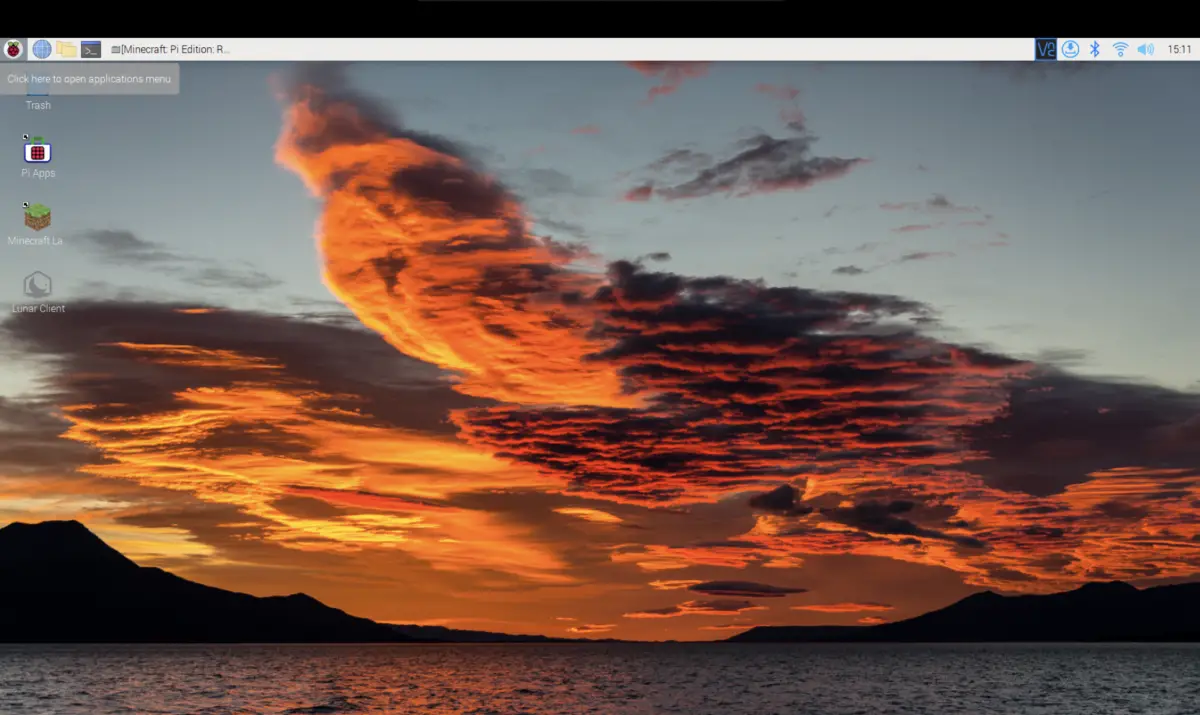
What I mean by Desktop GUI (Graphical User Interface) is the screen you’d see when you first log into your Raspberry Pi.
For instance, you’ll see your wallpaper, your applications on the side, and the taskbar at the top of the screen.
Here are the steps you’ll need to take to disable screen blanking:
- Open the applications menu
- You can do this by clicking on the Raspberry Pi logo icon on the top left corner of your screen.
- Click on “Preferences”
- Then, click on “Raspberry Configurations”
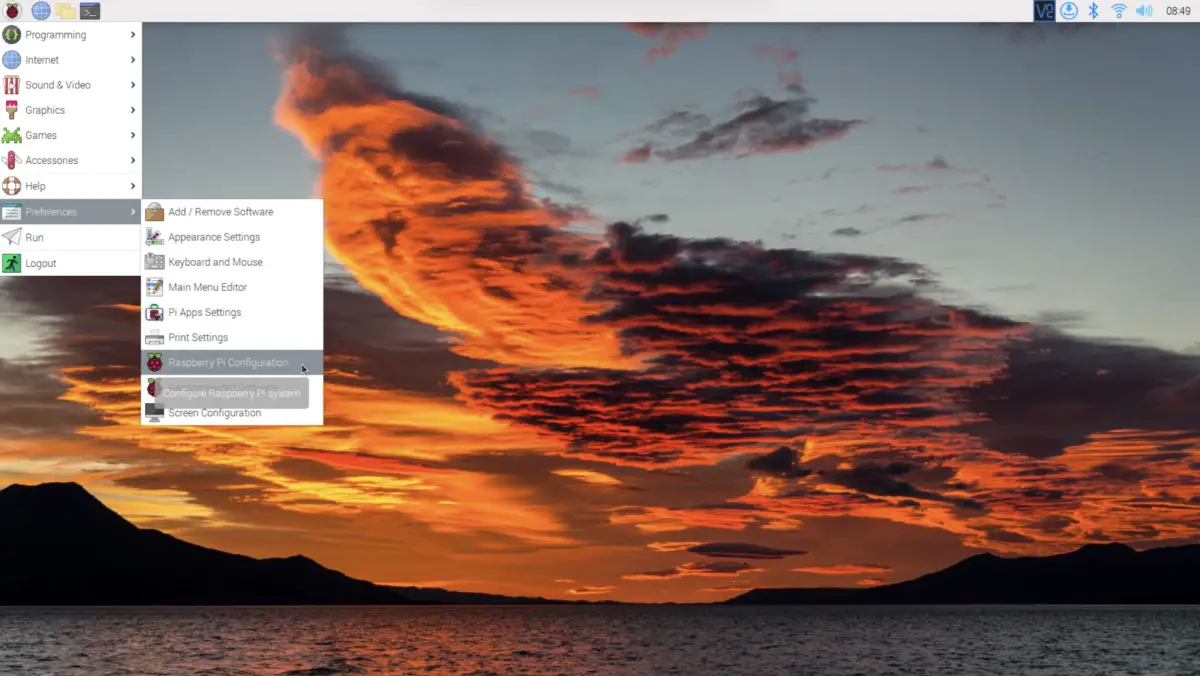
- Next, click on the “Display” tab
- Finally, find the line “Screen Blanking” and click on “Disable”
Note: If your enable and disable buttons are greyed out and/or you can’t click on the disable button, that means that you don’t have control over this feature. Consequently, you’ll have to handle this from the terminal (which is what the second method will show you).
2. Using The Terminal
Here is the method that I prefer using since it’s guaranteed for me to work all the time. Here’s what you’ll need to do:
- Open up the terminal
- To do this, you can click on the fourth icon from the top left corner of your screen. The icon should look like a blackboard with the symbols “>_” on it.
- Alternatively, an easier method is to use the keyboard shortcut CTRL + ALT + T
- Type in the following command
sudo raspi-config- You will now see the terminal version of the settings. To navigate, you’ll need to hit your arrow keys. Now, scroll down to the line that starts with “2 Display Options Configure Display Settings”
- Next, go to the line that states “D4 Screen Blanking Enable/disable”
- Now, you’ll see a screen that asks you if you want to enable Screen Blanking. Click on ‘no’
- Congratulations! You should now see a message: “Screen blanking is disabled”. To exit, hit the enter key and the esc key.
Now, you should reboot your Raspberry Pi to ensure that the disabled screen blanking feature actually goes into effect. Here are two ways you can restart your Raspberry Pi:
How To Reboot Raspberry Pi
1. Using The Terminal
- Open your terminal
- Type in either one of the following commands
sudo shutdown -r nowsudo reboot2. Using The Desktop GUI
- Open the applications menu
- You can do this by clicking on the Raspberry Pi logo icon on the top left corner of your screen.

- Click on “Logout”
- Now, you’ll see 3 options: “Shut down”, “Reboot”, and “Logout”. Click on the second option (“Reboot”).
Note: As you may have noticed, there are two other options besides Reboot. The logout option is useful if you want to sign out and let others access the Raspberry Pi.
The shutdown option will turn your device off. That means all the data that is being processed will gracefully come to a stop. Moreover, it’s a safe way to keeping your SD card safe and not corrupting it, especially if the Raspberry Pi is in the middle of writing to SD card.
Why Does Raspberry Pi Sleep?
Technically, Raspberry Pi does not have the ability to go into sleep mode. They don’t have any power management capabilities, so if you want to shut the Raspberry Pi down, you’ll need to physically type in the command: sudo halt.
On the other hand, all Raspberry Pi comes with the screen blanking feature enabled. This is the blank black screen you’d see after 10 to 15 minutes of inactivity. This can help the Raspberry Pi save power, which can be great if you forget to turn off your device, but it can be annoying if you’re doing something with the Raspberry Pi (i.e. installing applications).
Now, if you encountered a blank screen, you may be wondering:
How Do You Wake Raspberry Pi From Sleep?
Don’t fret if your Raspberry Pi is displaying a blank screen. All you need to do is let the Raspberry Pi know you’re still there. You can do this by either moving your mouse or pressing any key on your keyboard.
Summary – tl;dr (Too Long; Didn’t Read)
Here are the key takeaway point you should keep in mind after reading this article:
- Raspberry Pi doesn’t have a sleep mode, but it does have a screen blanking feature built into it.
- Screen blanking is when your display goes blank/dark after 10 to 15 minutes of inactivity. All new Raspberry Pi comes with this feature enabled.
- You can wake a Raspberry Pi from “sleep” by moving your mouse or simply pressing a key on a keyboard.
- You can disable screen blanking if you:
- Go to the applications menu (ie the Raspberry Pi logo icon)
- Click on Preferences
- Click on Raspberry Configurations
- Click on the Display tab
- Navigate to the line that says “Screen Blanking”
- Click on the disable button
- After that, to make sure it actually works, you’ll need to restart your Raspberry Pi.
- To do that, you can either go to your terminal and type in the command sudo reboot or go to your applications menu, click on logout, and click on reboot.
In the end, I hope that you won’t sleep on the tips found in this article!

