Is Your Arduino Not Compiling? Here’s How To Fix It!
When I first started out with Arduino, I frequently encountered compiling errors. I was so excited to upload my code after typing it all out, but when I pressed the upload button, a red error message jumped out at me and blocked me.
I was annoyed by this, but after many attempts that were both successful and unsuccessful, I’ve encountered these messages less frequently. Consequently, I want to create this guide to help you prevent these error messages from popping up, so I’ll go over the 4 common compiling errors I’ve seen.
But first, let’s define:
What Is Compiling?
Compiling your Arduino basically means that your IDE is translating your code into machine code, so that your Arduino can understand it, and then uploading the sketch (your code) to the Arduino board itself.
Typically, users can use the verify and upload buttons to check and compile their code.
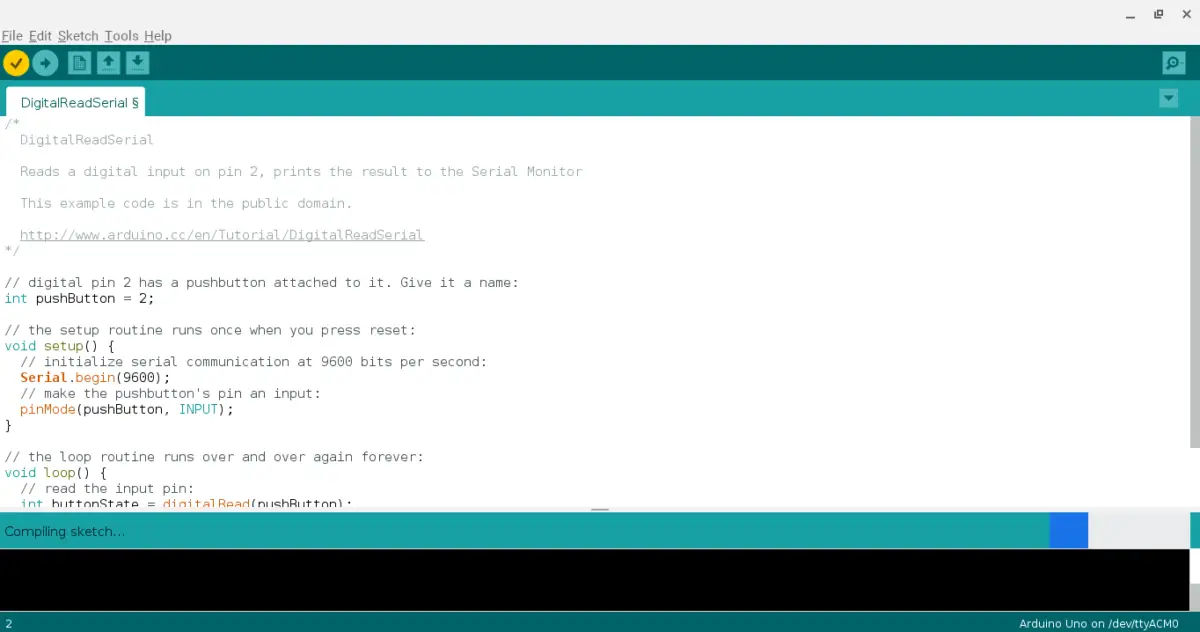
Verify Button
The verify button is the first button you see on the top left corner of your Arduino IDE. Its symbol is a checkmark and it basically checks your code to see if there are any errors.
If there are any errors, it will highlight the line of code that’s wrong in red and send a message to the console. The message will be in red letters detailing what the IDE thinks is wrong with your code.
The upload button is the second button (to the right of the verify button), and its symbol is an arrow pointing to the right. This basically uploads your finished code to your Arduino.
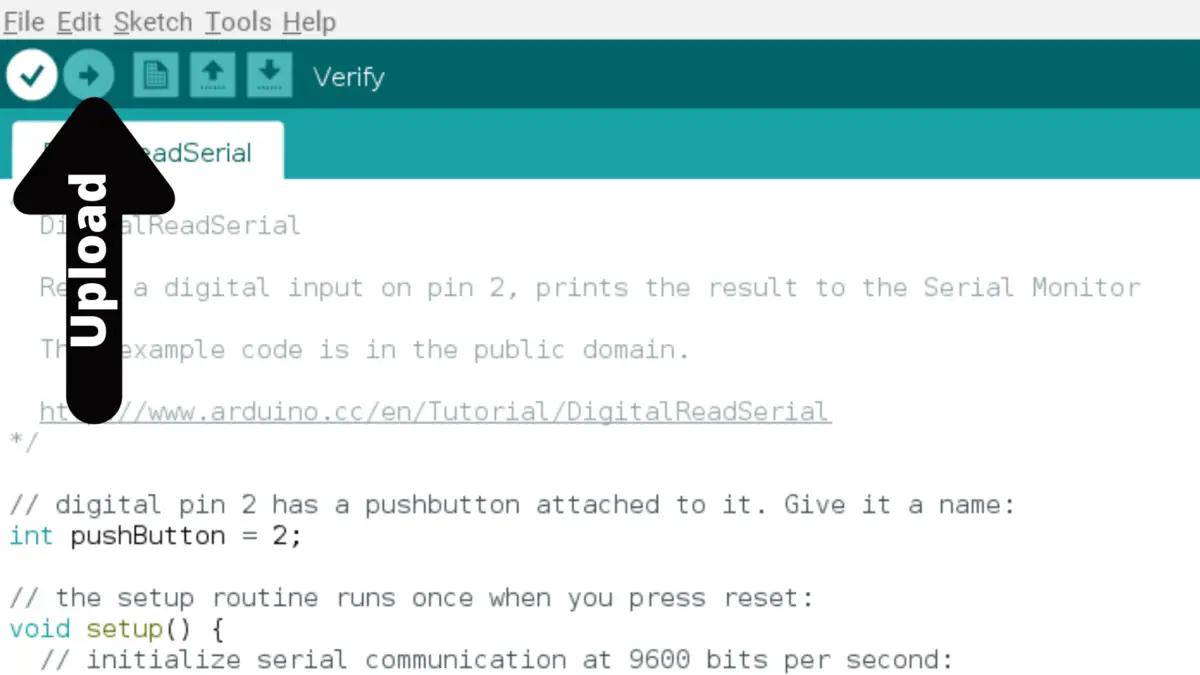
When you upload code, you can tell it’s working by looking at your Arduino board and seeing the TX and RX light flashing.
Sometimes, the upload won’t work because you have an error in your code or because your computer is not properly detecting your Arduino.
Why Is Your Arduino Not Compiling?
Here are 4 reasons why your Arduino Arduino isn’t compiling:
- You picked the wrong board in the Arduino IDE.
- You picked the wrong COM port in the Arduino IDE.
- You didn’t install the library you’re using.
- You have bugs in your code.
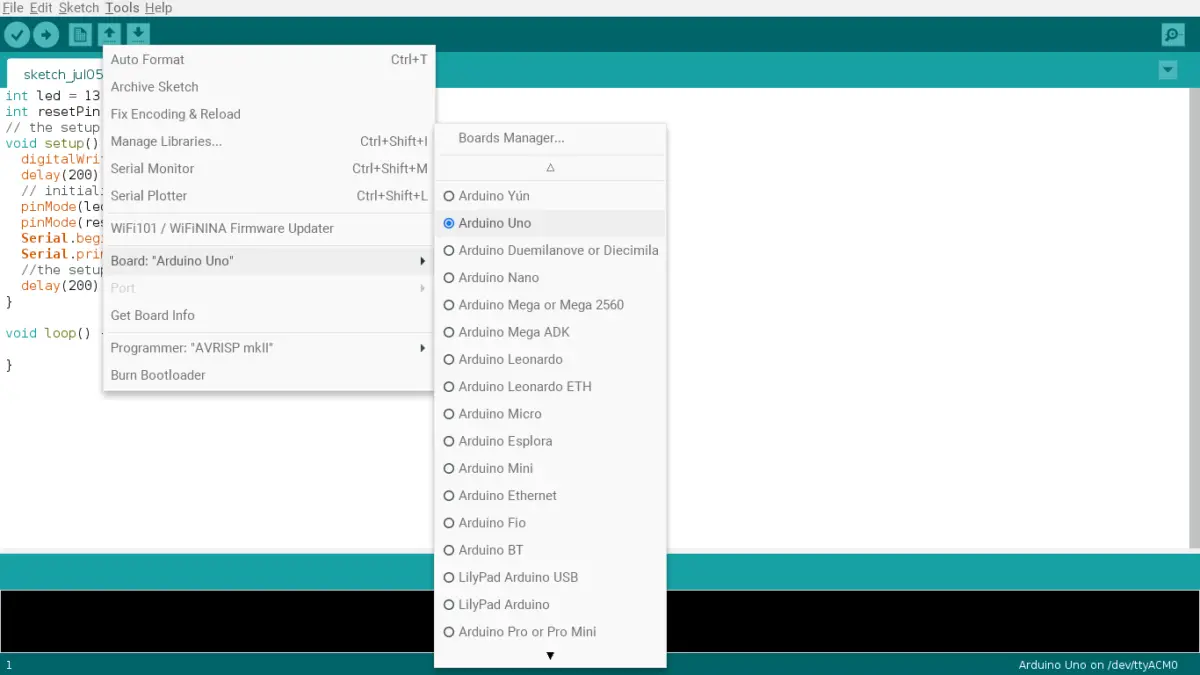
You Picked The Wrong Board In The Arduino IDE
A mistake that beginners can make is clicking on the wrong type of board in the Arduino IDE or not checking whether the selected board is the correct one.
Because there are many types of Arduino (like the Arduino Uno or the Arduino Nano), picking a board in the IDE other than what you have will make your computer not recognize it. Your computer expects one type of Arduino, but your Arduino type doesn’t match up.
You can check what board you’re using at the bottom right-hand corner of the screen:
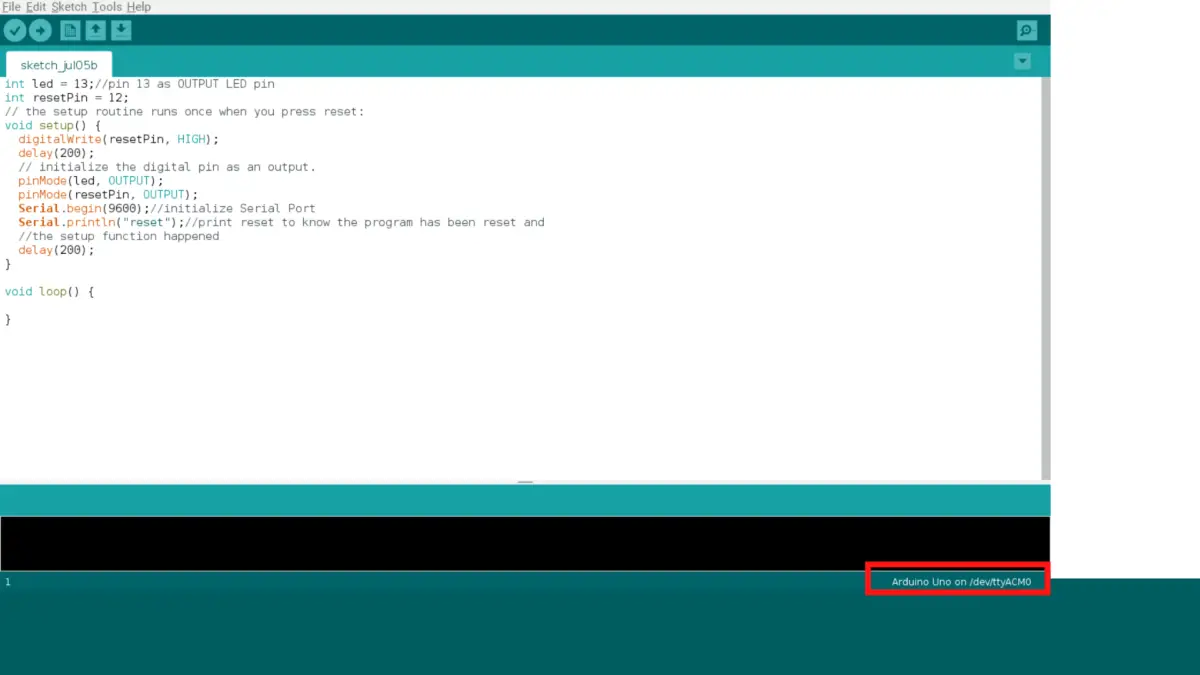
Solution: To fix it, click on “Tools”, and look for “Board: <the name of the Arduino board>”. Know what type of Arduino you have and make sure it matches. If not, just click on the board and pick the right one.
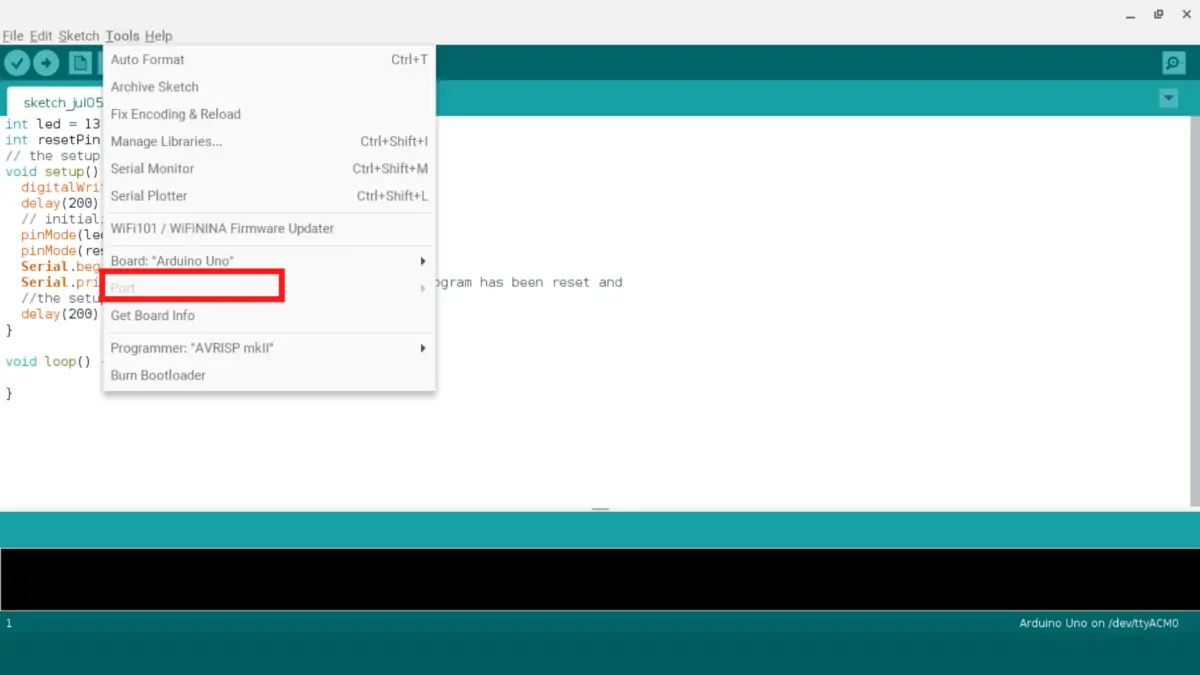
You Picked The Wrong COM Port In The Arduino IDE
For some beginners, they choose the wrong COM port, which is why their Arduino can’t be detected.
What is a COM port?
A COM (which stands for communication) port an Input/Output (I/O) interface that allows a serial device (like an Arduino) to be connected to a computer. It is also known as a serial port.
You can tell which COM port you’ve connected by looking at the bottom right of the Arduino IDE
Solution: To change your COM port, go to your Arduino IDE, click on “Tools”, click on “Port”, then choose the correct one that’s compatible with your Arduino. After that, your Arduino should be detected.
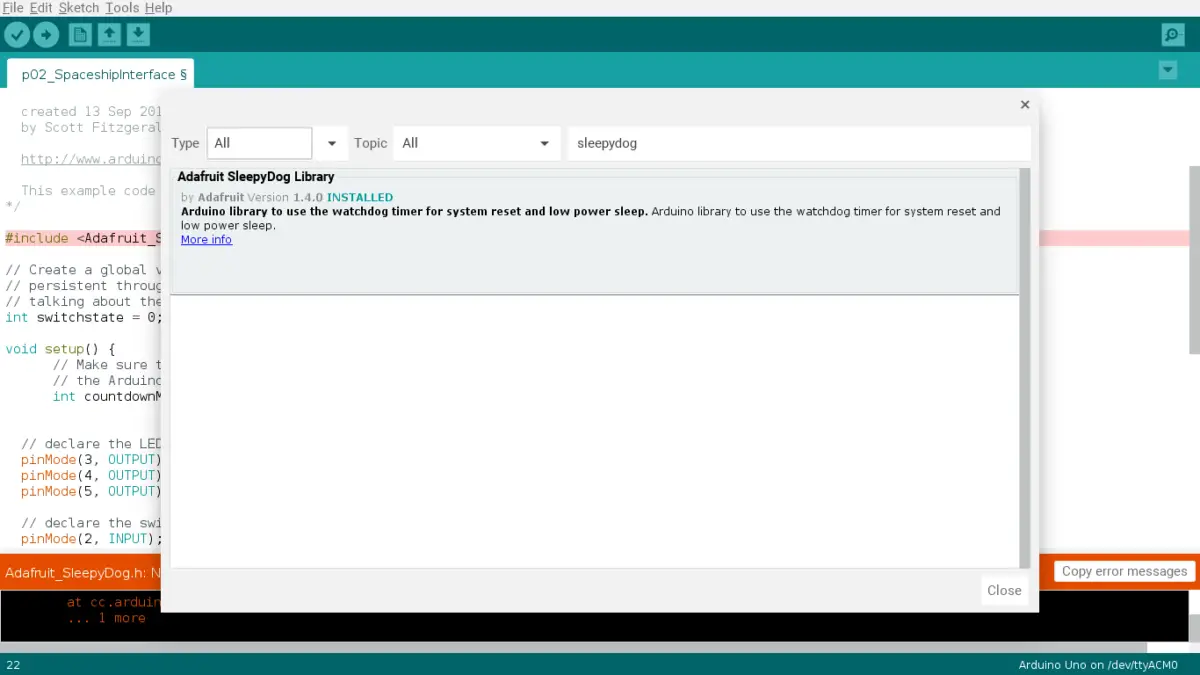
You Didn’t Install The Library You’re Using
Another mistake you can make is forgetting to install your library when using it. If you don’t install the library, your Arduino won’t know where to find the code that you’re calling from the library.
Solution: To install the library, use the shortcut control + shift + I. Or you can click on Sketch > Include Library > Manage Libraries. (see the picture below)

Then, you’ll need to type in your library name and search for it.
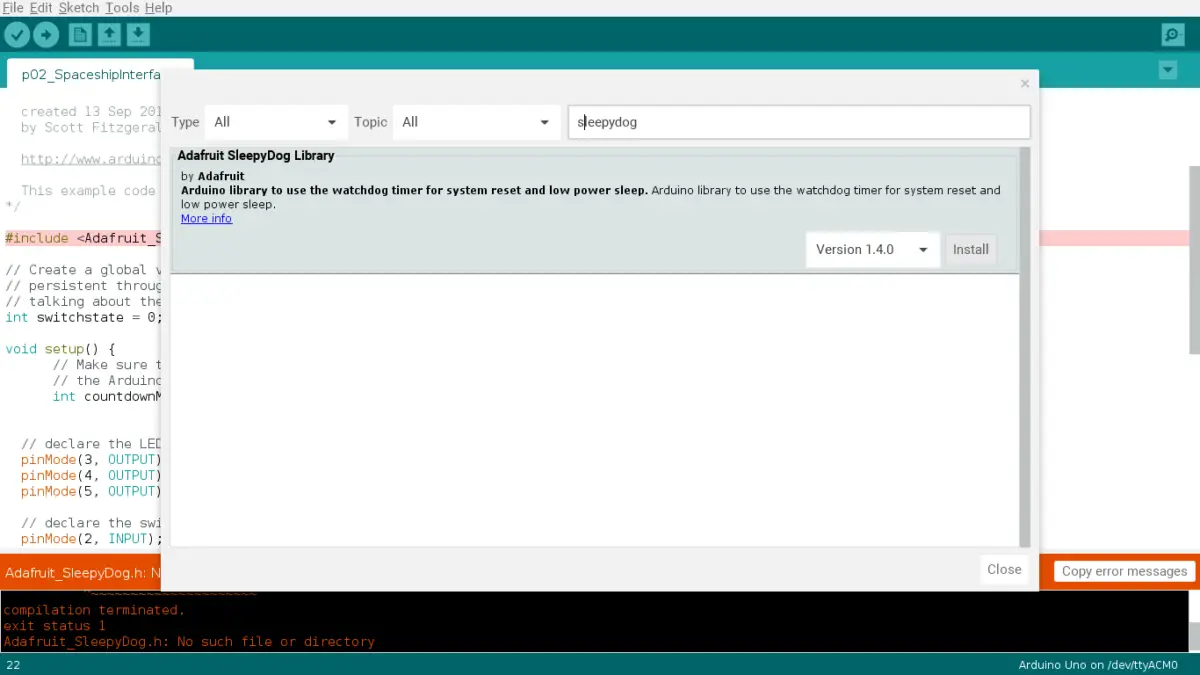
Finally, just install your library and you’re all set!
You Have Bugs In Your Code
A major issue Arduino users may face when trying to upload their code to their board is bugs in their code. You can tell you have bugs (or errors) in your code if you see a red message telling you that you have some bugs.
Solution: Obviously, you need to fix the errors in your code. To do so, you can use the verify button to check your code. However, that is not a guarantee, so I’d recommend you use the serial monitor to guide you.
I’ve written a great article that takes you step by step on how you can use the serial monitor to find your bugs. In my debugging the Arduino guide, I’ll also tell you some useful tips when you’re debugging.
Summary – tl;dr (Too Long; Didn’t Read)
Here are all the important pieces of information after you’ve read the article:
- Compliling is basically where you upload your code and your Arduino IDE converts the human-readable code into machine code so that your Arduino board can understand and use it.
- You may encounter compiling error because you:
- Picked the wrong board in the Arduino IDE
- Have code with errors in it
- Chose the wrong COM port
- Didn’t install the library
Hopefully, the guide I compiled for you is helpful and will assist you in resolving your compiling issues.
If you’re new to programming or want to learn more about programming, then you must read my Arduino IDE programming guide. It also contains some great Arduino IDE tips and help make sure that you optimize your work. Now, what are you waiting for? Check it out and you won’t be disappointed!