Easy Guide To Finding & Changing MAC Address On Raspberry Pi
When I first heard of MAC addresses, I thought they only pertained to macOS devices like a Macbook. Turns out, these addresses play a critical role in tracking people’s devices, which made me consider spoofing (which is a term for changing) the MAC address on my Raspberry Pi.
The first thought you may have is: “How do you find a MAC address?”
There are 6 ways to find a MAC address. You can run the ethtools command or look in the address file for a quick and short answer. If you want other information besides the MAC (like IP address), then you should use the ifconfig or ip commands. You could also download and run a Python script or just boot up your Raspberry Pi without the SD card.
Now that you’ve located the MAC address, you might now be wondering “How do you change the MAC address?“
There are 3 different ways you can change the MAC address. You can download the MacChanger software and run it to generate random MAC addresses every time you connect to the Internet. You can also temporarily change it to an address you desire with the ifconfig and ip commands. Lastly, you can edit the cmdline.txt file.
To help you better understand all these techniques better, I’ll explain each one in full for the rest of the guide.
What Is A MAC Address?
A MAC (Media Access Control) address consists of 12 characters that are either numbers or letters and are separated by either colons or hyphens.
It’s mainly used to track a device over the network and is a protected way to find receivers and senders on the network.
Why Would You Change A MAC Address?
MAC addresses have been known to be used by government agencies and some marketing companies to track computers over different networks.
Of course, if you want to avoid targeted ads from these companies, then the best way to prevent that is by creating a new MAC address regularly. For instance, you may want to change your MAC address each time you restart your system.
How To Find MAC Address On Raspberry Pi
1. Use Ethtools
Ethtools is a networking tool on Linux originally authored by David S. Miller.
It’s used for finding out information about connected Ethernet devices on your Linux system as well as for configuring them.
It prints out the MAC address for the wired device (eth0) as soon as you type the following command in your terminal:
ethtool -P eth0However, if you want to see the MAC address of wireless device (wlan0), you’ll just have to slightly modify it in your terminal:
ethtool -P wlan0The -P option is short for “show permanent address”.
Note: If you want to learn more about ethtools and the many options it possesses, you can open its manual in the terminal by typing:
man ethtool
Once you’re finished looking it over, you can exit by pressing the ‘q’ key.
2. Check The Address File
The address file contains the MAC address, and it is located in the /sys/class/net/ directory.
Consequently, if you want to access the wired device’s MAC address (eth0) and see what’s inside, you’ll need to implement the cat command in the terminal:
cat /sys/class/net/eth0/addressIf you want to see the address for a wireless device (wlan0), type this in the terminal instead:
cat /sys/class/net/wlan0/addressJust like the previous method, this command only prints out the MAC address.
You can also see that depending on which type of device’s MAC address you want to see, you only have to switch between eth0 and wlan0.
3. Use Ifconfig
The ifconfig command, which is short for interface configuration, is a system administration tool that can used to assign, configure, or display network interface configuration information.
It should come pre-installed with your Raspberry Pi OS (operating system), but in case it doesn’t and you get an error message, you can install it with net-tools. Here is the process for installing it:
- Open the terminal. You can do this by using the keyboard shortcut CTRL + WINDOWS KEY + T (or CTRL + COMMAND + T if you’re a Macbook user).
- Alternatively, you can click on the terminal icon near the top left corner of the screen. It looks like a blackboard and it’s near the Raspberry Pi icon (which is the start menu).
- Update your system. Doing this will make sure we pull the latest version of the net-tools package.
sudo apt update- Install net-tools:
sudo apt install net-toolsNow, to use the ifconfig command, just type this in the terminal:
ifconfigThis is what you should see:
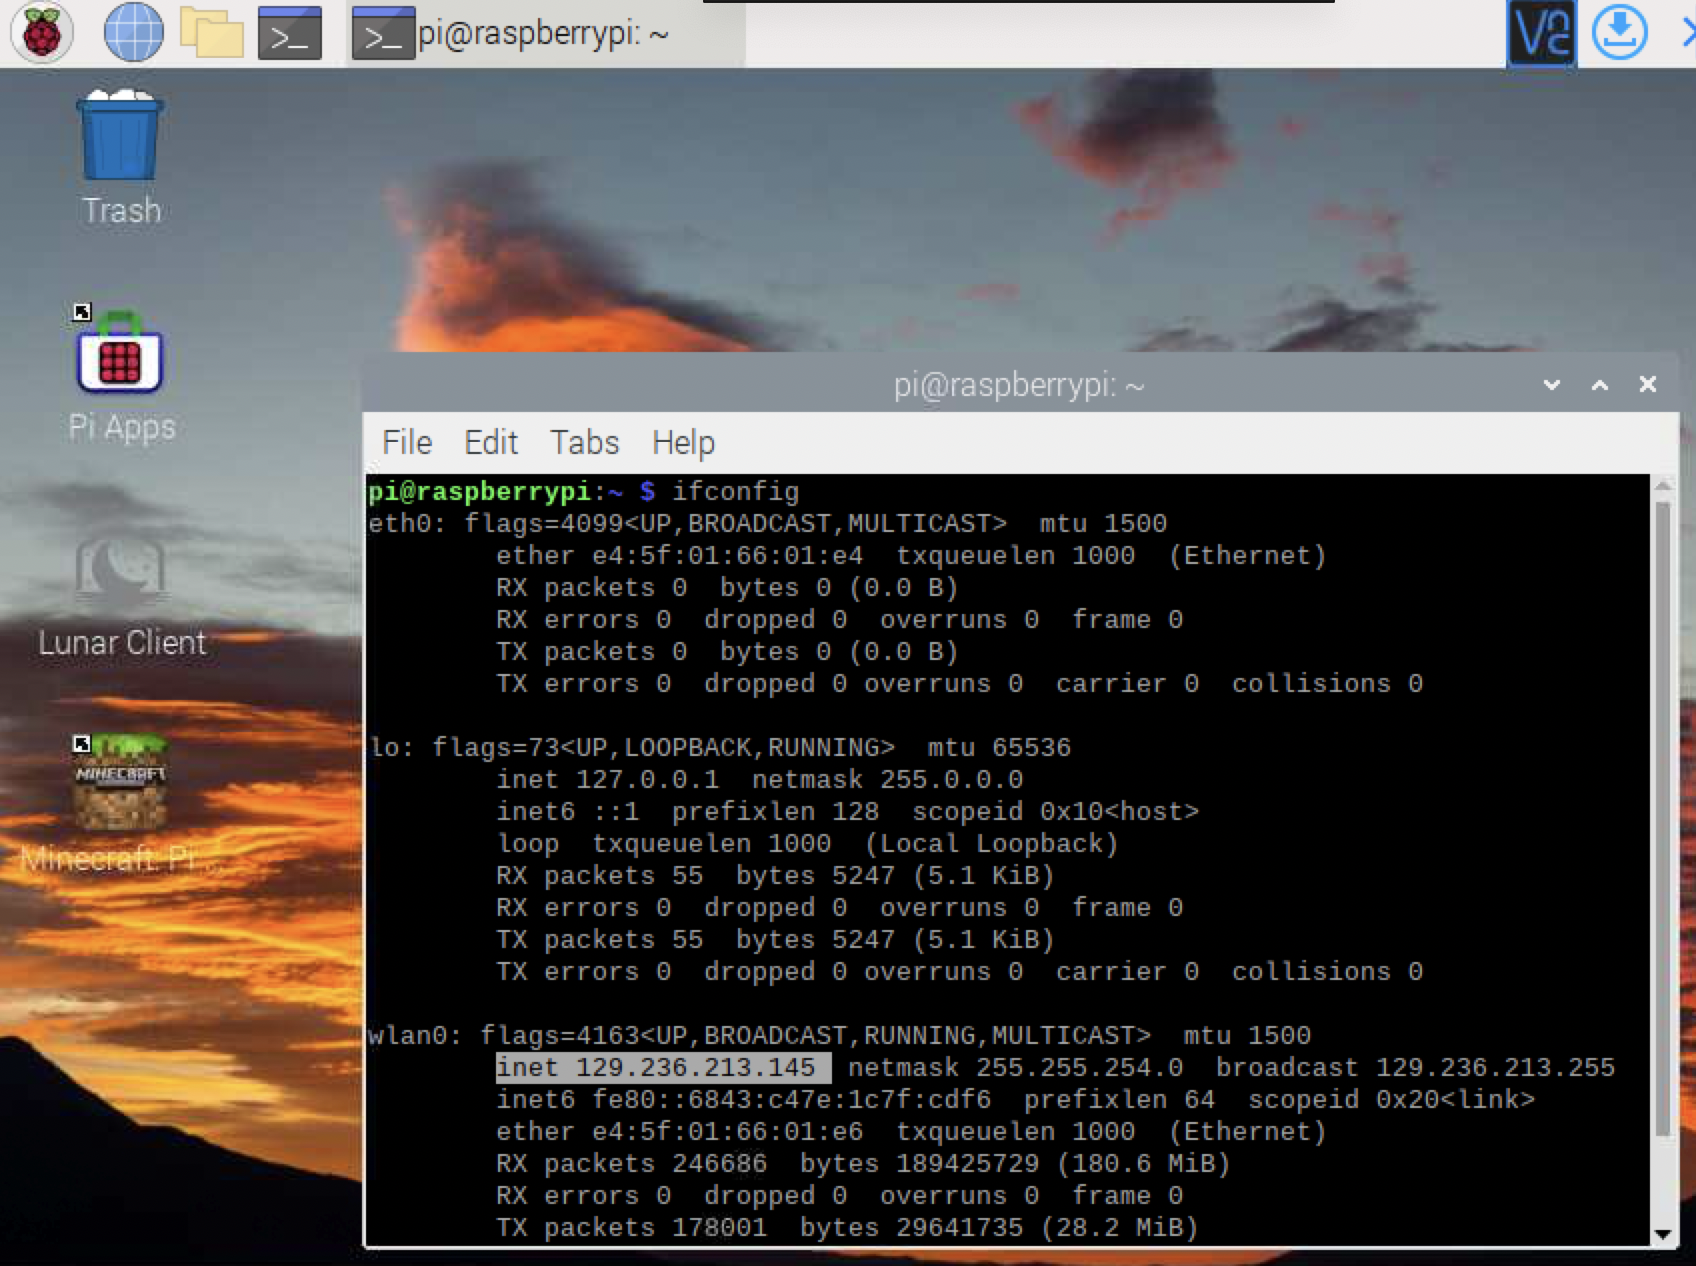
You can find the wired device’s MAC address under the ‘eth0’ section whereas the wireless device’s MAC address lies under the ‘wlan0’ section. In either case, the MAC address will come right after the word ‘ether’.
4. Use Ip
The ip command (which stands for Internet Protocol) displays the same information as ifconfig, but it’s formatted differently.
Interestingly, it comes pre-installed onto Raspberry Pi OS just like ifconfig because it’s part of the net-tools package.
You can find an ip command equivalent for almost all the commands you can execute with ifconfig. For example, you can delete the network mask, make the interface go down, make the interface go up, and more with either one of these commands.
Consequently, you might be wondering what the difference between them is. Well, ip can do a whole lot more than ifconfig because ifconfig only deals with interface stuff. For example, ip can also set routes and tunnels besides handling the interface.
Now, if you want to show the MAC address with ip, then go to your terminal and type this in the command line:
ip link show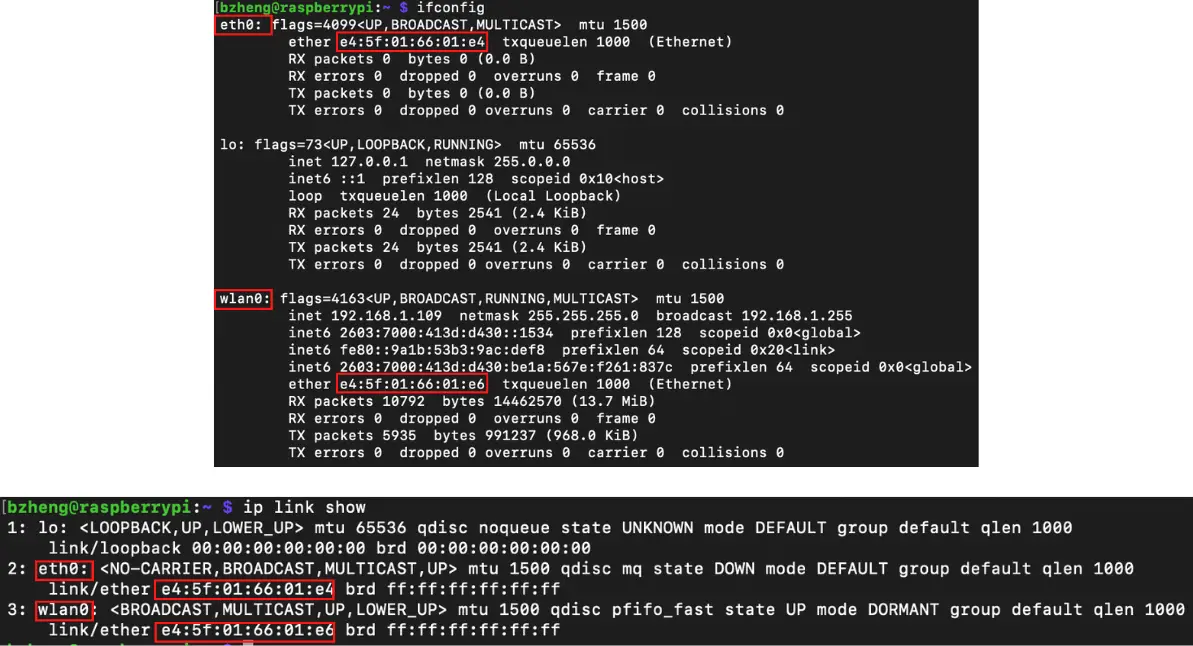
Just like in the ifconfig command, you’ll need to pay attention to the stuff that comes after the word ‘ether’.
5. Run Python Script
Python is a very popular programming language that’s easy to pick up because the code is very intuitive.
You can install and run a Python script that will give you additional information besides the 2 MAC addresses.
There are only 2 easy steps involved in this process. After opening up your terminal:
- Download the Python script from the Internet. After all, this program was created by Matt Hawkins:
wget https://bitbucket.org/MattHawkinsUK/rpispy-misc/raw/master/python/mypi.py- Run the script
python mypi.py
Now, the terminal will print out a nice, neat table with a lot of information about your device.
6. Check The BIOS Screen
This method is very simple, but it can only work if you have the Raspberry Pi hooked up to a display or monitor.
Here is the general process:
- Make sure your Raspberry Pi is powered off
- Remove the SD card from the SD card port
- Power on your Raspberry Pi
- Now, the BIOS screen will boot up. This is usually where the system will let you know that you need to insert the SD card, but disregard the error messages. Focus near the top of the screen on the word “board”. You should be able to see the Mac address near the very end of that line.
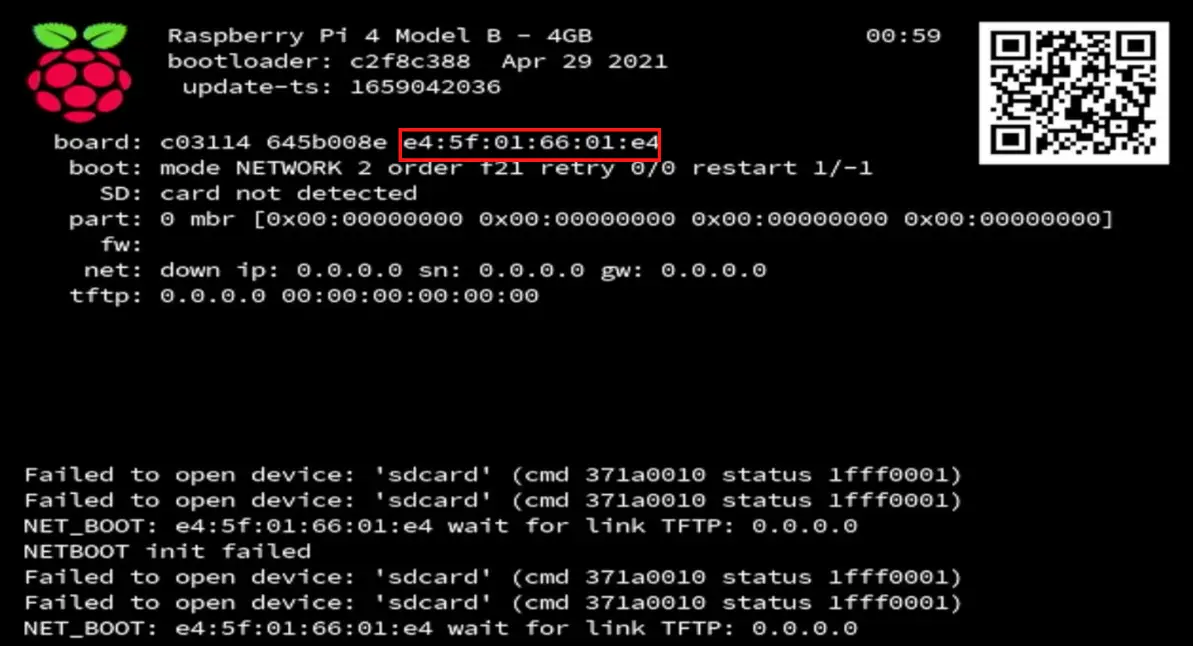
Sadly, in this method, you won’t be able to see the wired device’s MAC address (only the wireless device’s).
Bonus Tip: Use Scripts
A fun and easy thing you can do is putting one of your favorite commands in a script and running it.
A script is a file that you write code in, which is saved and can later be executed. The fifth method is an example, but it uses Python code. Of course, you can use the Bash programming language, which has commands very similar to Linux
For example, if I wanted to use the first method and print out both the MAC addresses for wlan0 and eth0, I do this:
- Create a script:
sudo nano find_mac.sh- Paste the following code in it:
#!/bin/sh

wired_MAC=$(ethtool -P eth0)

wireless_MAC=$(ethtool -P wlan0)

echo "Wired MAC's" $wired_MAC
echo "Wireless MAC's" $wireless_MAC- Save the code and exit by doing the following:
- Press CTRL + X
- Press the ‘y’ key
- Hit enter to confirm
- Change execution permission so you can run it:
sudo chmod 777 find_mac.sh- Run the following code:
./find_mac.shIf you want to learn more about shell scripting, then you should check out my post on the levels of programming you can try in Raspberry Pi.
How To Change MAC Address On Raspberry Pi
1. Run MacChanger
MacChanger is the tool that will randomly create MAC addresses each time you connect to a network (whether it’s wireless or wired).
To use macchanger, open the terminal and do the following:
- Update your system to make sure the version of the package you pull is the most recent.
sudo apt update- Install macchanger
sudo apt install macchanger- After that, a new window will open called “Configuring macchanger”. Select the ‘yes’ option if you want the program to automatically change the MAC address each time you connect to the Wi-Fi or an Ethernet cable.
- Disable your interface, using either one of the following commands depending on whether you want to change the wired (eth0) or wireless (wlan0) MAC address:
sudo ifconfig eth0 downsudo ifconfig wlan0 down- Run either one of the following macchanger commands so that it can create a completely random MAC address:
sudo macchanger -r eth0sudo macchanger -r wlan0- OPTIONAL: If you want to change your MAC address to your liking and make it permanent, then you should run the following command instead of the previous one (just replace the X’s with numbers):
sudo macchanger --mac=XX:XX:XX:XX:XX:XX- Activate your interface (using either one of the commands):
sudo ifconfig eth0 upsudo ifconfig wlan0 upThis is perhaps the easiest way on this list to change your MAC address automatically.
2. Temporarily Change It
Remember how I said the ifconfig and ip commands were very similar and that there was most likely an ip command equivalent of the ifconfig command? This is one of those instances.
The general process for both remains the same:
- You’ll first need to disable the interface before you can mess around with it.
- Change the MAC address
- Finally, you’ll need to enable the interface
As a result, I’ll show you both methods and you can decide on which one you like the most.
Ifconfig Method
Here are some pointers:
- You can replace ‘eth0’ with ‘wlan0’ if you’re changing the MAC address for a wireless device
- Make sure to replace the ‘X’s with actual numbers
Now, run these commands in the terminal:
sudo ifconfig eth0 downsudo ifconfig eth0 hw ether XX: XX: XX: XX: XX: XXsudo ifconfig eth0 upIp Method
Keeping the previous ideas in mind, run these commands in the terminal:
sudo ip link set eth0 downsudo ip link set eth0 address XX XX: XX: XX: XX: XXsudo ip link set eth0 upKeep in mind that once you restart, reboot, or turn off your Raspberry Pi, the MAC addresses you set will disappear, and you’ll end up with your regular MAC.
3. Edit The cmdline.txt File
This next method is not recommended and only works for changing the MAC address for an integrated Ethernet adapter.
Thus, if you feel confident to proceed, then you’ll need to perform the following steps:
- Open your terminal
- Open the /boot/cmdline.txt file:
sudo nano /boot/cmdline.txt- Append the following line of code to the end of the file (make sure to replace the capital X’s with actual numbers and keep the spaces between them):
smsc95xx.macaddr = 00: XX: XX: XX: XX: XX- Reboot your system to put this in place
sudo rebootSummary – tl;dr (Too Long; Didn’t Read)
Here are the key takeaway points you should keep in mind after reading this article:
- MAC addresses can be used to track computers over a network, which is a reason some people want to change (or spoof) it.
- The 6 ways to find a MAC address are:
- Use the ip command
- Use the ifconfig command
- Use Ethtools
- Look in the address file
- Boot your Raspberry Pi without an SD card
- Download and run a Python script
- The 3 ways to change a MAC address are:
- Install and use macchanger
- Temporarily change it with either the ip or ifconfig commands
- Edit the cmdline.txt file
I hope this article was helpful and addressed your concerns over finding and changing MAC addresses!