Easiest Way To Emulate Raspberry Pi On A Macbook
For a while, I’ve been looking into how I can emulate Raspberry Pi on my laptop, yet I kept running into obstacles. Many online articles explain how you can emulate by installing the VirtualBox software and running the ISO disk image on it.
Unfortunately for me, I have an M1 Macbook whose architecture isn’t supported by VirtualBox. Consequently, that made me wonder: “How could I emulate Raspberry Pi on my laptop?”
To emulate the Raspberry Pi OS (Operating System) on a Macbook, you need to perform the following steps:
- Install the UTM software
- Create a Virtual Machine (VM) emulator
- Install the Raspberry Pi Desktop iso disk image
- Flash an external drive with the Raspberry Pi image
- Attach the disk image and the external drive to the VM
- Boot the VM with them
- Go through the setup process
- Restart the VM and enjoy
If you need more clarification on these steps, the rest of the article will dissect each one in full detail. Moreover, I’ll be listing the pros and cons of using a Raspberry Pi emulator as well as the methods I’d use for emulating a Raspberry Pi on different OS systems.
How To Emulate Raspberry Pi
To do the following steps, here are the tools you’ll need:
- SOFTWARE:
- Raspberry Pi Imager
- Raspberry Pi OS Desktop iso disk image
- UTM Software
- HARDWARE:
- Laptop
- External Drive (with at least 4 GB)
- This can be an SD card or a USB drive
- Dongle
- Macbooks don’t have all the necessary ports, so find a dongle that can connect the external drive you have to USB-C (the port Macbooks do have)
1 . Install The UTM Software
UTM is an open source virtual machine environment that is free to all macOS users. It was created for (and only for) these users, which means other operating system (like Windows) can use it.
You can install the UTM software at this website: https://mac.getutm.app/.
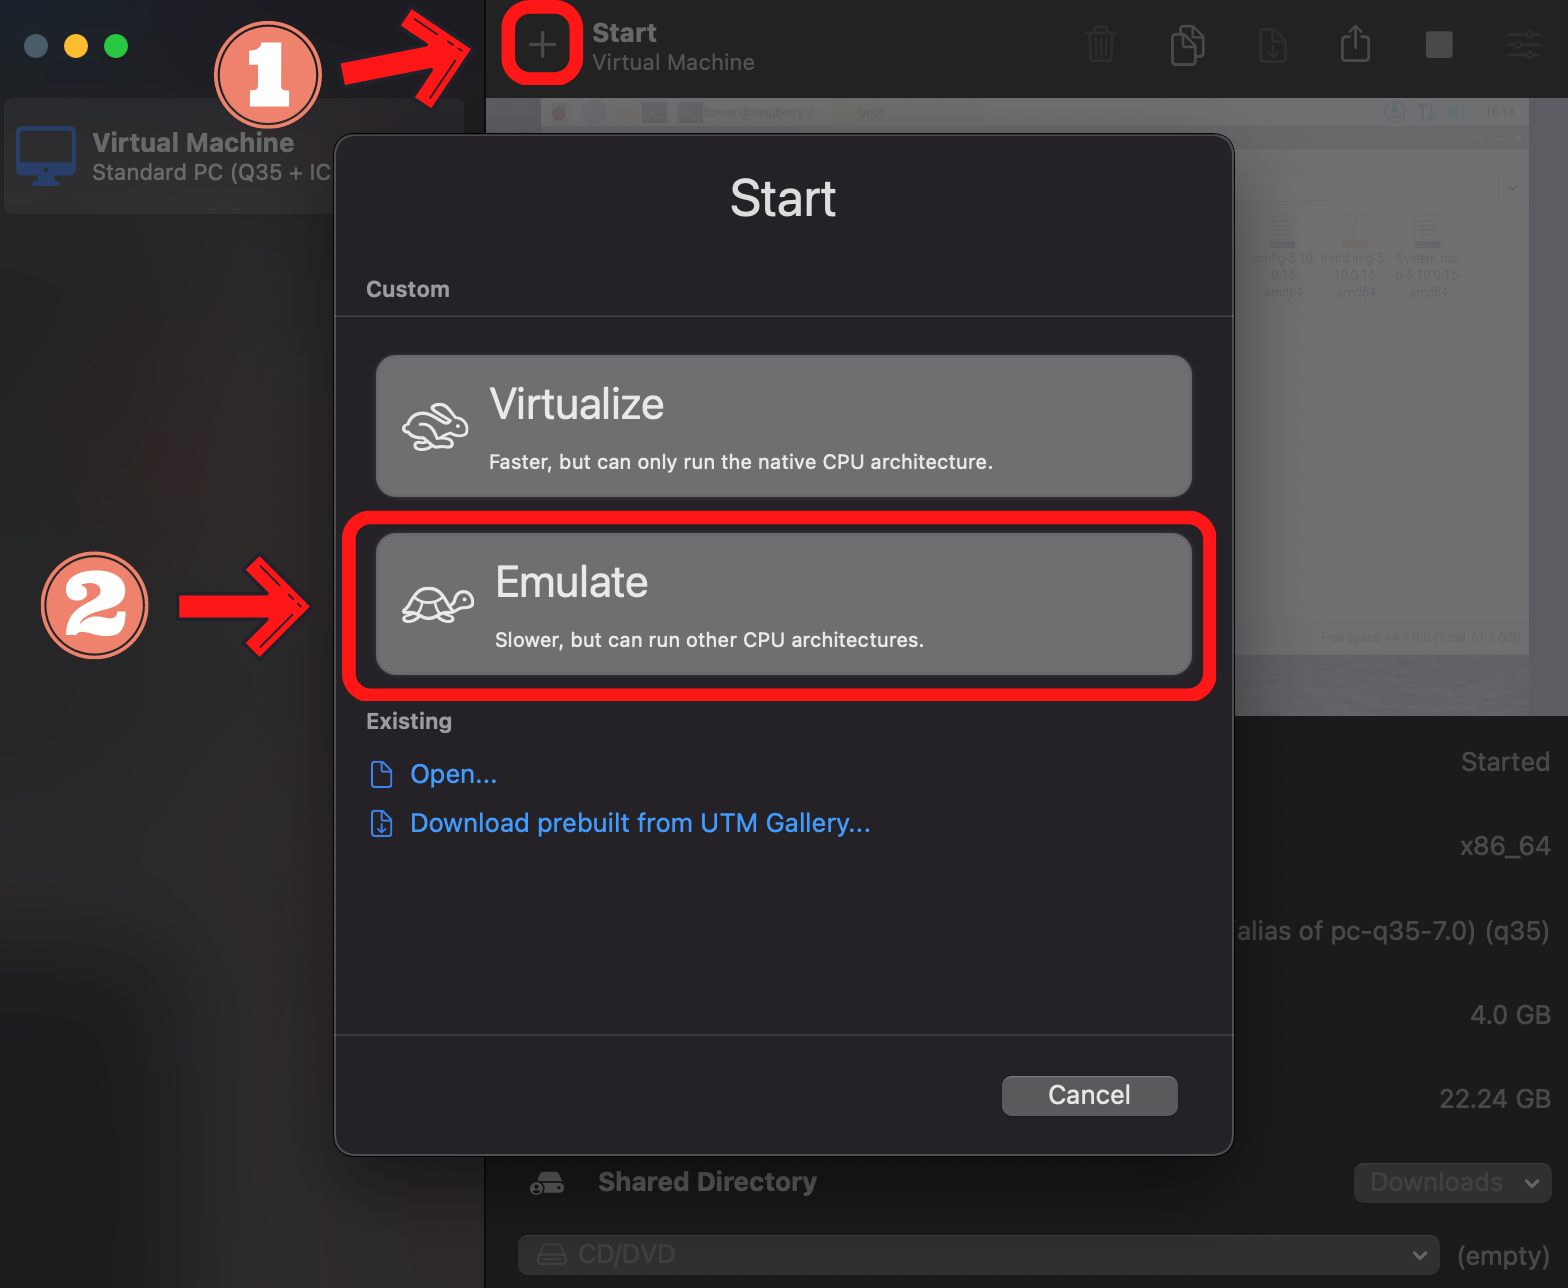
2. Create A VM Emulator
Once you’ve installed UTM, you’ll need to open it up and click on the plus sign (+) near the top middle of the screen.
Then, choose the “Emulate” option.
3. Install The Raspberry Pi Desktop Iso Disk Image
The next thing you’ll need is the iso disk image. To get this, go to the Raspberry Pi website and click the download button. This is the website you can go to: https://www.raspberrypi.com/software/raspberry-pi-desktop/
4. Flash An External Drive With The Raspberry Pi Image
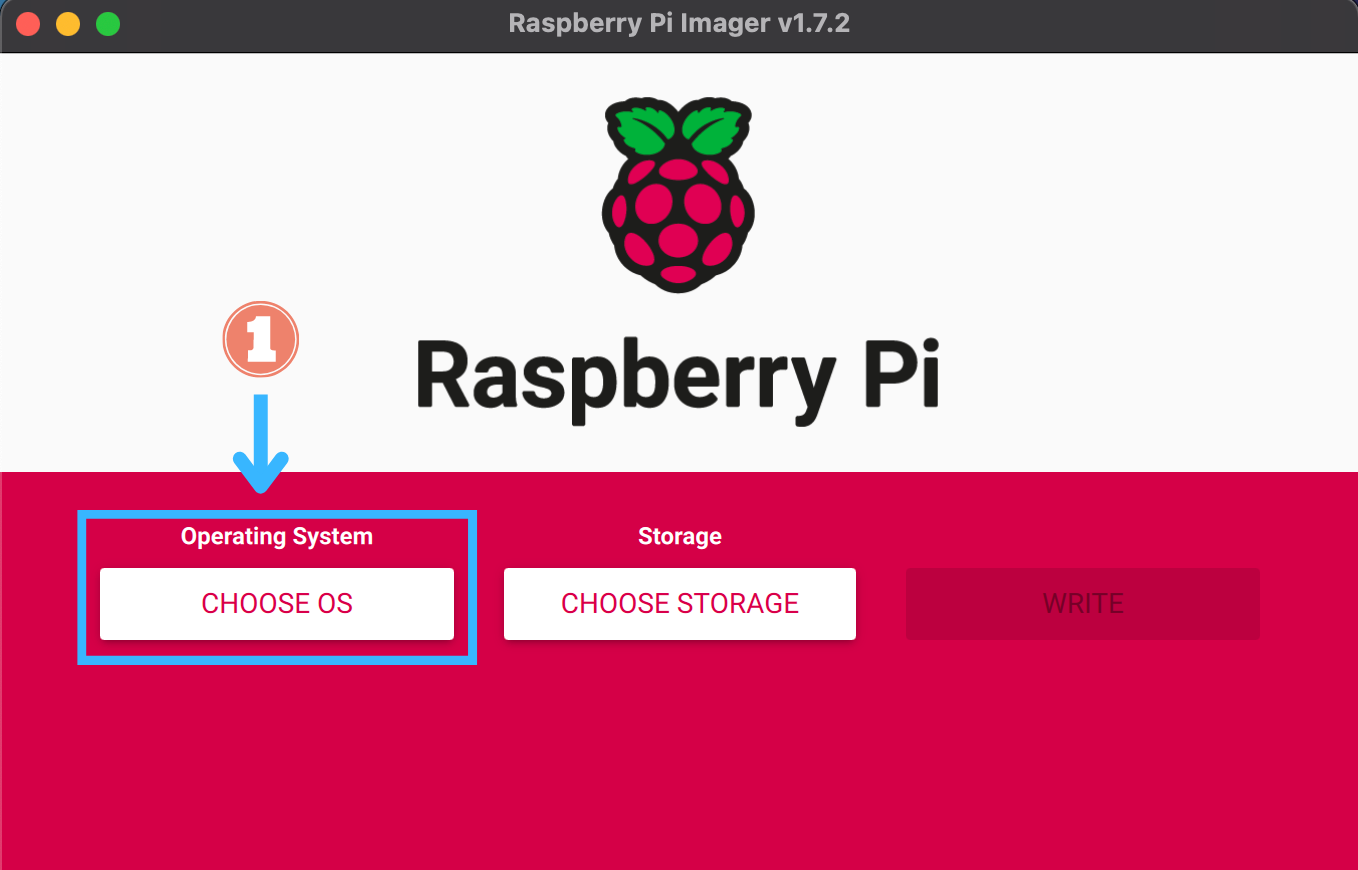
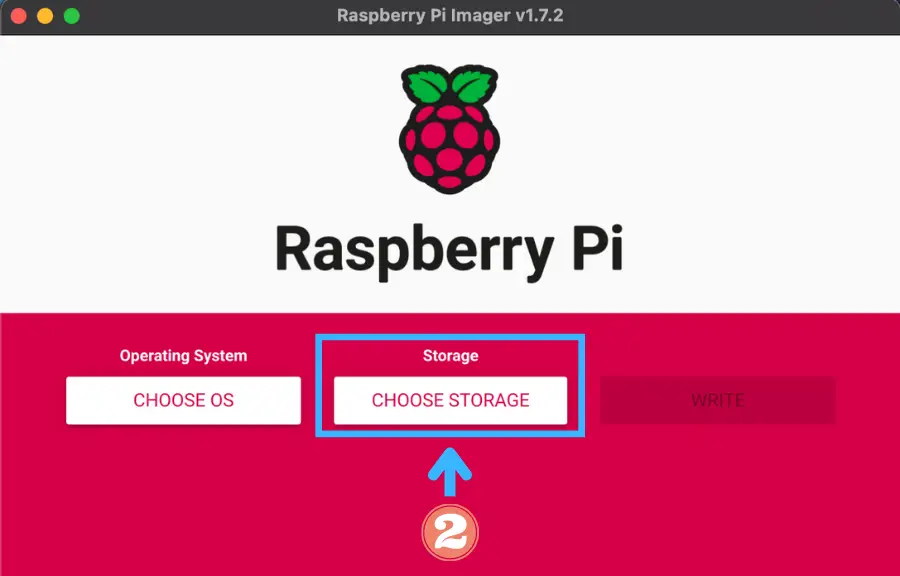
First, you’ll need to install the Raspberry Pi Imager. The download can be found at this site: https://www.raspberrypi.com/software/.
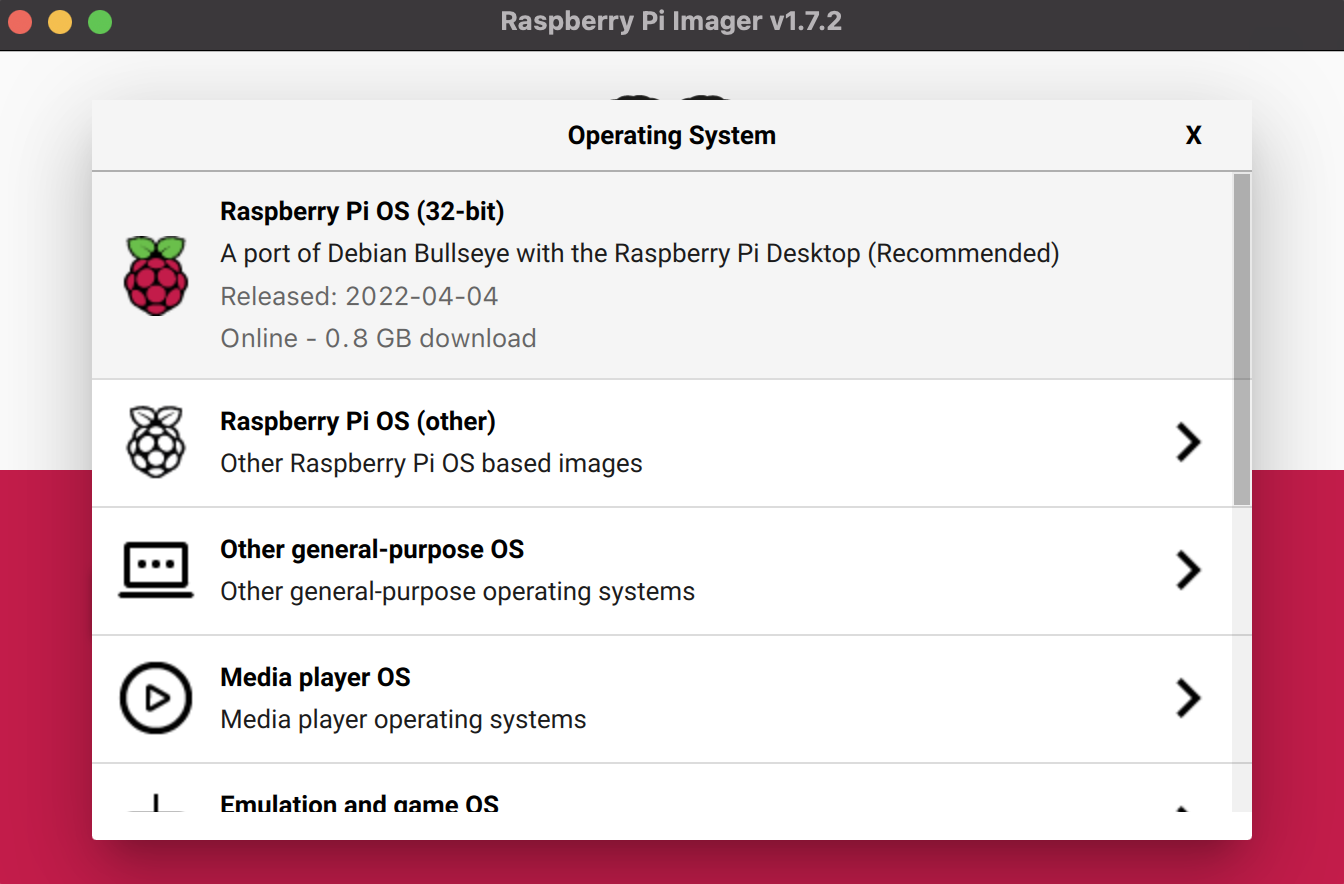
Once you have it installed and open, plug in your external device. Then, click on “Choose OS” and select the first option (which should state Raspberry Pi OS (32-bit)).
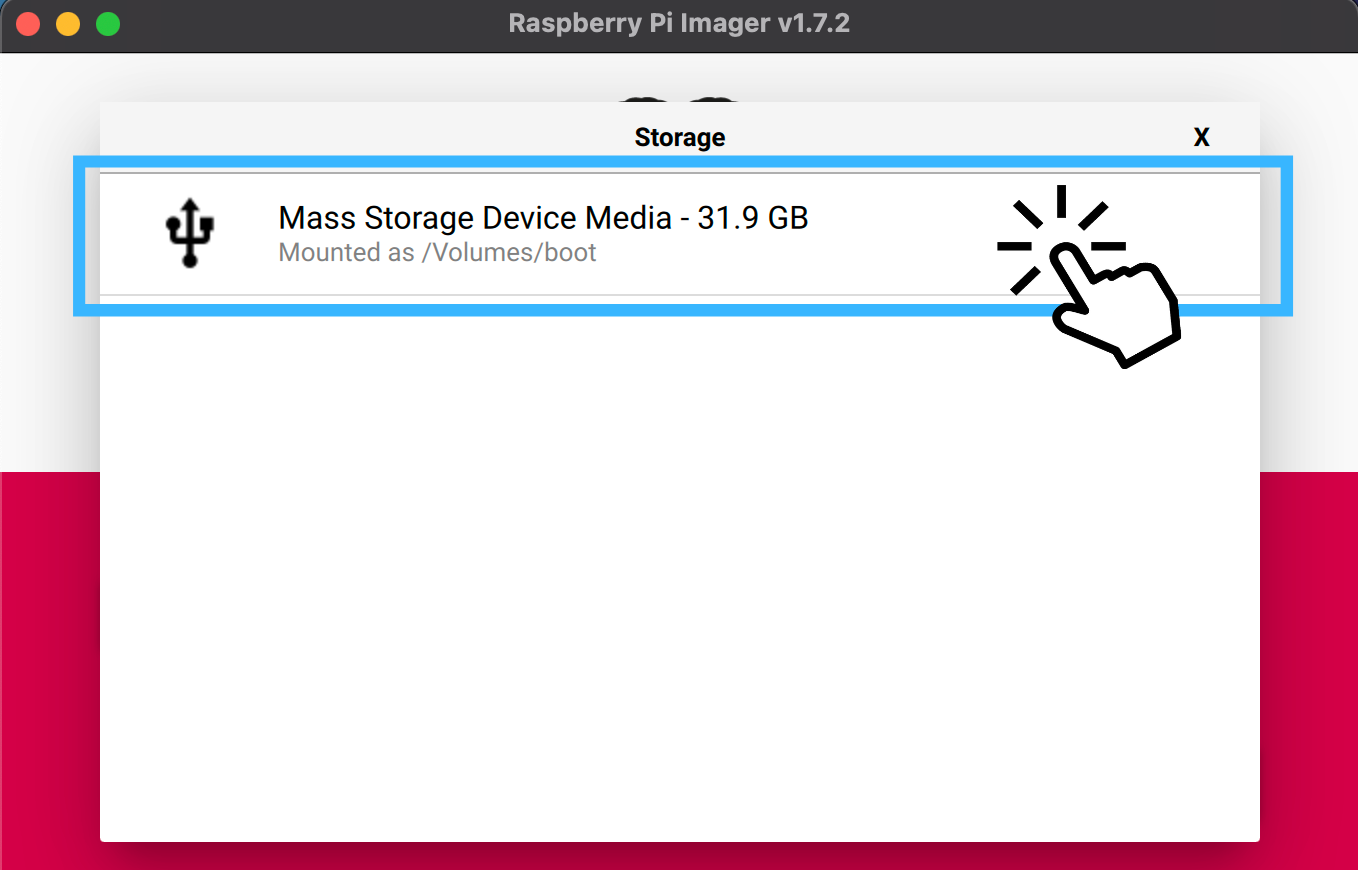
Next, click on “Choose Storage” and pick the name of your external device (it should be the only option you see).
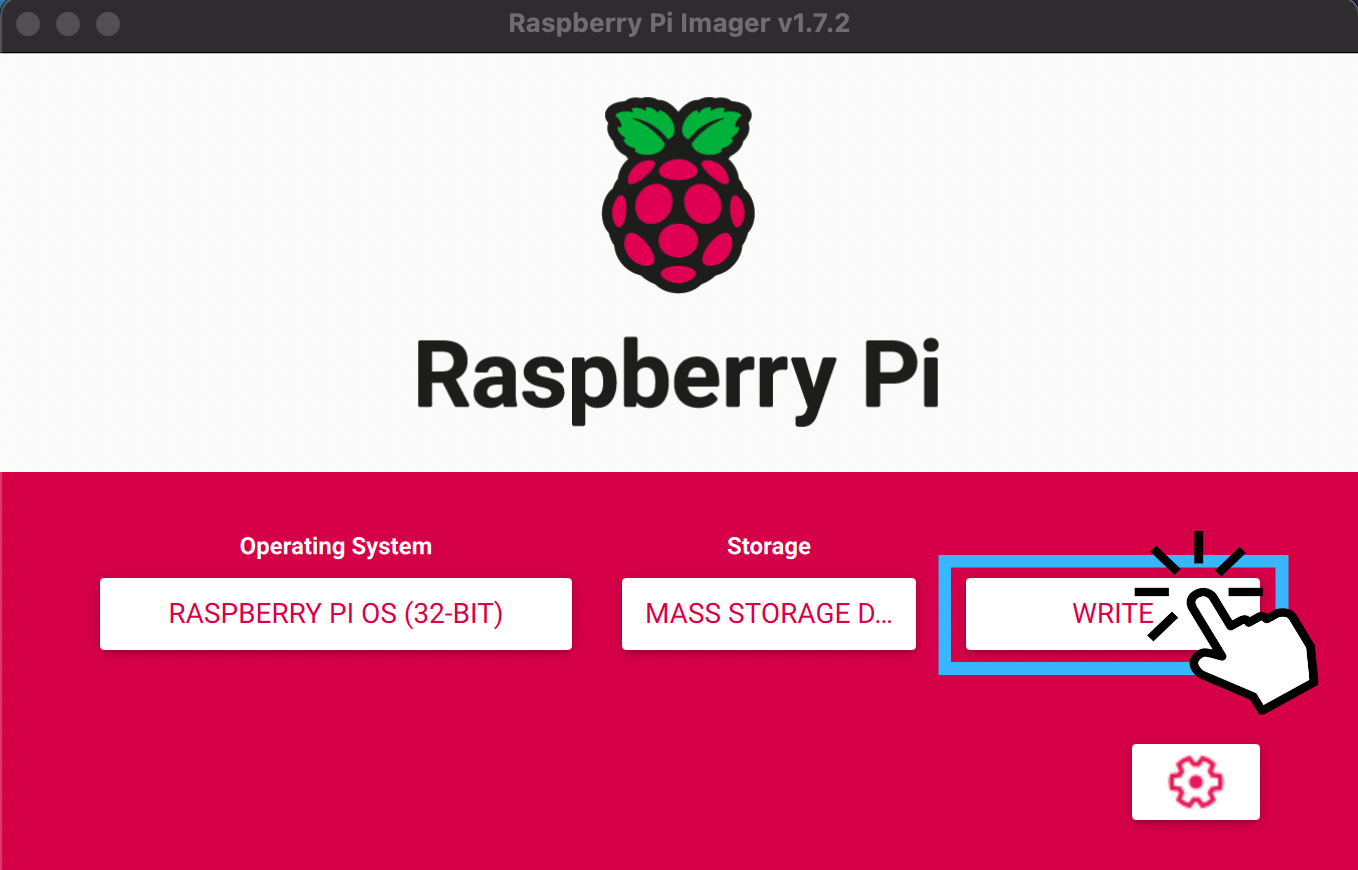
Now, click the verify button and wait for the installation to finish.
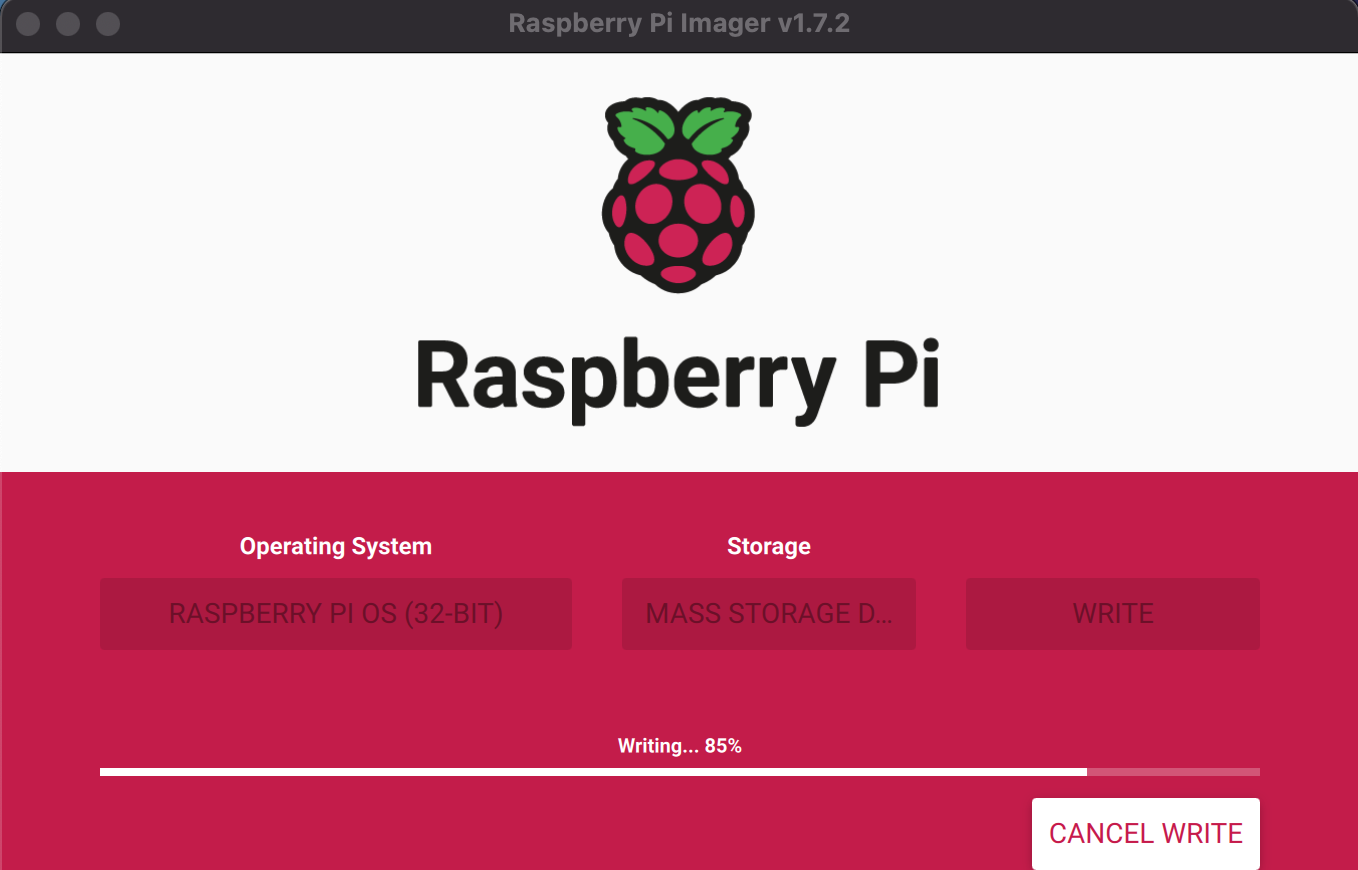
Once it’s finished, it’ll eject your external drive. That means you can safely remove the SD card!
5. Attach The Disk Image And The External Drive To The VM
Go to your UTM virtual machine and reinsert your external drive. Then perform the following steps:
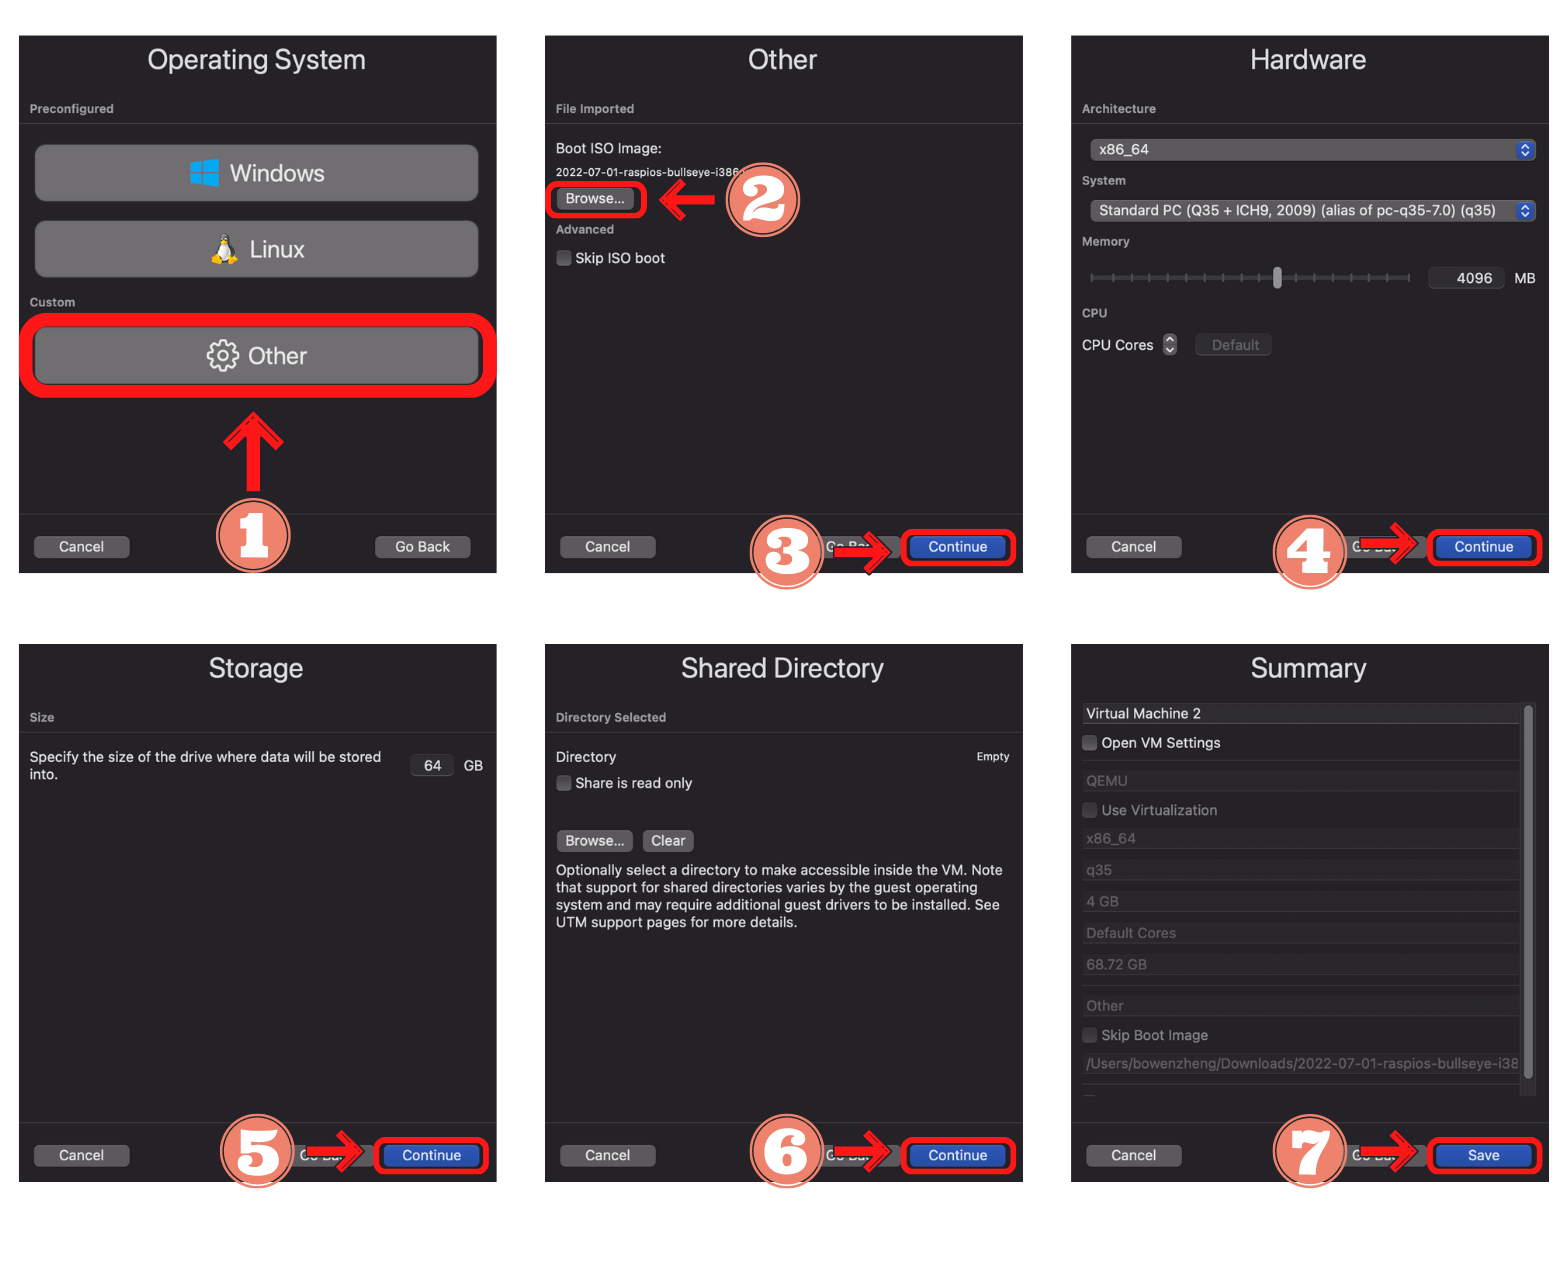
- Click on “Other” in the Operating System screen
- Click on “Browse” and select the disk image you downloaded in the “Other” screen. Once you’ve chosen it, click continue
- Click continue on the “Hardware” screen
- Click continue on the “Storage” screen
- Click continue on the “Shared Directory” screen
- Click save on the “Summary” screen
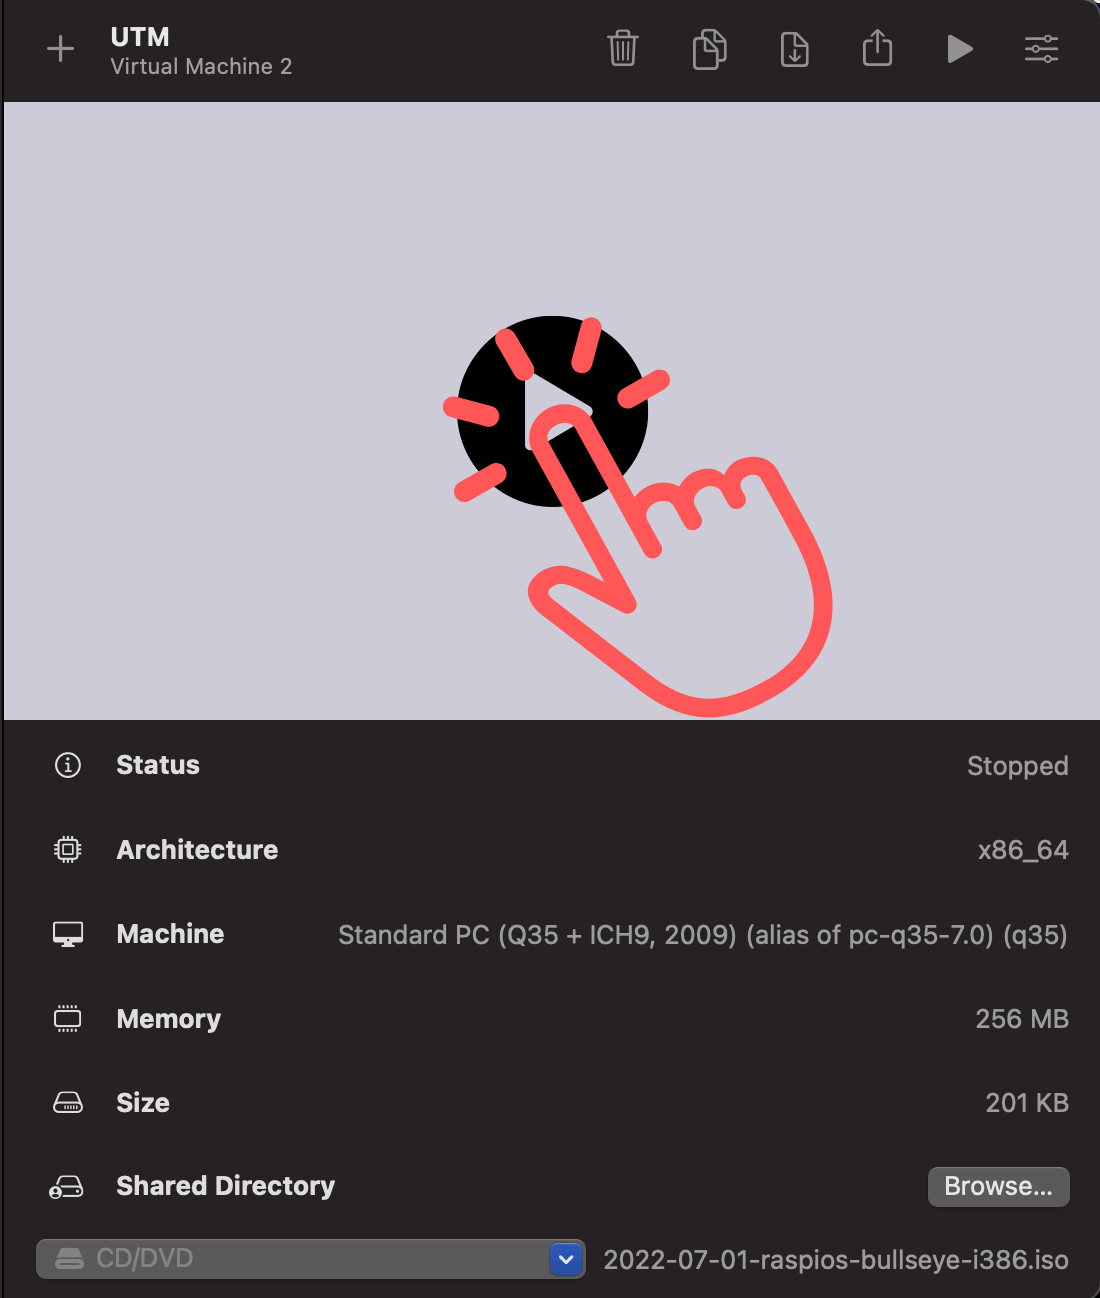
6. Boot The VM With Them
Now, you should be back on the main UTM screen. Double-click on the play button to launch the virtual machine
7. Go Through The Setup Process
This is the tedious part of the whole process. For me, it took me a good 2 hours to finish
You’ll see the following screens and will need to do the following:
- Choose “Install”
- Choose your location
- Select “Finish partitioning”
- Then, you’ll see the Raspberry Pi Desktop setup. From here on out, you’ll need to set your country, language, username, password, and etc.

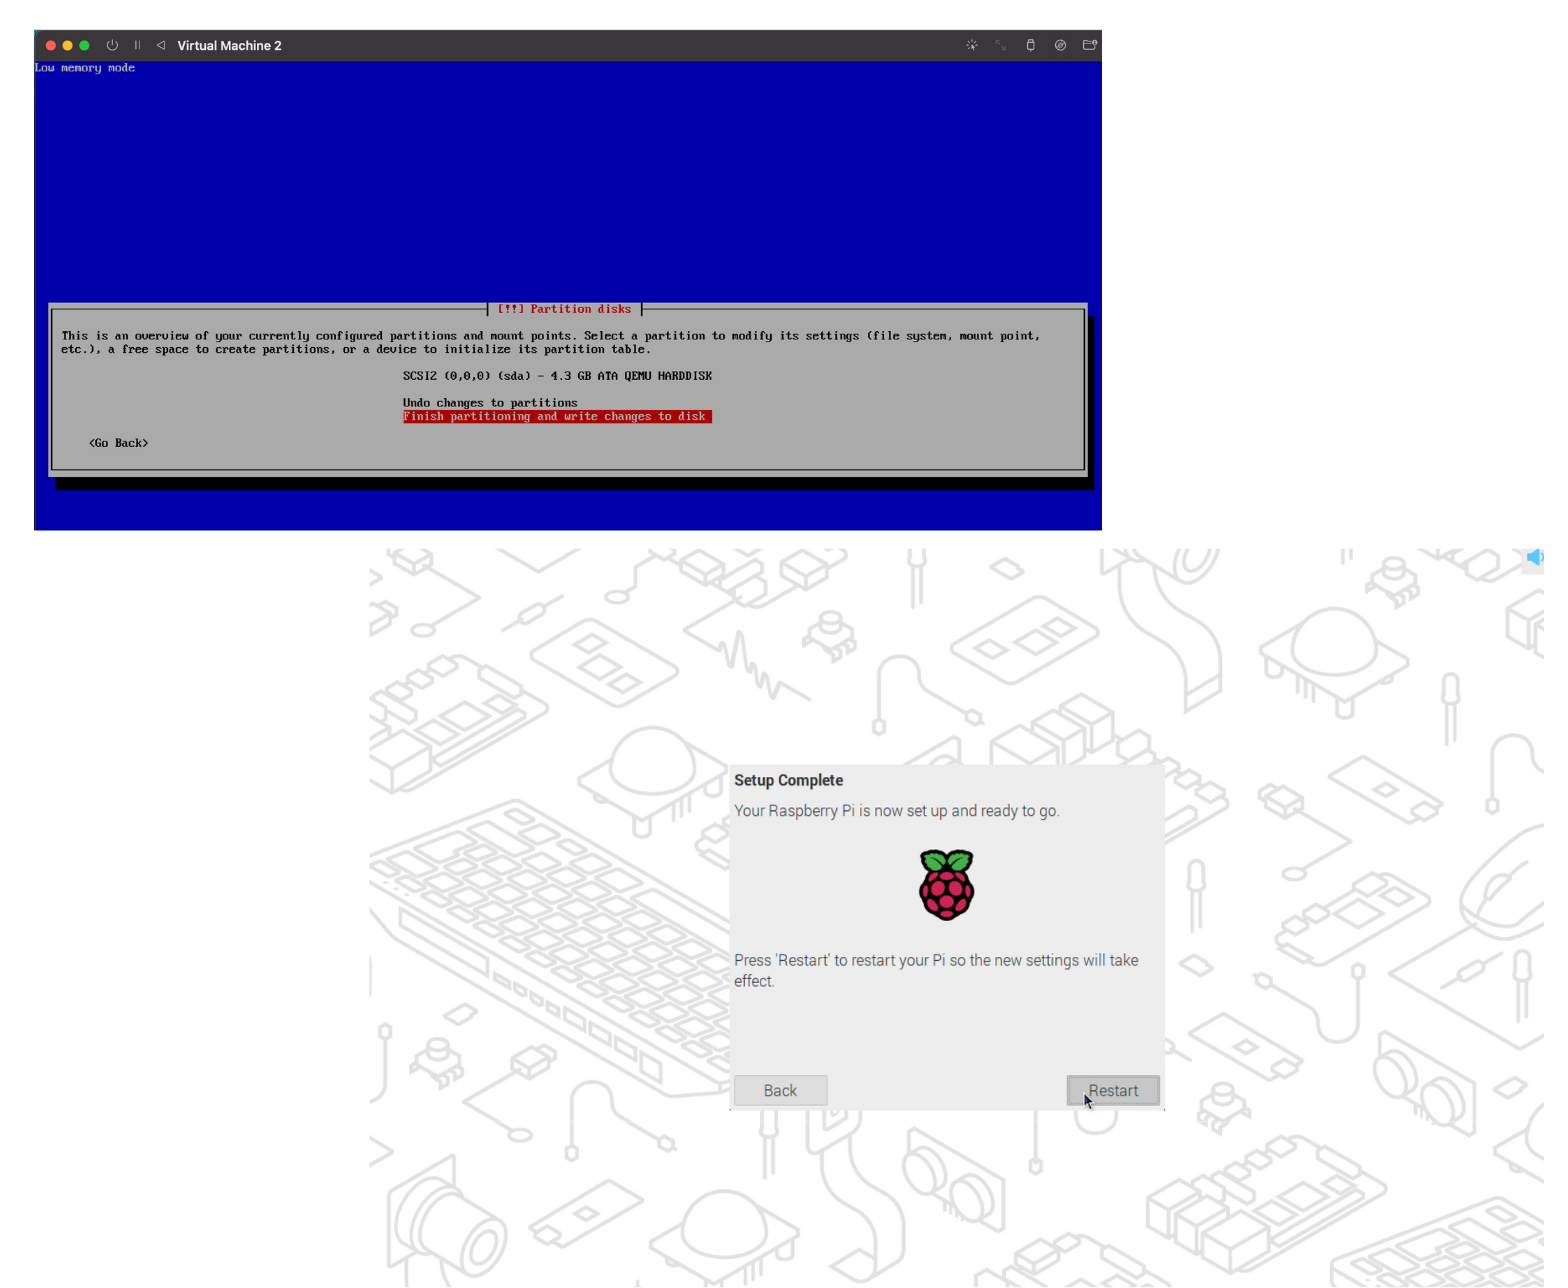
8. Restart The VM And Enjoy
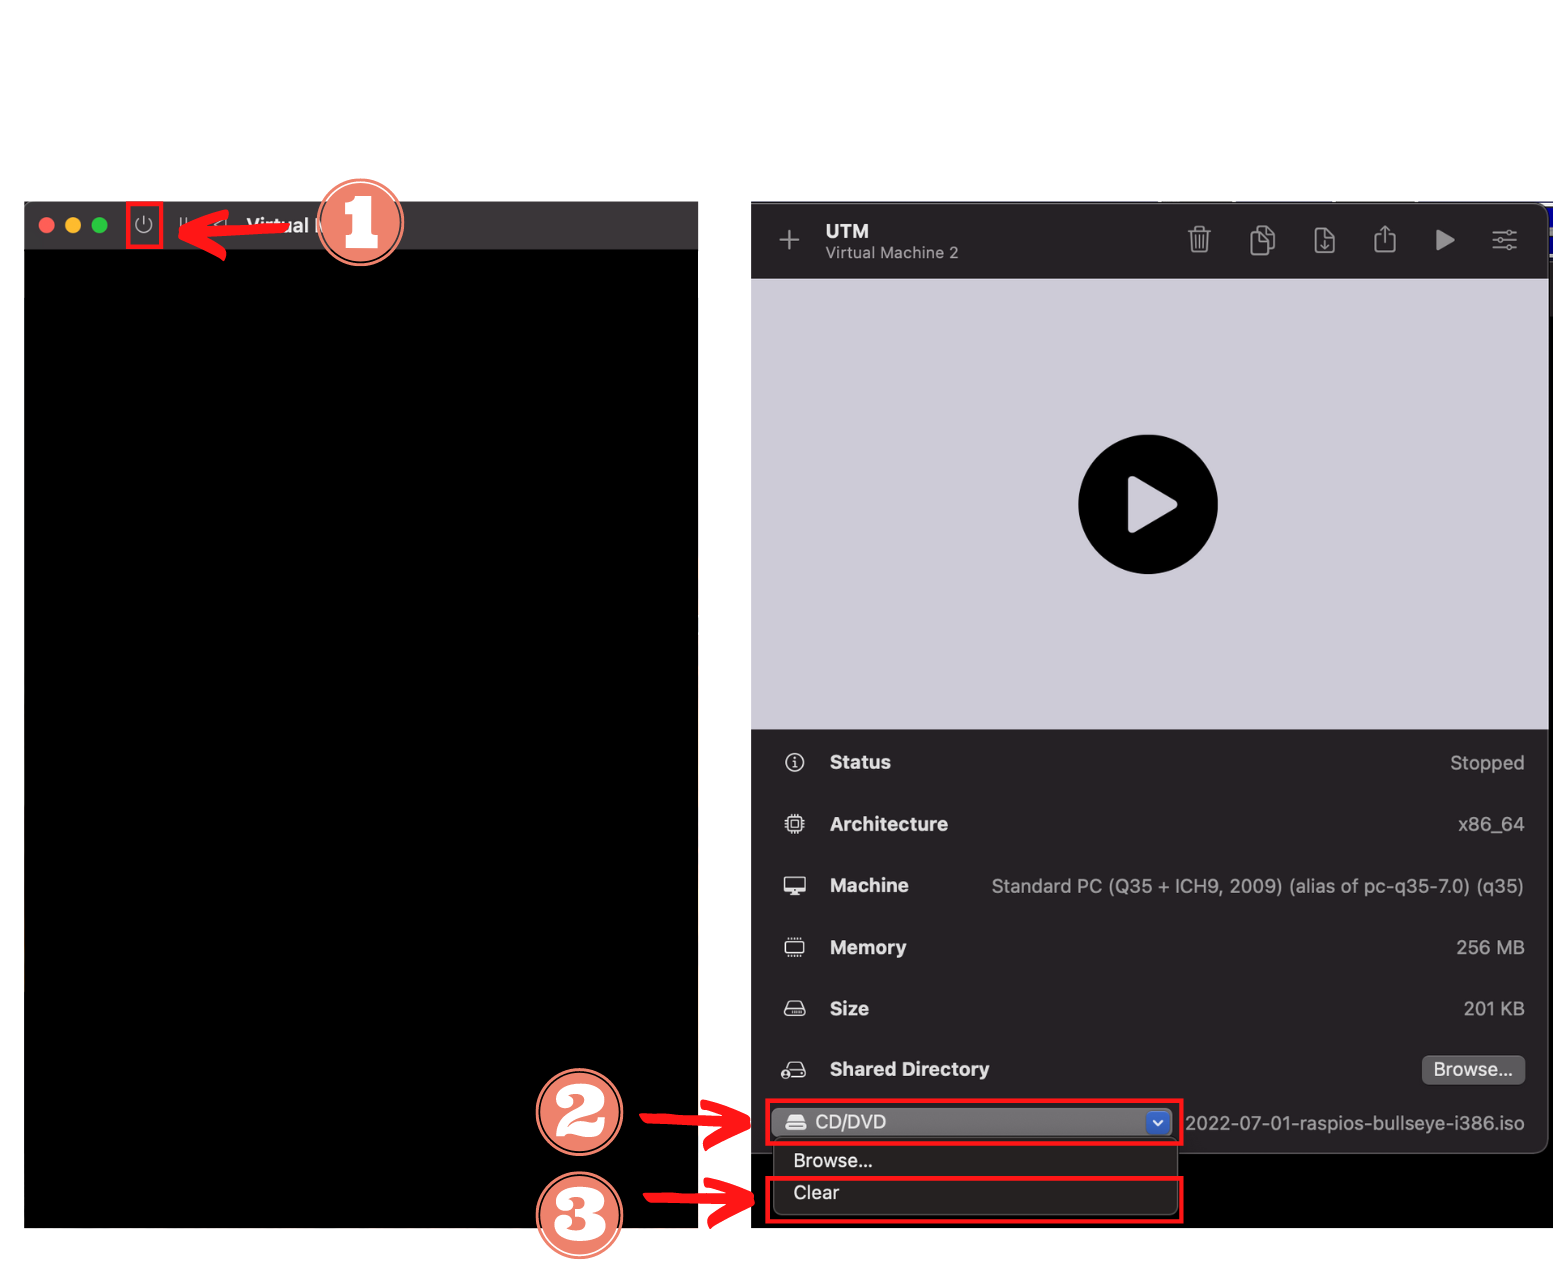
Once you’re done setting up your Raspberry Pi Desktop, you’ll see the restart button. Click on that, but immediately right after you do that, you’ll need to:
- Press the shutdown button near the top left corner of the screen.
- Close the tab
- Click on CD/DVD on the UTM window and select clear
- If you don’t clear the disk image, you’ll have to go through the entire process of setting up your Raspberry Pi Desktop because the VM won’t know any better and use the disk image again
- Now, you can press the play button and restart your VM
Congratulations! You can now work on your Raspberry Pi virtually. Moreover, you can remove your external drive because you won’t need it in the future when you boot up your VM. Make sure to safely eject the drive so that you don’t corrupt it!
General Process For Emulating Raspberry Pi
Researching and implementing the Raspberry Pi emulation on my Macbook took about a week. There were a lot of mistakes made, yet I learned a great deal about virtual machines.
Consequently, for those who don’t have a Macbook and want to try it out themselves, I’ve boiled down the recipe to essentially 7 steps:
- Install the Virtual Machine (VM) software
- Find a software that is free and is built for your operating system
- For example, you can use Oracle VirtualBox or VMWare on your Windows computer
- Find a software that is free and is built for your operating system
- Create a VM
- Install the Raspberry Pi Desktop iso disk image
- Attach it to the VM
- Boot the VM with it
- Go through the setup process
- Restart the VM and enjoy
There may be intermediary steps like the use of an external drive. I realized I needed this because I kept getting storage issues, and I didn’t want to use up all my memory for this one project. Thus, this journey is all about experimentation and learning what works or not.
Still, if you rather pursue a tried and true route, you can watch Youtube videos like this one: https://www.youtube.com/watch?v=xiQX0YXYuqU&ab_channel=TechWizTime
This video will guide you through setting up an emulator in QEMU for Windows laptops.
Pros and Cons Learning Through A Raspberry Pi Emulator
Whenever I try to make a decision on something, I always make a pros and cons list. Afterward, this allows me to understand what’s important to me and help me conclude which decision benefits me the most. Consequently, I’ve decided to create one for you so that you can come to your own conclusion.
Pros of Learning Through A Raspberry Pi Emulator
- Saves you money
- When you use an emulator, all you need to access it is a computer.
- However, if you needed to use a physical Raspberry Pi, you would have to buy one in addition to the peripherals.
- For instance, when I purchased my Raspberry Pi 4 from Adafruit, it took me approximately 4 days to receive. The model I bought was $55, and on top of that, the shipping cost and tax totaled $69.79.
- Moreover, you’ll need to buy a mouse, a keyboard, a USB to HDMI cable, and a display if you want to see and use it.
- Additionally, prices may increase dramatically if there are shortages, which is the case at the time of this writing.
- Saves you time
- Working with a physical device can be time-consuming because you have to plug in peripherals at the beginning, and you’ll have to unplug them and put them away when you’re done.
- Moreover, if you decide to start learning Raspberry Pi right now, you would have to wait for a week for the board to ship to your house. If you use the emulator, it would take you less than a day to get everything set up.
- Saves you effort and the hassle of fixing physical problems.
- For example, you may have display issues when connecting your Raspberry Pi to a monitor
- Or your Raspberry Pi can’t detect the USB devices you plugged
- Can be used anywhere and at any time
- The best thing about using a Raspberry Pi emulator is that you can use it anywhere because you won’t have to lug around the device itself and the peripherals, you can just open up the emulator on your computer like it’s a tab in your browser.
Cons of Learning Through A Raspberry Pi Emulator
- Initial setup is long and can be a little frustrating
- When I tried emulating the Raspberry Pi, the download times were long and required me to stay vigilant and focused.
- Once you get it set up, using it from there is easier than ever.
- When I tried emulating the Raspberry Pi, the download times were long and required me to stay vigilant and focused.
- Provides less satisfaction compared to using a physical device
- When using a physical Raspberry Pi, you can utilize it for advanced projects like home automation besides just programming.
- Is limited in its abilities
- This one ties in with the “less enjoyable experience” bullet point from above.
- Raspberry Pis can be exploited through their GPIO (General Purpose Input/Output) pins, which means they can connect with external peripherals like sensors and interact with their environment.
- For example, a popular use of Raspberry Pi is a project called “Smart Mirror”. This can display the date and time, weather, calendar tasks, etc in addition to acting as a reflective mirror.
- Shelters you from physical problems that Raspberry Pis have
- I know I’ve mentioned previously in my pro list that not having to deal with issues like detection-error or freezing can be beneficial.
- However, absolute beginners or those who have worked with Raspberry Pi before and never encountered problems can be easily lulled into a false sense of security that they won’t face problems when working with a physical device.
- Additionally, those users won’t be adequately prepared to face these problems for when they do arise. From my interaction with many users ranging in different skill levels (from Facebook and forums), they’ve told me that everyone is prone to mistakes and problems do arise.
Final Verdict
If you’re a Raspberry Pi beginner or are only interested in programming with it, then I highly recommend you pursue the emulation route.
For beginners, the emulation will let you get a feel for Raspberry Pi, help you decide whether or not you like Raspberry Pi experience, and help you understand if you want to continue it in the future.
Plus, if you’re just starting to learn Raspberry Pi, it is common for many people to start off with the programming aspect.
Consequently, if you’re mostly programming with the Raspberry Pi, emulation will invoke many of the benefits I mentioned in my previous pros and cons list. Moreover, as you become more familiar with the Raspberry Pi, the prices for current Raspberry Pi will drop and make it more affordable to get into.
However, if you have some experience with Raspberry Pi and want to make some projects with it, the physical device is a must-have because you’ll need to be able to access the circuitry (like the GPIO pins).
Summary – tl;dr (Too Long; Didn’t Read)
Here are the key takeaway points you should keep in mind after reading this article:
- The 8 steps to setting up a Raspberry Pi emulator on your Macbook is:
- Install the UTM software
- Create a VM emulator
- Install the Raspberry Pi Desktop iso disk image
- Flash an external drive with the Raspberry Pi image
- Attach the disk image and the external drive to the VM
- Boot the VM with them
- Go through the setup process
- Restart the VM and enjoy
- The pros of using an emulator are:
- It saves you time
- It saves you money
- You can use it anywhere at any time
- Saves you the effort of fixing physical issues
- The cons of using an emulator are:
- You don’t get the full Raspberry Pi experience
- Initial setup is long and tedious
- It’s limited in its abilities
- It shelters you from actual problems you might encounter with Raspberry Pi
In the end, I hope you had success emulating the results I got in this guide and find the experience rewarding!