How To Change Raspberry Pi’s Web Browser & Search Engine
I never realized I had a favorite search engine until I started working with Raspberry Pi. Before that, I was accustomed to Google and never gave a second thought about its amazingness and ease of use.
However, when I got onto Chromium on Raspberry Pi to search up something, I found the DuckDuckGo search engine to be unsuitable. Consequently, I started wondering: “Can you change Raspberry Pi’s search engine?”
You can change your search engine in Raspberry Pi by performing the following steps:
- Open up Chromium
- Click the 3 dots
- Click on “Settings“
- Click on “Search Engine”
- Pick a search engine
If you don’t know how to implement these steps, the rest of the article will dissect each step in full detail. Moreover, I’ll provide pictures to help you see what I mean. Finally, if you dislike the Chromium browser, I’ll show you how to install a different one.
Now, let’s get started and learn:
How To Change Search Engine On Raspberry Pi
Step 1: Open Up Chromium
To open Chromium, you’ll have to go to your taskbar and click on the second icon. The icon looks like a globe, and it is located (by default) near the top left corner of your screen.
On the other hand, if you want an easy shortcut, you can use the keyboard shortcut: CTRL + B.

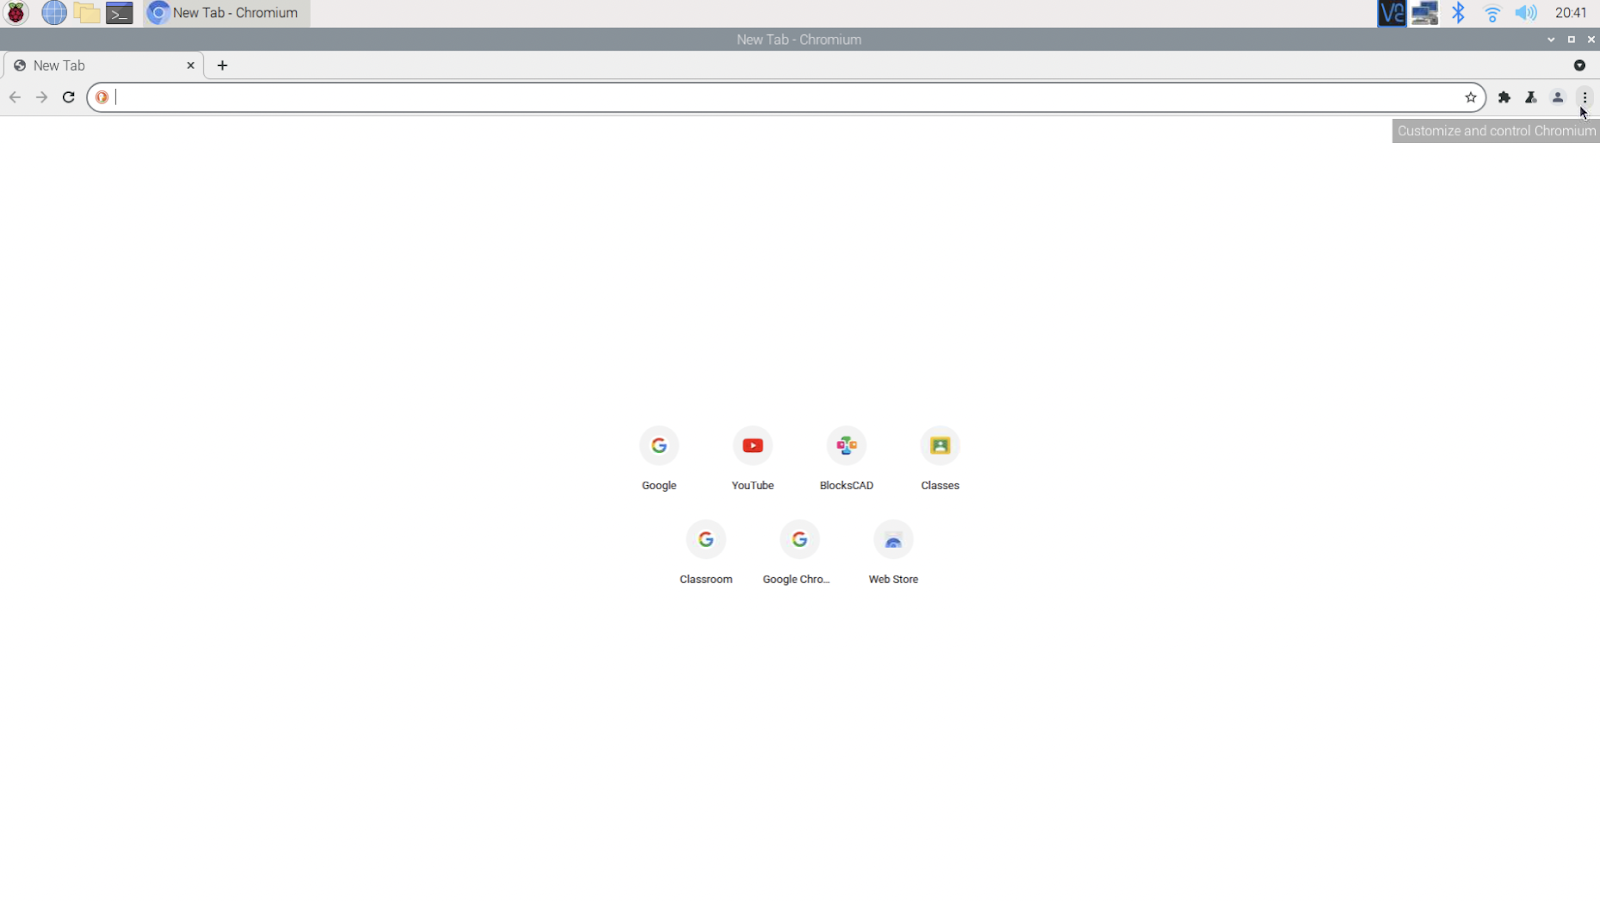
Step 2: Click The 3 Dots
The 3 dots are also known as the kebab menu, and the dots are usually arranged vertically. When you hover over it, a tag will pop up and read “Customize and control Chromium”. They can be found near the top right corner of your web page:
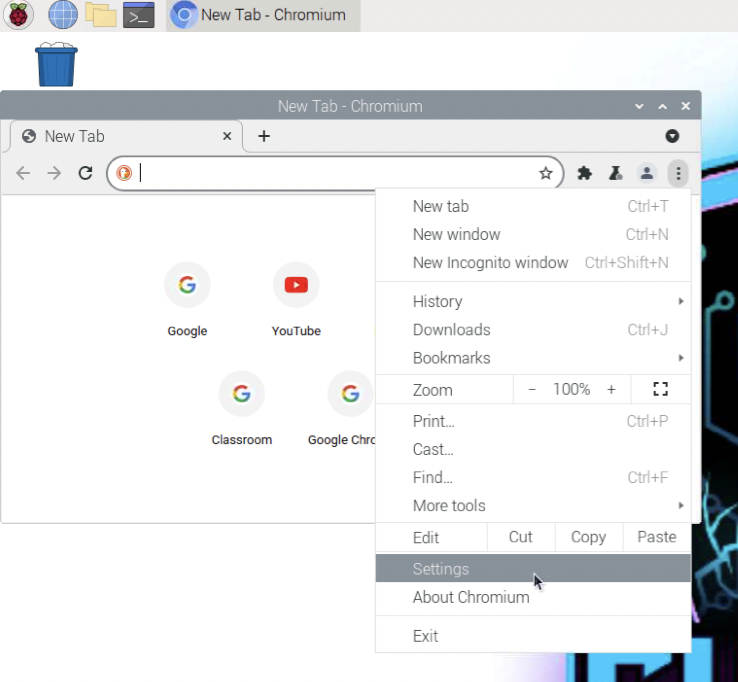
Step 3: Click on Settings
Settings can be found near the bottom of the kebab menu. More specifically, it’s the third one from the bottom:
Step 4: Click On Search Engine
The search engine tab is found on the left side of your web page. It should be the fifth one down:
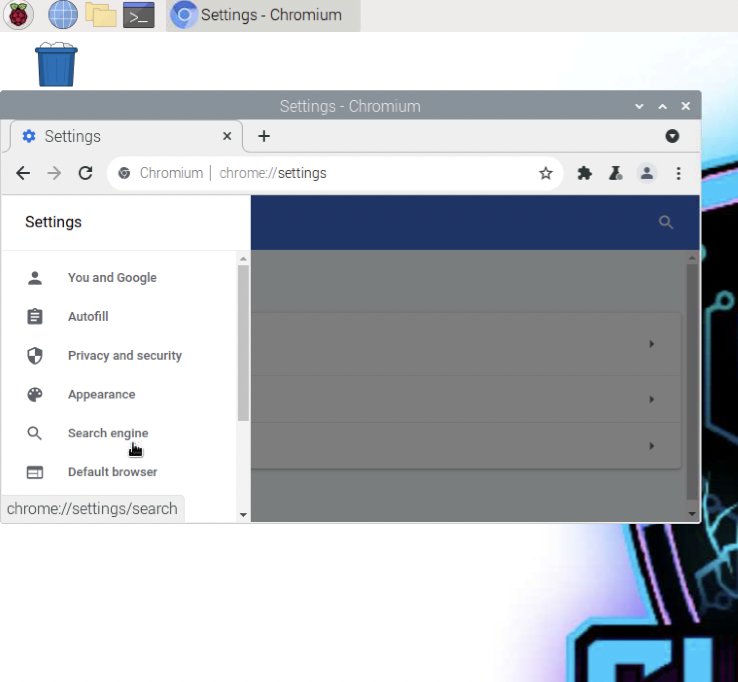
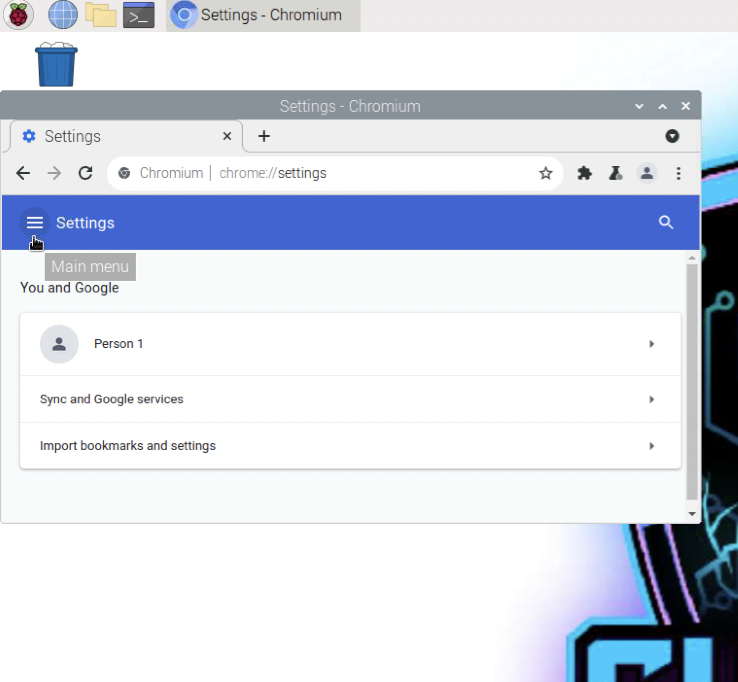
If you can’t find it, you probably need to click the 3 white lines that look like they’re stacked on top of each other (also known as the hamburger menu):
Step 5: Pick A Search Engine
Finally, you should click on the tab next to “Search engine used in the address bar” and pick from one of the 4 search engine options. Congratulations! You are now free from DuckDuckGo (or whatever your previous search engine was).

Now, with that out of the way, you might want to change your web browser while you’re at it. Consequently, I will show you:
How To Change Web Browser On Raspberry Pi
In this example, I will go over how you can install Mozilla Firefox on your Raspberry Pi. If you want to install some other web browser, the process is still the same, except that you’ll need to find a different installation command appropriate for the web browser you wish to install.
Step 1: Open Terminal
To open the terminal, you’ll need to click on the fourth icon from the top left corner of your screen. The icon looks like a black board with the symbols “>_” on it.
An easier way to access it is to use the keyboard shortcut: CTRL + ALT + T.
Alternatively, you can SSH into your Raspberry Pi terminal so that you can copy and paste the commands found in the rest of the steps.
If you want to learn how to use SSH on your Raspberry Pi, I made a special guide on it that you should definitely check out! I include tips and tricks in there, so you can avoid the mistakes I made!
Step 2: Update Your Raspberry Pi
In order to make sure that the system is installing the latest package, you’ll need to type in the following command in the terminal:
sudo apt update -ysudo apt upgrade -yStep 3: Install Web Browser
This is where you’ll have to find the installation command for your web browser if you don’t want to install Firefox.
If you want to install Firefox, type in the following command:
sudo apt install firefox-esrThis should take a few minutes to finish installing.
Step 4: Run It
To access your web browser, you’ll need to do the following:
- Open Applications menu
- This should be the Raspberry Pi icon you see on the top left corner of your screen.

- Click on Internet (It should be the second or third one down)
- Click on your preferred web browser

Doing this constantly may be tiring, so I’ll show you:
How To Set Firefox As Default Browser
To do this, you’ll need to:
- Open terminal
- It’s as easy as pressing CTRL + ALT + T
- Type in the following command to see the list of browser options you have:
sudo update-alternatives --config x-www-browser- Find the browser you want and find the number next to it. Type in it in the terminal. For example:
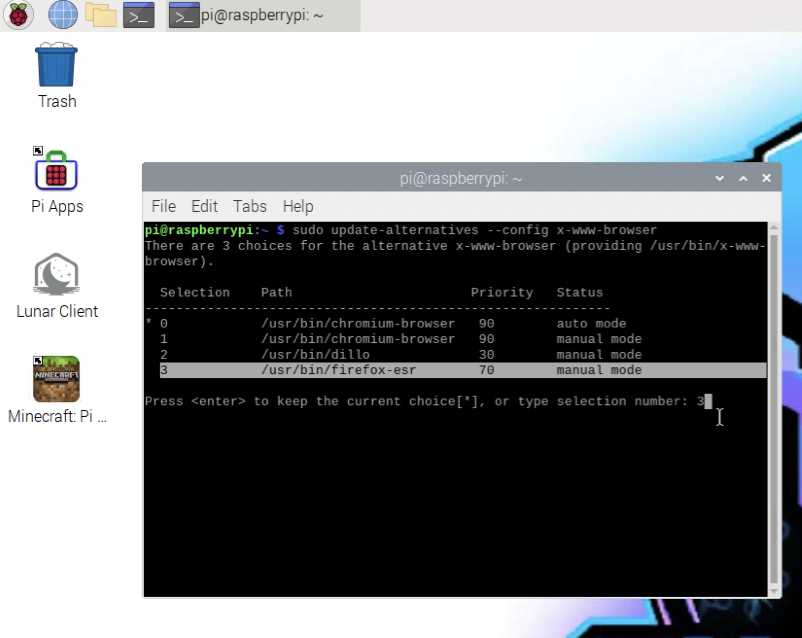
As you can see, Firefox is Selection number 3, so I type that in the command line.
Now, when you click on the globe icon, you should see Firefox (or the web browser of your choosing) pop up instead of Chromium.
Besides that, if you want to create a shortcut on your desktop for your browser so that you can quickly access it, check out my guide on creating desktop shortcuts on the Raspberry Pi!
Summary – tl;dr (Too Long; Didn’t Read)
Here are the key takeaway points you should remember for the future after reading this article:
- You can easily change the search engine in your Raspberry Pi by following these easy steps:
- Open up Chromium
- Click the 3 dots
- Click on “Settings”
- Click on “Search Engine”
- Pick a search engine
- You can easily change the web browser in your Raspberry Pi by following these easy steps:
- Open the terminal
- Update your Raspberry Pi
- Install the desired web browser
- Run the web browser
- If you want to set the web browser as your default browser, you’ll need to perform the following steps:
- Open your terminal
- Type in the following command: sudo update-alternatives –config x-www-browser
- Find the browser you want. Then, look to the left of it and identify its number. Type that number in the terminal and hit enter. Congratulations, you have set your desired web browser as you default web browser!
In the end, I hope this article fulfilled all your needs so that you won’t have to browse for any more answers!