Why Is Your Arduino Hanging? 3 Common Causes And Solutions!
When I was just starting to program, I always encountered hanging. This occurred frequently because I was inexperienced with loops, so I created a lot of infinite loops. When I made my transition to working with Arduinos, I also realized that they can also hang.
Consequently, you may be wondering: What causes an Arduino to hang?
An Arduino can hang because it’s stuck in an infinite loop. It may also look like it’s hanging because it’s waiting for a function to finish running or to return something. Moreover, the Arduino could potentially look like it’s hanging if you don’t handle the interrupts properly.
The rest of this article will dissect each of these three causes. But first, let’s define:
What is Hanging?
Hanging is a situation where Arduino appears to stop running. For example, it will hang if it gets stuck in a loop. It will keep running the code inside the loop but nothing else outside of the loop. Consequently, it will appear that your Arduino isn’t doing anything.
If you find your Arduino board not responding when you’re trying to upload new code (that fixes this loop issue), then you’ll need to reset the board. The easiest way you can do that is to press the reset button that’s built directly into the Arduino board.
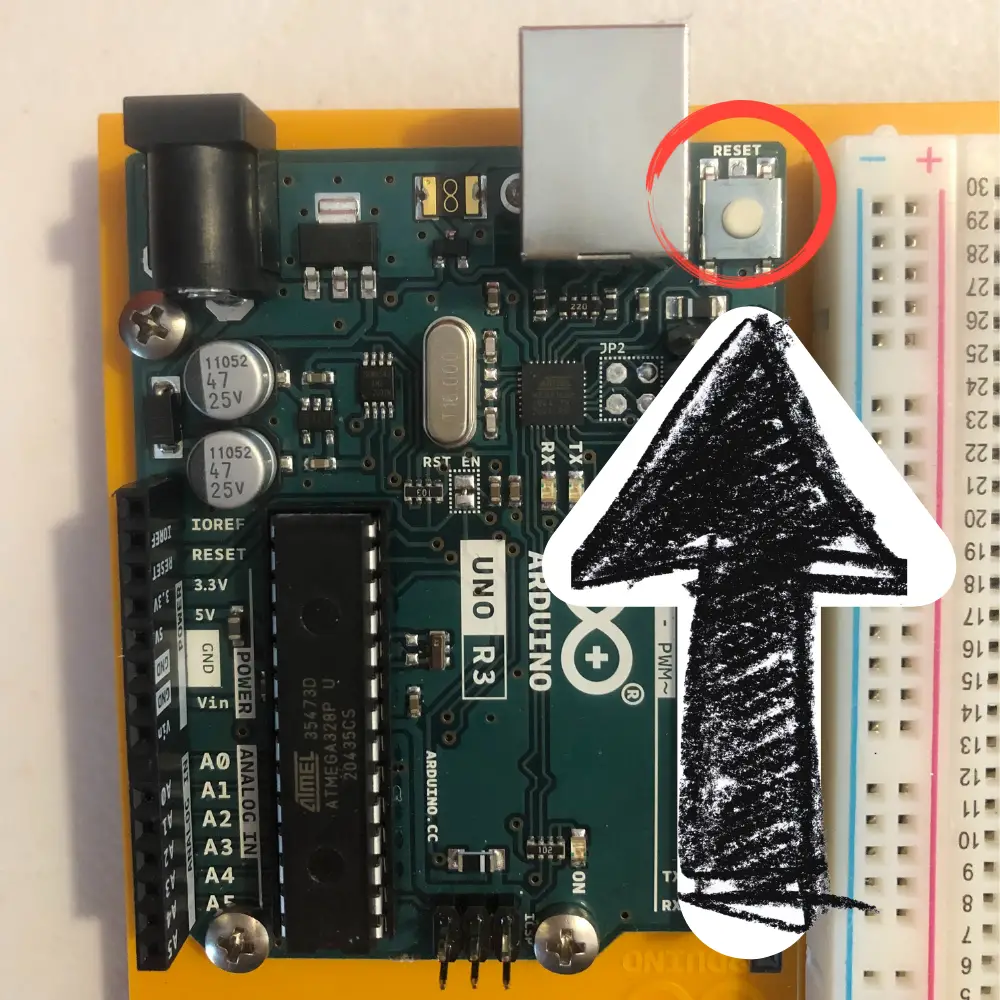
Another way you can reset it is to trigger the reset pin or incorporate a watchdog timer into your code to prevent this from happening in the future. The watchdog timer will routinely check on your code to make sure everything is running smoothly. If it ever senses something is wrong, it will automatically reset your code.
If you want to learn more about resets and other ways you can do it, you should go check out my Arduino reset guide.
Common Causes And Solutions
1. Infinite Loops
Infinite loops are common causes for hanging. Infinite loops are basically loops that run forever and can be very annoying.
The two common causes for an infinite loop occurring is the lack of an exit condition or incorrect code that will never activate the exit condition.
What I mean by the “lack of an exit condition” is that you never specified when you want the loop to stop running. As common sense dictates, if you don’t tell the loop to stop running, it will run forever.
The second reason is what I see happen the most since mistakes happen all the time. Perhaps the way you’ve written the condition statement isn’t specific enough so that the condition statement won’t ever be false. If it’s not false, then the loop won’t know any better and keep running the code inside the loop block.
Solution: Something I do to check my loops is to manually write out the steps in the loop on a piece of paper. If I don’t get the expected result (such as getting out of a loop), then it is highly unlikely the machine will be able to.
2. Waiting Functions
Your Arduino can hang if it has to wait for functions to return or finish running something. Arduinos cannot run multiple things at the same time since they’re single-core.
A good example of this is when you use the delay() function. When it stops running for the specified amount of time you’ve set, everything stops. This can be annoying when you want something else to run while the rest of your code is paused. Consequently, more experienced programmers tend to choose the millis() function over the delay() function.
Solution: To ensure that your Arduino doesn’t have to wait for a function (or multiple functions to return) you can either use the millis() function or the Scheduler library.
Millis() function
Using the millis() function is probably the best way for all the Arduino boards. You can see other users using the millis() function over the delay function because it doesn’t stop all the Arduino code from running.
It’s like a silent partner in the background, so you can set a timer with your millis() function that will order a group of code to run when you want it to. Then, it will look like you’re making your Arduino do two (or more) things at once!
Scheduler Library
The Scheduler library is great for letting multiple loops/functions run simultaneously and without interrupting each other. Sadly, it is only compatible with a few select Arduino boards like the Due, the Nano 33 IoT, or the Zero. That’s because the library needs boards with SAM or SAMD architecture, and the Arduino Uno R3 is sadly not one of them.
If you want to learn more about the Scheduler library or want to find out if your Arduino board is compatible, check out the resource here.
If you want to see a real-life example of it, go check out the Arduino company’s Multiple Blinks project.
3. Poor Interrupt Use
What I mean by this is that you’re not using your interrupts properly. If your Arduino board keeps getting triggered by the interrupt, then it will not run the actual main code that you want to run, which makes it look like it’s hanging.
What is an interrupt?
An interrupt basically signals the Arduino’s processor to stop running the program that it’s in the middle of doing and focus on performing high-priority tasks.
These tasks are described by the code in the interrupt handler, which is the same as any other void function. However, when the interrupt is triggered, the code inside the interrupt handler runs first while all the other code is paused
Solution: To make sure that you reduce the chances of interrupts continuously being activated, you should follow the following tips:
- Optimize your code so that your Arduino can process the interrupts much more quickly.
- You should also ask yourself if you really need a particular interrupt or whether you can merge an interrupt or two.
- Try to isolate your interrupts from each other so that each doesn’t get easily triggered by other one.
There are also some additional problems that may look like your Arduino is hanging. I’ve included the extra information in the my crashing Arduino guide. Go check it out to learn all the tips to prevent these types of situations from happening to you!
Summary – tl;dr (Too Long; Didn’t Read)
Here are some of the key points you should remember after reading this article:
- Hanging is where your Arduino doesn’t appear to be doing anything.
- It can hang because:
- It’s stuck in an infinite loop
- You can fix this by adding an exit condition (or checking if your exit condition works)
- It’s waiting for a function to finish running or returning something
- You can fix this by using the millis() function or the Scheduler library (if you have the appropriate Arduino board)
- It’s working through your poor use of interrupts
- You can fix this by optimizing your code or isolating your interrupts from each other
- It’s stuck in an infinite loop
Hopefully, this article has helped you with your hanging problems and encourages you to continue hanging out with your Arduino!