Ultimate Guide For Resetting Your Arduino (Best 5 Ways)
When I first started learning Arduino, I stumbled upon the reset button and the reset pin. I wondered what their purpose was and how I could utilize it. Now that I have that knowledge, I want to share it with you:
“How do you reset an Arduino”?
You can reset your Arduino by doing one of the following 5 methods:
- Pressing The Reset Button
- Utilizing The Reset Pin
- Using The resetFunc() Function
- Implementing The Watchdog Timer Method
- Running SleepyDog Library.
However, these 5 methods must be executed correctly for the reset to work properly and not damage your Arduino. That’s why, for the rest of the article, I will show you the code needed and the physical alterations you need to make to your board.
NOTE
All of these methods have been personally tested by me repeatedly in order to ensure they work. I will also include the time it took for me to implement these resets.
I based the time off of a project mentioned in the Arduino starter kit (it’s project 2 which is the Spaceship Interface one). The code is pretty short, so if you use a lot of code, times may vary.
What Does the Reset Do For Arduino?
The reset’s purpose is to restart your program, which means your Arduino runs your code from the start (first line). This is equivalent to unplugging and replugging your Arduino back in.
One thing to keep in mind when resetting your Arduino is making sure you save your code. This is important because once you reprogram it, the code is lost forever.
Why Do You Need To Reset Your Arduino?
An Arduino may need to be reset because it is stuck in a loop and it can’t break out of it. Other reasons for resetting include getting rid of internal bugs and errors in your code, troubleshooting errors when you are coding, and running the bootlegger so you could upload a new sketch.
If you need to completely stop your program, check out my guide on stopping an Arduino from running. It contains 6 tested methods, and I’ve included some tips from my own experience.
Personally, I’ve found infinite loops to be the most common reason for resetting my Arduino because some of my code usually ends up stuck in a loop. I normally get frustrated over this, but I’ve found the reset button to be the best and easiest way to take care of that problem.
If you to learn more about loops and how to use them to your advantage, you should read my guide on using loops in the Arduino IDE.
5 Methods of Resetting Arduino
1. Pressing The Reset Button
Time To Complete: 5 SECONDS
Pushing the reset button on your Arduino is the best, most simple way of resetting your Arduino. It requires no coding and no physical changes. All you’ve got to do is find the button (usually white or orange) and push it.
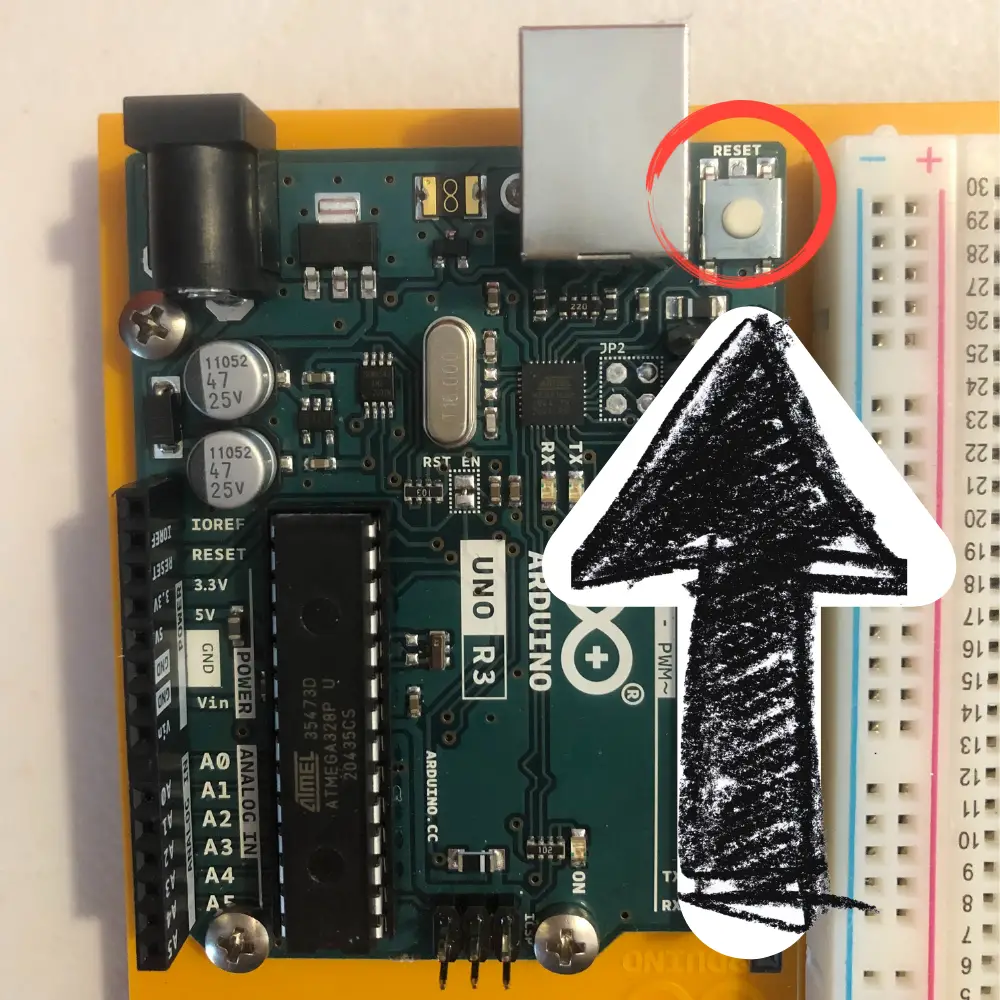
For guidance, it is next to the USB port (where you plug in the USB cable to connect your Arduino to your computer) and has the word “reset” labeled above it.
2. Utilizing The Reset Pin
Time To Complete: 2 MINUTES
For this method, you’ll be making a make-shift reset button, which means you don’t need any code. You would use this only if your reset button is broken or if you want to challenge yourself.
To do this, you’ll need a pushbutton, a breadboard, and 3 jumper wires (in addition to the USB cable, computer, and Arduino). Now, follow the steps listed below:
- Firstly, take one jumper wire and connect one end to the RESET pin and the other end to hole A19.
- Next, take the second jumper wire and connect one end to the GND (ground) pin and the other end to the hole on the negative (-) power rail.
- After that, take the third jumper wire and connect one end to the one of the other holes on the same negative power rail (as mentioned previously in step 2) and the other end to hole D17.
- Take the pushbutton and insert the legs into the following holes: E17, E19, F17, and F19.
- Finally, connect your Arduino to your computer using the USB cable.
Or you can just follow this picture (the green lines are the jumper wires):
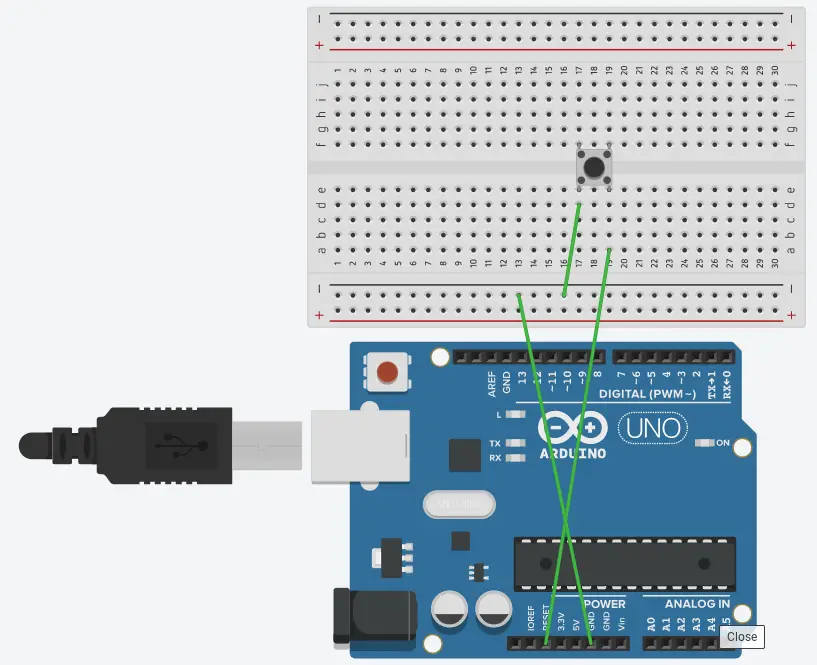
This method is courtesy of the site Programming Electronics, but the pictures are all my own.
Note: I didn’t use different colored wires in this diagram, which is something you shouldn’t do. You should ALWAYS use different colored wires to avoid miswiring (which would cause the Arduino to not work). In this instance, I should’ve used black wires for the ground (negative) and a red wire for the power (positive).
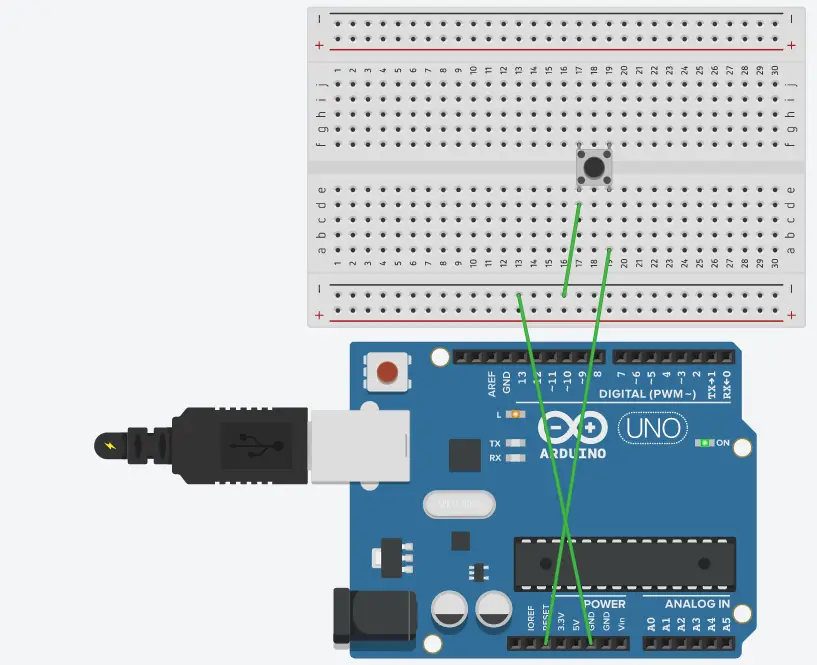
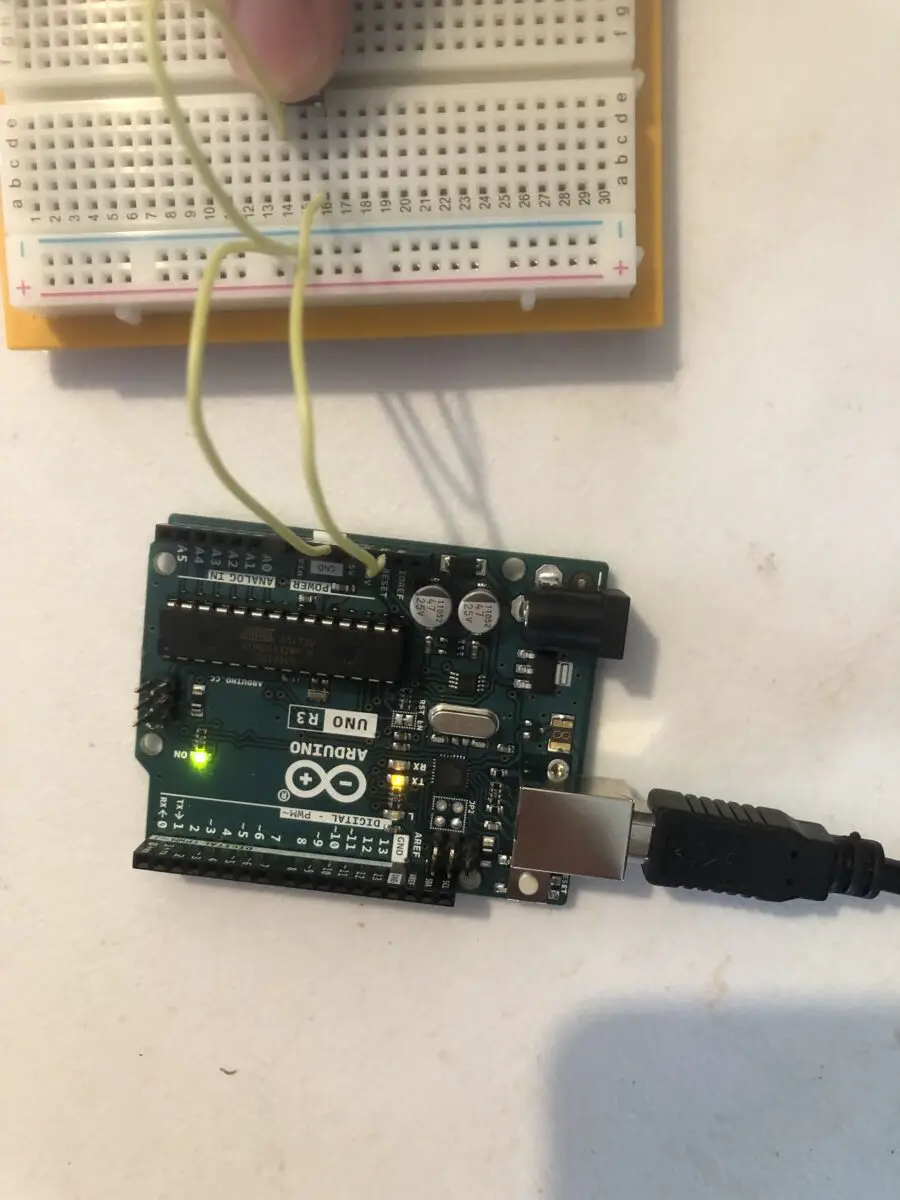
To reset it, you need to push the pushbutton (like you would for the reset button mentioned in the first method). Afterward, the L light located on the Arduino itself should flash yellow and turn off. After 2 seconds, the TX light should also flash yellow.
Still confused? Let’s take a look at the following pictures to understand what I mean:
3. Using The resetFunc() Function
Time To Complete: 2 MINUTES
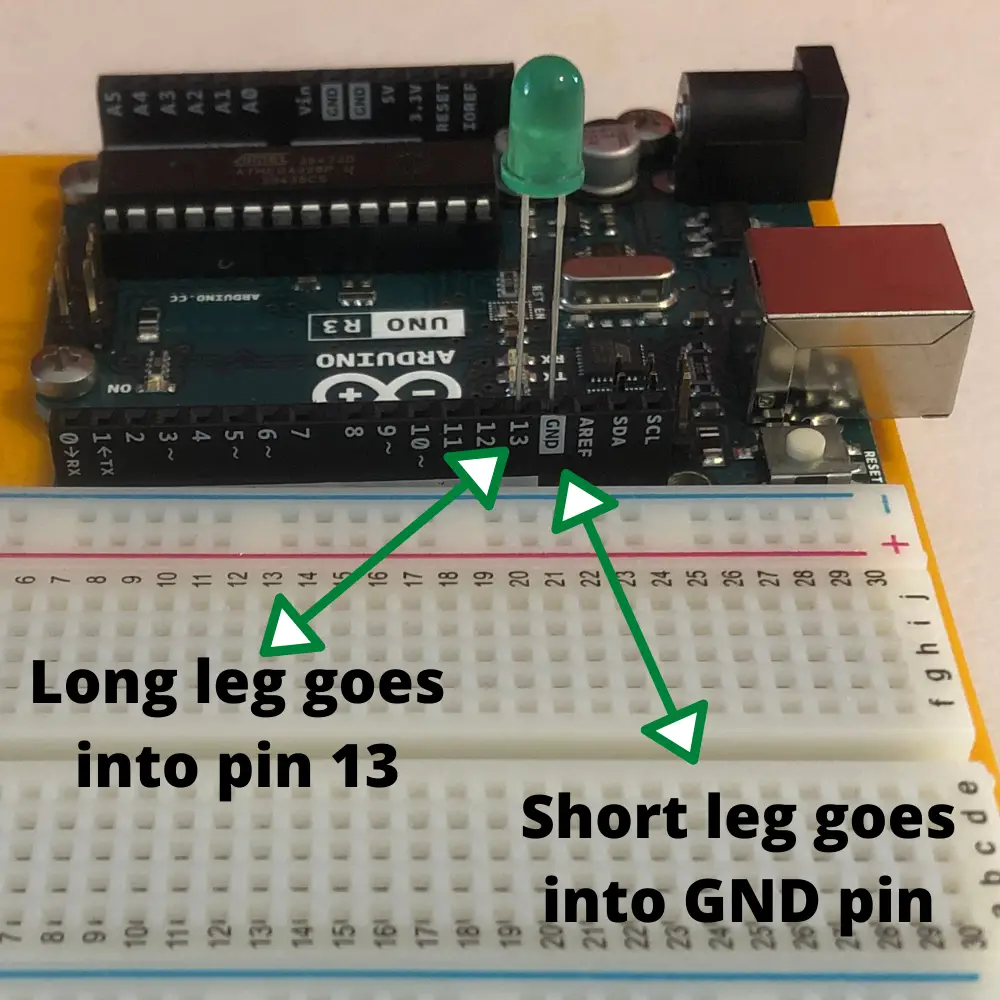
For this method, you only need an LED (in addition to your Arduino, USB cable, and computer).
Firstly, connect the anode (the longer leg) of your LED to pin 13 and the cathode (the shorter leg) of your LED to the GND pin (the ground). Here is an example of what it should look like:
After that, upload the following code and run it.
int led = 13; // means that we are using pin 13
// the setup routine runs once when you press reset:
void setup() {
// initialize the digital pin as an output.
pinMode(led, OUTPUT);
Serial.begin(9600);//initialize the serial port
}
void(* resetFunc) (void) = 0; //declare reset function at address 0
// the loop routine runs over and over again forever:
void loop() {
digitalWrite(led, HIGH); // turn the LED on (HIGH is the voltage level)
Serial.println("on");
delay(1000); // wait for a second
digitalWrite(led, LOW); // turn the LED off by making the voltage LOW
Serial.println("off");
delay(1000); // wait for a second
Serial.println("resetting");
delay(1000); // waits for another second so that you can see that the reset is working in the serial monitor
resetFunc(); //call reset
delay(100);
Serial.println("never happens"); // this will show in the serial monitor if the reset doesn't work
}
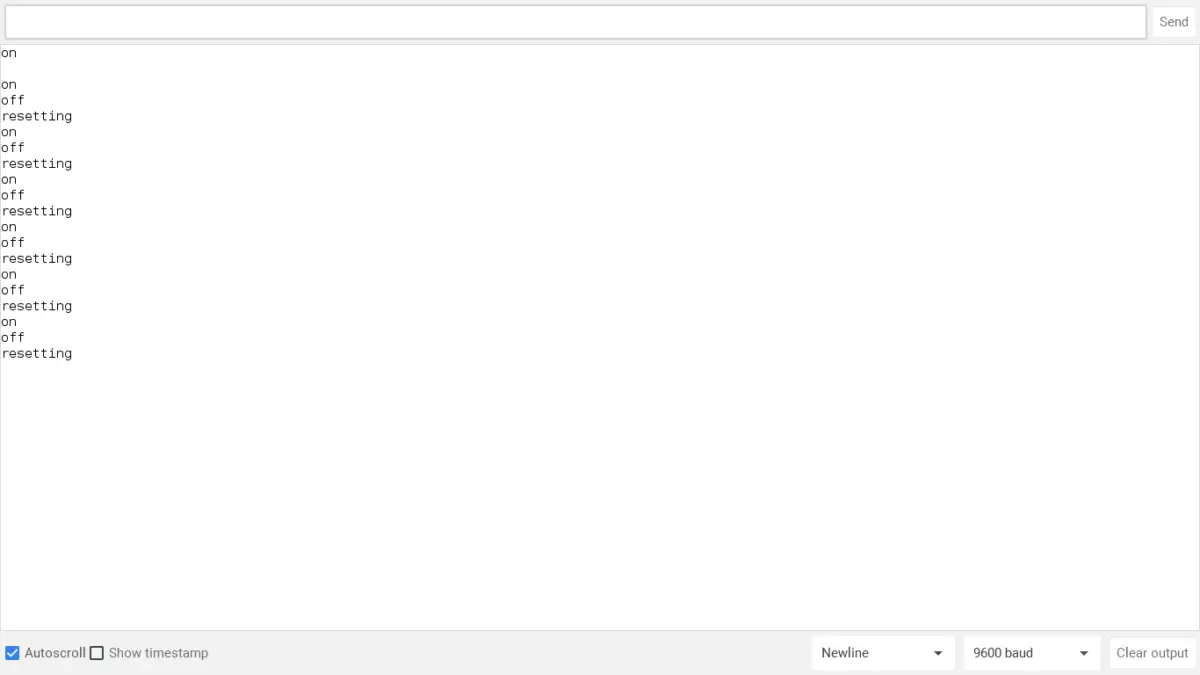
//the code is courtesy of Gabriella Levine with revisions by Bowen ZhengNow, you can see your Arduino communicating with your computer by going to the serial monitor. You should see this:
When the word “on” comes on, the LED should light up, like this:
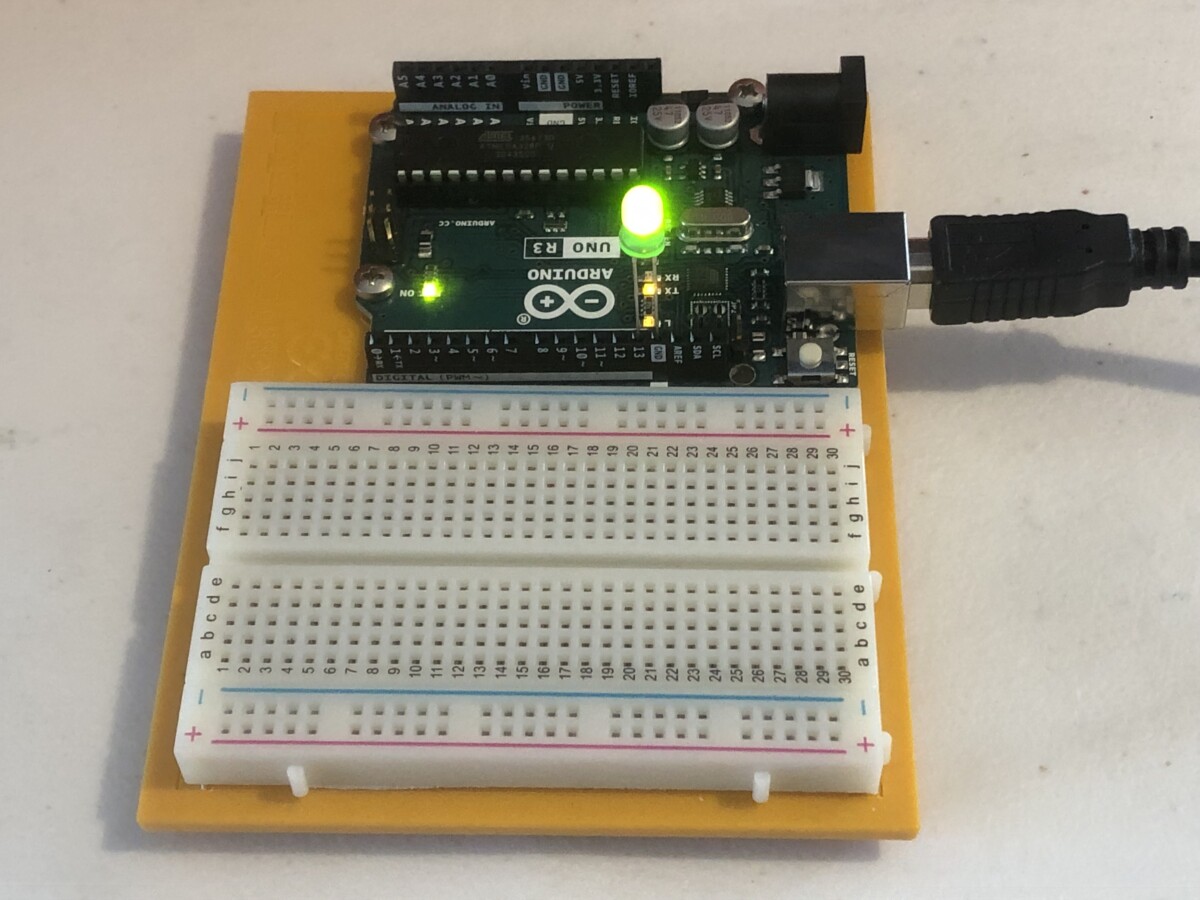
When the serial monitor shows the new words “resetting” or “off”, that means the LED pin won’t light up, but your Arduino is resetting.
4. Implementing The Watchdog Timer Method
Time To Complete: 20 MINUTES
This is a great technique as it automatically resets your Arduino if it senses that something has gone wrong (from time to time). Unlike the three methods above, the user cannot control when their program resets.
Moreover, the method is not universal, meaning that whatever I code will not work for your project. You need to learn how to use a watchdog timer and how to incorporate it into your project.
For me, it took me about 20 minutes to incorporate the watchdog timer into my spaceship interface project.
I will show a sample code of how the Youtuber Ralph S. Bacon coded his watchdog timer into his project.
#include <avr/wdt.h>

void setup() {
  wdt_disable();
  Serial.begin(9600);
  Serial.println("Setup! Check the LED.");
  pinMode(13, OUTPUT);
  delay(5000);
  wdt_enable(WDTO_2S); //this is where define the watchdog timer. 2s is the time (2 Seconds)
}

void loop() {
  Serial.println("Main Loop!");
  for (int cnt = 0; cnt < 5; cnt++) {
    Serial.println(cnt);
    delay(500);
    digitalWrite(13, LOW);
    delay(500);
    digitalWrite(13, HIGH);
    wdt_reset();
  }

  Serial.println("Reset by Watch Dog?");
  delay(3000);

  // Code should never get to here
  Serial.println("Reset failed");
}
If you want a better understanding of how this code works or how the watchdog timer works in general, you should watch the embedded video below. Go to the time 8:44 to see it in action!
There are 3 more tips he uses in his videos for resetting your Arduino such as a simple reset function, a pseudo reset function, and a relay reset.
5. Running SleepyDog Library
Time To Complete: 10 MINUTES
This technique is almost like a variant of the watchdog technique, but now, it’s more user-friendly. Here are the steps:
1. If you don’t have Adafruit’s SleepyDog library installed, install it!
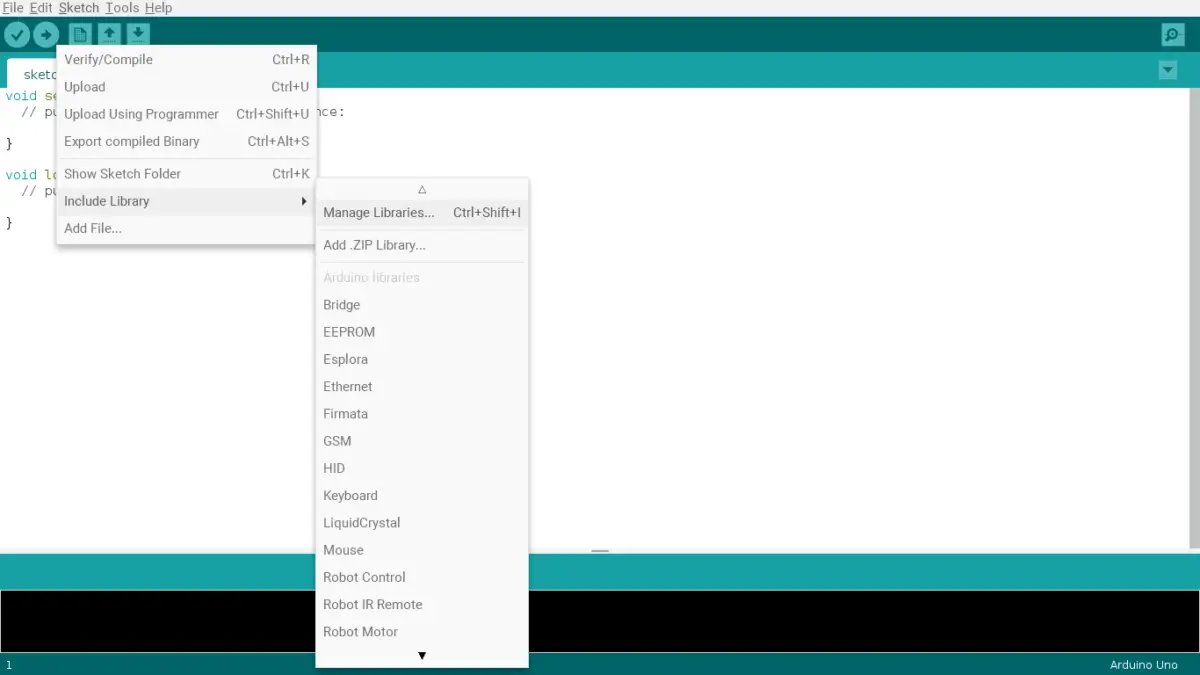
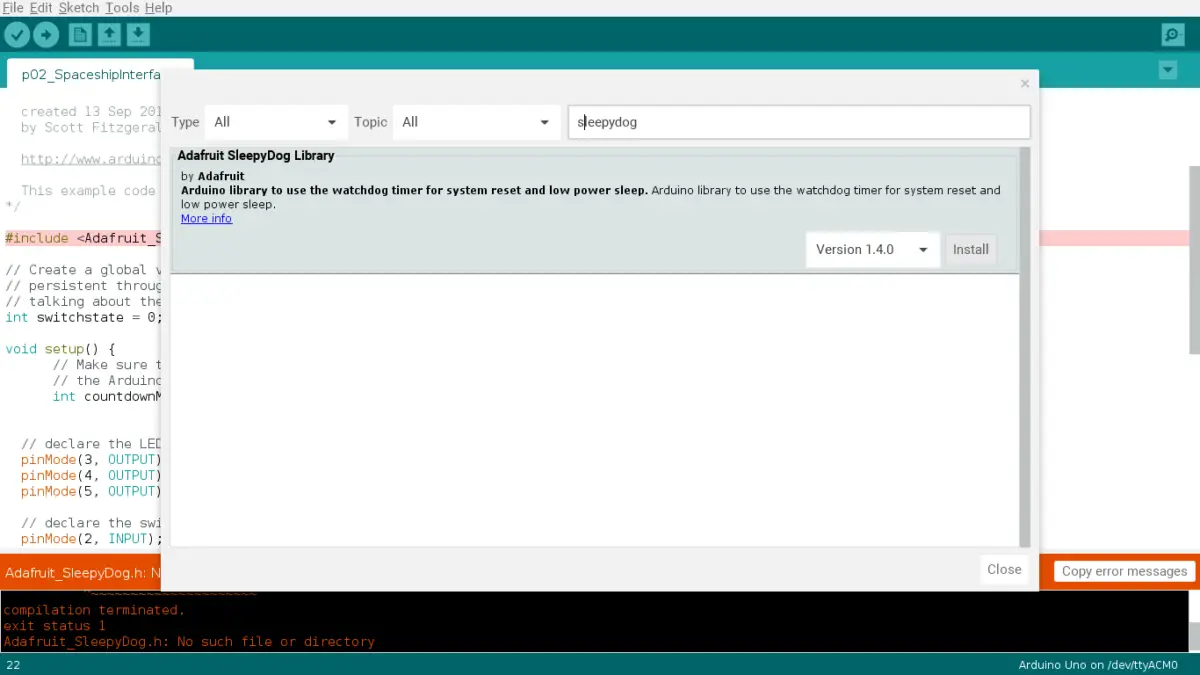
To install the SleepyDog library, use the shortcut control + shift + I. Or you can click on Sketch > Include Library > Manage Libraries. (see the picture below)
Next, search for the library by typing in ‘sleepydog’ in the search and clicking install.
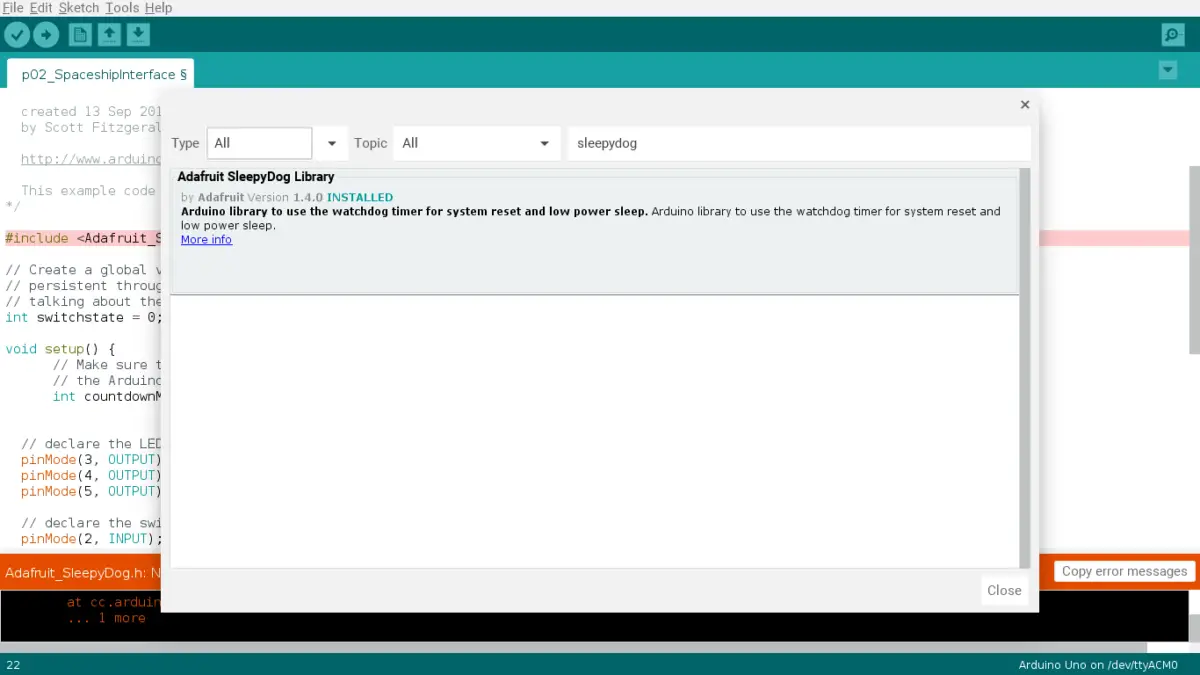
Afterwards, you should see the “Installed” message and now you can use SleepyDog:
2. Copy the code from below and insert your own code by following the comments:
#include <Adafruit_SleepyDog.h>

void setup() {
      // Make sure to reset the watchdog before the countdown expires or
      // the Arduino will reset!
      int countdownMS = Watchdog.enable(4000);

//insert your project's setup code here
}
void loop(){
    // insert your project's loop code here
}
This code is courtesy of DelftStack, which my own revisions to improve user experience.
After implementing this, you will have to wait 4 seconds before the reset will work for your Arduino.
If you want an example of how this works, here’s an example of mine using the Spaceship Interface code:
/*
  Arduino Starter Kit example
  Project 2 - Spaceship Interface

  This sketch is written to accompany Project 2 in the Arduino Starter Kit

  Parts required:
  - one green LED
  - two red LEDs
  - pushbutton
  - 10 kilohm resistor
  - three 220 ohm resistors

  created 13 Sep 2012
  by Scott Fitzgerald

  http://www.arduino.cc/starterKit

  This example code is part of the public domain.
*/

#include <Adafruit_SleepyDog.h>

// Create a global variable to hold the state of the switch. This variable is
// persistent throughout the program. Whenever you refer to switchState, you’re
// talking about the number it holds
int switchstate = 0;

void setup() {
      // Make sure to reset the watchdog before the countdown expires or
      // the Arduino will reset!
      int countdownMS = Watchdog.enable(4000);

//insert your setup code below here!
  // declare the LED pins as outputs
  pinMode(3, OUTPUT);
  pinMode(4, OUTPUT);
  pinMode(5, OUTPUT);

  // declare the switch pin as an input
  pinMode(2, INPUT);
}


void loop() {
  //insert your loop code here!

  // read the value of the switch
  // digitalRead() checks to see if there is voltage on the pin or not
  switchstate = digitalRead(2);

  // if the button is not pressed turn on the green LED and off the red LEDs
  if (switchstate == LOW) {
    digitalWrite(3, HIGH); // turn the green LED on pin 3 on
    digitalWrite(4, LOW);  // turn the red LED on pin 4 off
    digitalWrite(5, LOW);  // turn the red LED on pin 5 off
  }
  // this else is part of the above if() statement.
  // if the switch is not LOW (the button is pressed) turn off the green LED and
  // blink alternatively the red LEDs
  else {
    digitalWrite(3, LOW);  // turn the green LED on pin 3 off
    digitalWrite(4, LOW);  // turn the red LED on pin 4 off
    digitalWrite(5, HIGH); // turn the red LED on pin 5 on
    // wait for a quarter second before changing the light
    delay(250);
    digitalWrite(4, HIGH); // turn the red LED on pin 4 on
    digitalWrite(5, LOW);  // turn the red LED on pin 5 off
    // wait for a quarter second before changing the light
    delay(250);
  }
}
Summary – tl;dr (Too Long; Didn’t Read)
Here are the key takeaways after reading this article:
- The purpose of the reset for Arduino is to restart your Arduino and force it to run the sketch from the first line.
- This is very useful for breaking out of loops or to help you get rid of bugs in your code.
- There are 5 ways you can easily reset your Arduino:
- Press the reset button on your Arduino board.
- Use the reset pin.
- Use the resetFunc() function.
- Implement the watchDog timer.
- Utilize the SleepyDog library.
In the end, you should be pumped to try out all these methods. Now, get ready, re-set, go!