Top 10 Beginner Mistakes That Can Damage Your Arduino
Arduino mistakes can occur very often. I see them happen all the time when I started out myself or when I helped my siblings Emily and Henry with their Arduino. Some mistakes aren’t hazardous, but many of them can end up damaging your Arduino (and maybe starting a fire).
That’s why I’ve gathered all the dangerous problems here in this article along with the solutions to avoid them.
The 10 most common mistakes include:
- Reversing The Polarity When Powering The Board
- Using Arduino Pins To Run Components
- Mishandling Breadboards
- Rearranging Your Breadboard When The Arduino Is Powered
- Applying Too Much Voltage To I/O Pins
- Not Enough Ventilation
- Loosely Connected Components
- Faulty Components or Damaged Arduino
- Overloading Arduino Board
- Using Lithium-Ion Battery
How To Avoid Beginner Mistakes
Mistake #1: Reversing The Polarity When Powering The Board
This mistake is easy to make, especially for those who lack experience with hardware.
When my brother started Arduino, he didn’t pay close attention to inserting the wires to their correct places. It’s a good thing I doubled checked or else he could’ve fried his Arduino.
Short circuiting can cause an Arduino to fry. If you want to learn more about it and prevent it from happening to you and your Arduino in the future, go read my guide on preventing an Arduino from frying.
Reversing polarity basically means that one end of your jumper wire is connected to your Vin pin (or 5V pin since it depends on how you power your Arduino), and the other end is connected to the hole on the negative (-) side of your breadboard’s power rail. At the same time, one end of another jumper wire is attached to the GND (ground) pin, and the other end is connected to the hole on the positive (+) side of your breadboard’s power rail.
For a more visual demonstration, see the following picture:
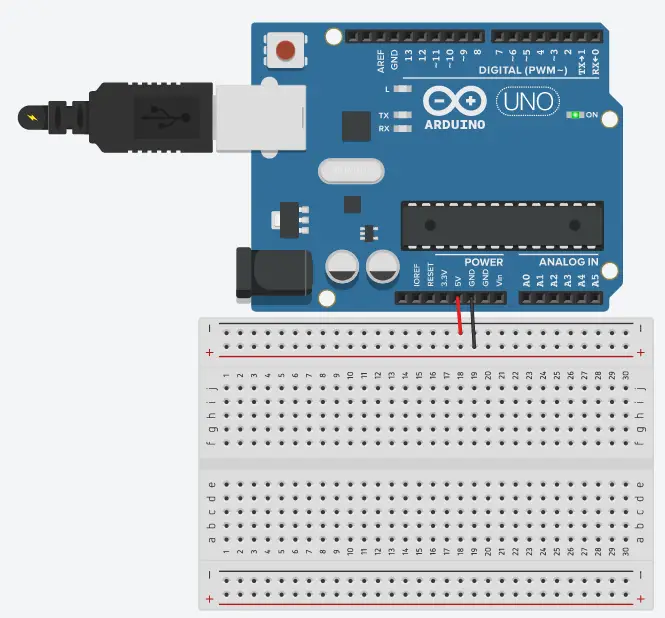
When you do this, you’re basically supplying 5V (volts) to the GND pin and 0V to your Vin pin. This fails because the GND isn’t designed to handle 5V. It’s designed to handle 0V. As a result, your Arduino will mostly likely be fried. The internal circuitry of your Arduino board could be damaged beyond repair, which means you have to pay for a new one.
Solution #1: Color-Code Your Wires
You MUST make a habit of assigning different colored wires to different functions.
For example, assign blue to positive and yellow to negative if you have to. Don’t mix them up. You can go out and buy nail polish to paint a group of wires the same color if they’re all mismatched.
Also, don’t be in a rush. Make sure to always double-check your work and don’t use two colored wires that are close in color.
For instance, don’t pick red for positive and orange for negative because you can easily mix them up when you’re in a rush.
Mistake #2: Using Arduino Pins To Run Components
This is the biggest mistake a beginner can make, especially if you don’t pay attention to the functionality of the different pins and the maximum voltage they can take.
The Arduino pins are meant for controlling different processes, which means that components that require high voltage (like motors) would try to draw too much power from the Arduino and end up destroying it.
I think some novices don’t really pay attention to these details because they don’t fully understand the consequence of their action.
Solution #2: Use Other Components To Shield The Effects
If you want to use power-hungry components, try using resistors, H-bridge, diodes, or transistors.
For instance, if you use a motor, make sure to include a diode or transistor to prevent damaging your Arduino.
Mistake #3: Mishandling Breadboards
If you mishandle your breadboard, you are going to most likely induce a short circuit and fry your Arduino.
What is a short circuit?
A short circuit is when the electrical current travels really fast through the circuit, which damages your Arduino. This is due to no (or very low) electrical impedance or the path the electrons are traveling through is very short.
Some beginners make this mistake because they either don’t understand how their breadboard works or they accidentally created a simpler route for the current to go through, resulting in a short circuit.
Solution #3: Learn Breadboard Basics
There are very good resources that will teach you Arduino basics, including the breadboard, so you need to be well versed in that before starting Arduino.
A breadboard is a solderless base, meaning that you don’t have to fuse components to the board.
There are the outer rails (which are where the positive, red line and negative, blue line run vertically) that work vertically and give power to your entire circuit.
The inner rails work horizontally that has 5 columns across (labeled from A to E), another 5 columns across (labeled from F to J), and 30 rows (marked 1 to 30 downward).
See the following picture to solidify your understanding:

In addition to learning all this, make sure to always double-check your work before powering your Arduino.
Mistake #4: Loosely Connecting Components
When you don’t properly insert your components, you can start a fire. This is because loose components block the path of the current and increase heat dissipation because the connection’s resistance has increased.
I admit that I’ve connected my components poorly when I first started out. I didn’t know how far a jumper wire’s lead (it’s the metal legs) could go into the breadboard. It was so horribly “attached” that I could make it go flying out their holes by breathing a little too hard on it.
When I plugged it in the Ardunio with the poorly connected components, nothing happened (which I am thankful for). I realized that I needed to apply more pressure to the wire to connect it properly. I think this is an easy mistake because beginners with no previous hardware experience won’t know if their work is correct or not.
Solution #4: Ensure Your Components Are Securely Connected
I highly recommend watching a few YouTube videos of people assembling Arduino or working through a project with you, especially if you lack experience in the beginning.
Follow along with the video and know what to expect when you begin working with your own Arduino. Here is a good video by the official Arduino company that shows you how to create your own build.
After you gain experience, make a habit of checking your components consistently and making sure they’re snug and tight.
Mistake #5: Having Faulty Components or Knock-off Arduinos
Arduino can be a little expensive, especially when you buy from the official company. That’s why I see many people switching to alternatives and knockoffs. However, the point of purchasing an authentic one is to feel good about working with it because the quality will be higher.
If you go too cheap, you will most likely end up one with a damaged Arduino or defective components. This can be very dangerous as these damaged products can lead to a fire when used incorrectly.
Solution #5: Purchase Good-Quality Arduino Or Reliable Components
Of course, I’d recommend you to buy an authentic Arduino from the company itself.
However, if you really can’t afford the Arduino, I’d recommend Elegoo. Even though they are cheaper, they still have a reliable Arduino.
Initially, I was very tempted to buy an alternative to Arduino. It’s much cheaper and I thought it would be the same as the authentic Arduino. In the end, I chose to pay $106 (which included tax and shipping fees) for the Official Arduino Starter Kit because I would rest assured knowing that my Arduino and the components that came along with it would be of high quality.
Mistake #6: Providing Not Enough Ventilation
When you use an Arduino, it gives off heat. When you supply power to your Arduino, heat will be generated and try to dissipate into your surrounding environment. As a result, if you don’t properly ventilate your Arduino or work in a ventilated area, it can catch on fire.
There will be more heat produced if your environment is already pretty hot. Moreover, if you are creating a big project where there are many connections to it, you may also overheat your Arduino. This can damage your Arduino because there are basically multiple currents going through your breadboard and Arduino.
Solution #6: Work in a Well-Ventilated Room Or Area
As the subheading suggests, you need to make sure you work in a properly ventilated environment.
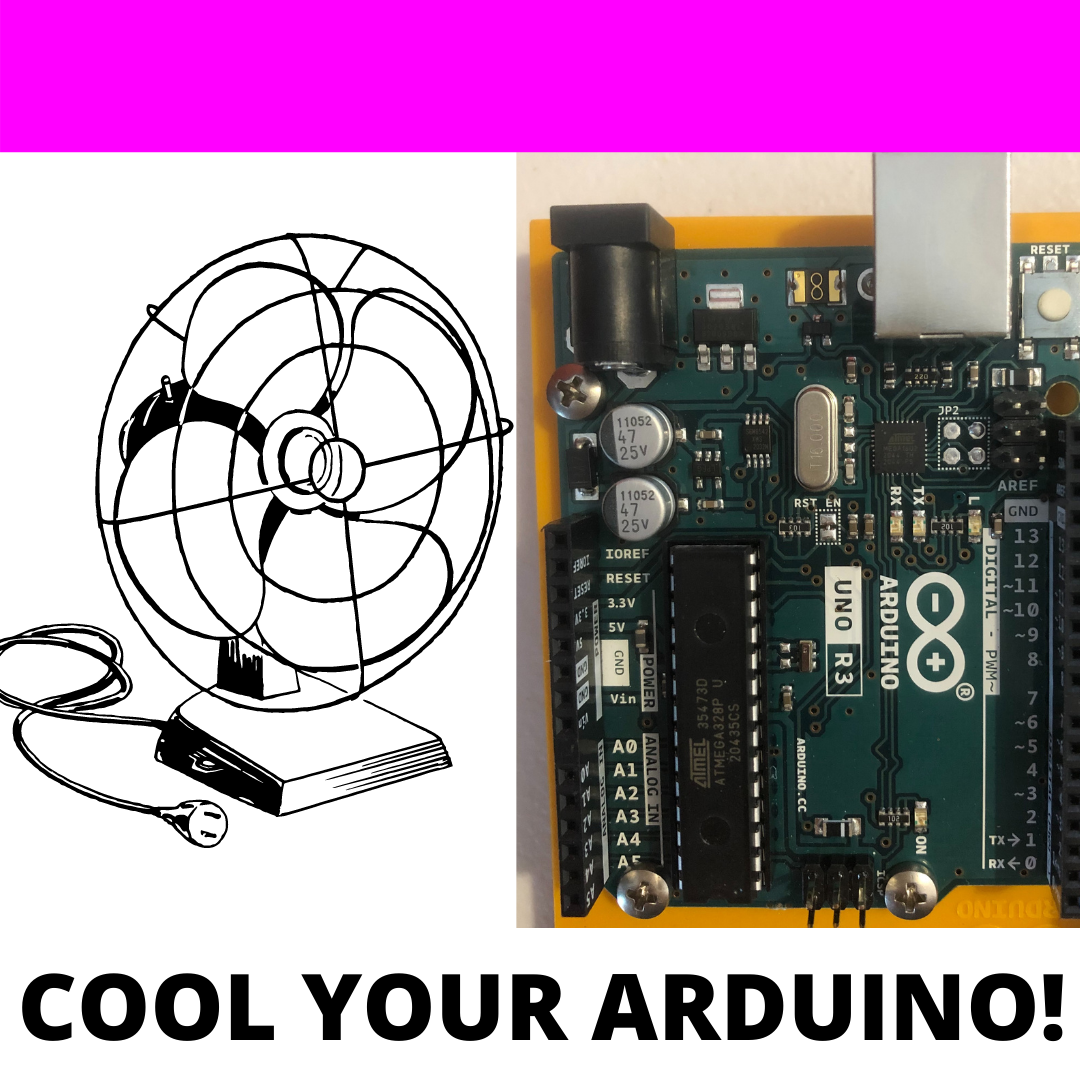
You could also try using fans to cool it down or make sure to give your Arduino a rest when it gets unbearably hot to handle. You don’t want to overheat it and it’s better to be safe than sorry.
Mistake #7: Rearranging Your Breadboard When Arduino Is Powered
This is the most common mistake all beginners make when working with their Arduino.
Sometimes, they either don’t pay attention or they’re too excited to notice when they manipulate their components on their breadboard.
When you change components with the Arduino still plugged in, you can cause your Arduino to short-circuit and the parts may not send or receive the correct signals.
Solution #7: Unplug Your Arduino Before Working
You NEED to make a habit of checking your Arduino and making sure it’s not plugged in when working on it. This is recommended in the Official Arduino YouTube channel and in their book (which comes with the Official Arduino Starter Kit).
I’ll admit that I was guilty of making this mistake when I was a beginner. Yet, through repetition and practice, I’ve finally kicked that bad habit, and nothing terrible has happened to me since.
Mistake #8: Applying Too Much Voltage To I/O Pins
I/O pins are input/output pins and they can only handle a certain amount of voltage. In general, these pins can only handle a max voltage of 5V.
Other pins require more research before you start working with them. For instance, the Vin pin has a maximum voltage of 12V, the reset pin has a maximum of 13V, the 5V pin has a max of 5V, and the 3.3V pin has a max voltage of 3.3V.
Solution #8: Research The Maximum Voltage Your I/O Pins Can Take
The limit depends on the type of pin you use, so you need to do your due diligence and research thoroughly on that specific pin.
If you are unsure about something, don’t wing it! Make sure you thoroughly understand what you’re doing and what the Arduino board can handle. It’s much better to know what you’re doing rather than having to face the problem.
Mistake #9: Overloading Arduino Board
Overloading your Arduino board means that you are using too many components on your breadboard. Using so many will draw a lot of current from the Arduino, which means it will heat up.
This is especially dangerous if you do this for a long period of time because the temperature of the Arduino will increase and exceed the safety limits, resulting in overheating.
If you overheat, your Arduino board may catch on fire.
If you want to know all about an overheating Arduino and prevent it from happening to you, you should definitely check out my guide on preventing Arduino from catching on fire.
Solution #9: Keep An Adequate Number of Components On Your Board
You need to understand your Arduino board’s limits and try not to go overboard with adding too many components to it.
Make sure to also give it some well-needed rest by removing the power to the Arduino if it gets too hot to touch.
Mistake #10: Using Lithium-Ion Battery
Lithium-ion batteries should be avoided at all costs because they are very flammable and can explode when you overheat them.
If you work with your Arduino project for a long period of time, a lot of heat will be produced. Even though it can dissipate, your lithium-ion battery can still be exposed to it and be more prone to react adversely.
Even if you use a regular AA battery and it gets exposed to overheating, it will be less likely to explode compared to a lithium-ion battery.
Solution #10: Choose Other Power Sources
If you choose to not use a regular AA battery (which is a great alternative to a lithium-ion one) there are many different ways to power your Arduino.
You can use a DC adaptor, USB cable, or power pack.
If you want to see how long an Arduino can run or how you can make your Arduino run for a long time, then you should go read my guide on how an Arduino can run 24/7. I talk about the 4 ways you can make it run constantly and factors you want to avoid that will diminish its ability.
Summary – tl;dr (Too Long; Didn’t Read)
Here are the key takeaway points you should keep in mind after reading this article:
- The 10 mistakes you want to avoid when working with your Arduino are:
- Don’t reverse the polarity when you’re about to power your board
- Don’t use mishandle your breadboard
- Don’t rearrange your breadboard when your Arduino is powered
- Don’t apply too much power to input/output pins
- Don’t improperly ventilate the room you’re working in
- Don’t loosely connect your components
- Don’t overload your Arduino board
- Don’t use a lithium-ion battery
- Don’t use Arduino pins to run components
- Don’t purchase faulty or damaged Arduino and components
In the end, I hope this article was helpful enough so that you won’t have to mis-take the wrong steps and damage your Arduino.

