Is The Arduino IDE safe? (Plus Other Arduino IDE Tips)
One worry I had before starting Arduino was its IDE (Integrated Development Environment). I had no clue how it worked and whether installing it on my laptop would be dangerous or not. Yet, after doing extensive research and speaking from my own personal experience, I now have the answer to the question:
“Is the Arduino IDE safe?”
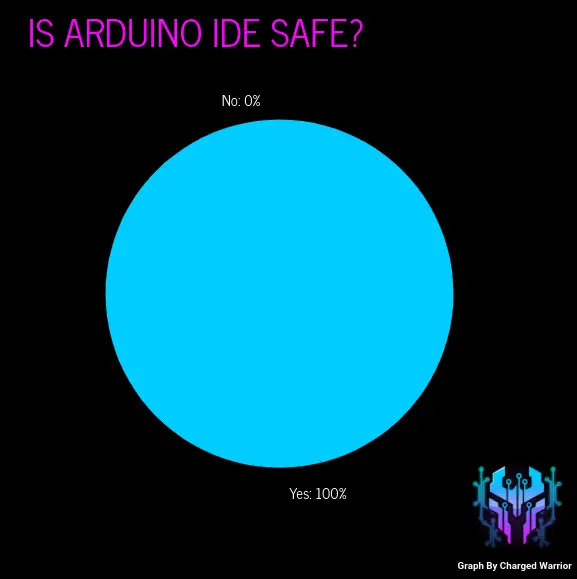
The Arduino IDE is very safe. There has been no detected virus, and even if there is, the company Arduino performs frequent software updates to optimize the IDE and make it user-friendly.
If you want to understand more about the Arduino IDE, why it’s safe, and techniques to keep in mind when working with the IDE, read on!
Lastly, I’ll include a key shortcut cheat sheet for the Arduino IDE at the end that’s downloadable.
Why Is The Arduino IDE Safe?
Arduino is a legitimate large company that serves approximately 30 million Arduino users. Consequently, they have worked hard to make sure their IDE is safe and accessible to everyone. However, if you download the IDE software from third-party sources rather than arduino.cc, you might encounter some viruses.
I’ve even polled 3 different Arduino Facebook groups, and all of the 53 people who participated in the poll agreed with me that the Arduino IDE is very safe.
If you’re still worried about viruses, just install good anti-virus software.
Arduino IDE Basics
Arduino Overview and Basics
Based on the Processing IDE, the Arduino IDE was created by the company Arduino to support their hardware product, the Arduino board. Its purpose was to make it easier for users to code and upload their sketches (programs containing code) to their Arduino.
This IDE is compatible with macOS, Windows, and Linux (which basically means you can download the IDE on any computer or laptop).
It also uses the programming language C/C++, and it has a software library. With this library, you can expand the capabilities of your Arduino because you can pull code that other users have created.
The beauty of Arduino is that everyone can be inspired by each other and make better code that anyone can use through libraries.
Setup and Loop
Many people, especially beginners, will use two main functions in the Arduino IDE: void setup() and void loop(). The setup function basically sets up your Arduino and runs once. The loop function is the meat of your sketch since it runs your code quickly and repeatedly.
If you still don’t fully understand these functions, then I’ll use an analogy. Pretend you’re a new restaurant employee, and I’m the manager. I have two manuals for you, one for opening the shop and the other one is for creating food.
The manual on opening the shop is the void setup() in this situation. You’d have to prepare the restaurant before you start working, just like how you’d prepare your Arduino before working on it.
Continuing with the shop example, you have to first unlock the door, turn on all the lights, turn on the open sign, etc. For the setup function, you’re initializing pins, assigning pins to different properties, etc.
The manual on preparing specific dishes (let’s say pizza in this instance) is the void loop().
When customers come in to place their orders, you need to whip out that manual to make the pizza of their choosing. Let’s say there’s a long line of customers wanting pepperoni pizza (yum!). You have to quickly churn out these pizzas, and you need to follow the recipe to make it correctly. That’s what the void loop does; it runs your code continuously and quickly.
Anatomy of the Arduino IDE
Verify Button
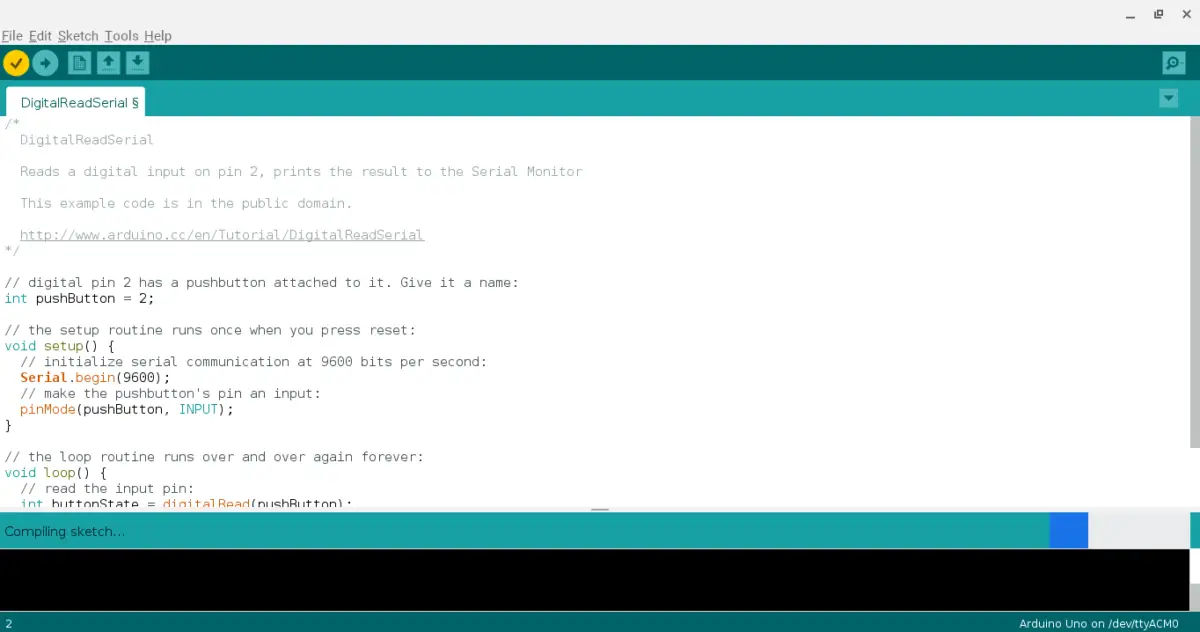
The verify button is the first button you see on the top left corner of your Arduino IDE. Its symbol is a checkmark and it basically checks your code to see if there are any errors.
If there are any errors, it will highlight the line of code that’s wrong in red and send a message to the console. The message will be in red letters detailing what the IDE thinks is wrong with your code.
Upload Button
The upload button is the second button (to the right of the verify button), and its symbol is an arrow pointing to the right. This basically uploads your finished code to your Arduino.
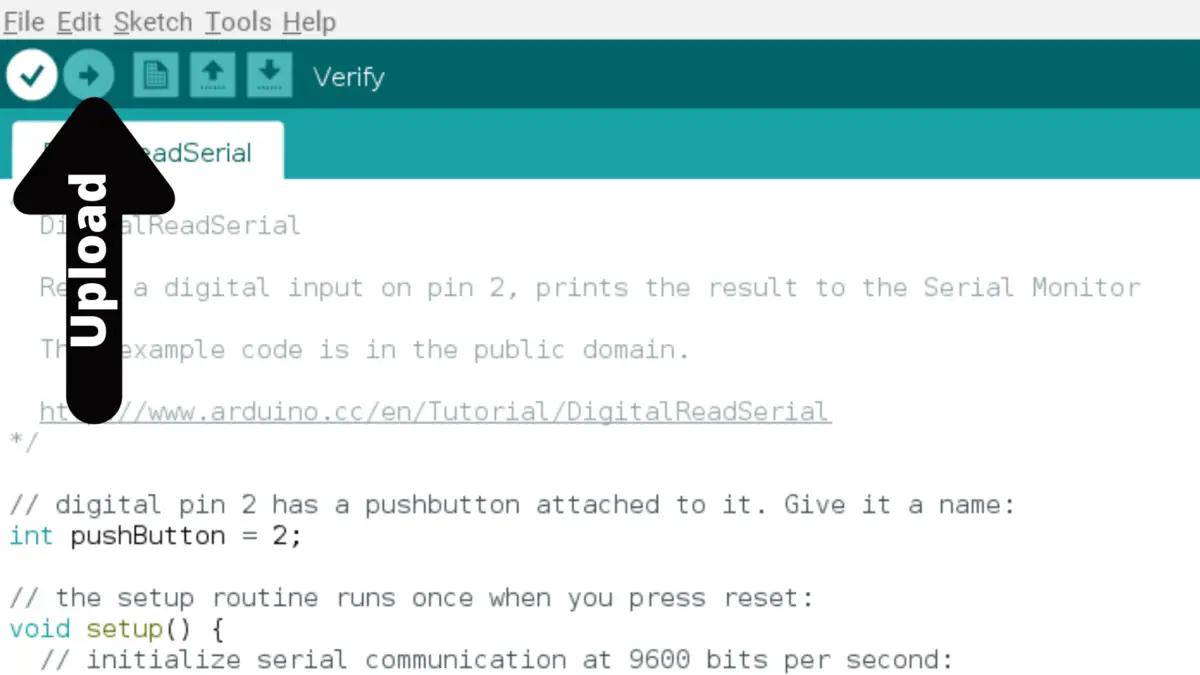
When you upload code, you can tell it’s working by looking at your Arduino board and seeing the TX and RX light flashing.
Sometimes, the upload won’t work because you have an error in your code or because your computer is not properly detecting your Arduino.
New Button
The ‘new’ button is the third button and it has an icon with a page with a corner folded down. Clicking on this will open a new window for you to code in.
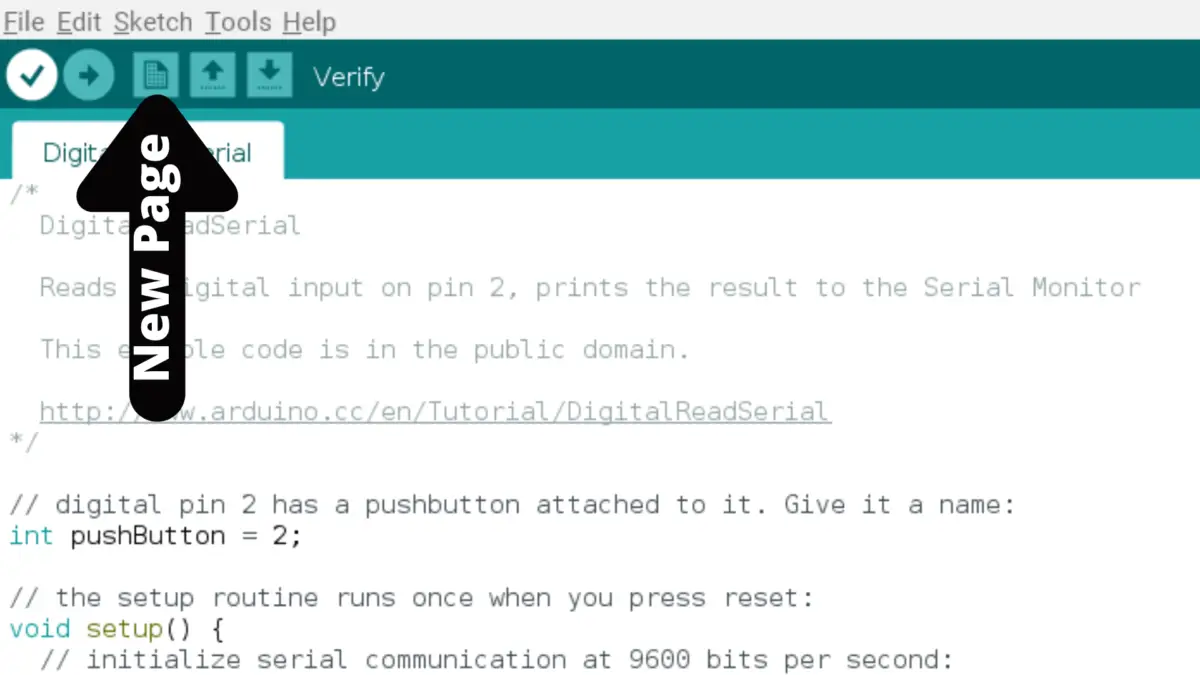
Just remember to save your files so that you don’t lose them.
Open Button
The open is the fourth icon and its symbol is an up arrow. You’d use this if you wanted to reopen a pre-existing file with all your code in it.
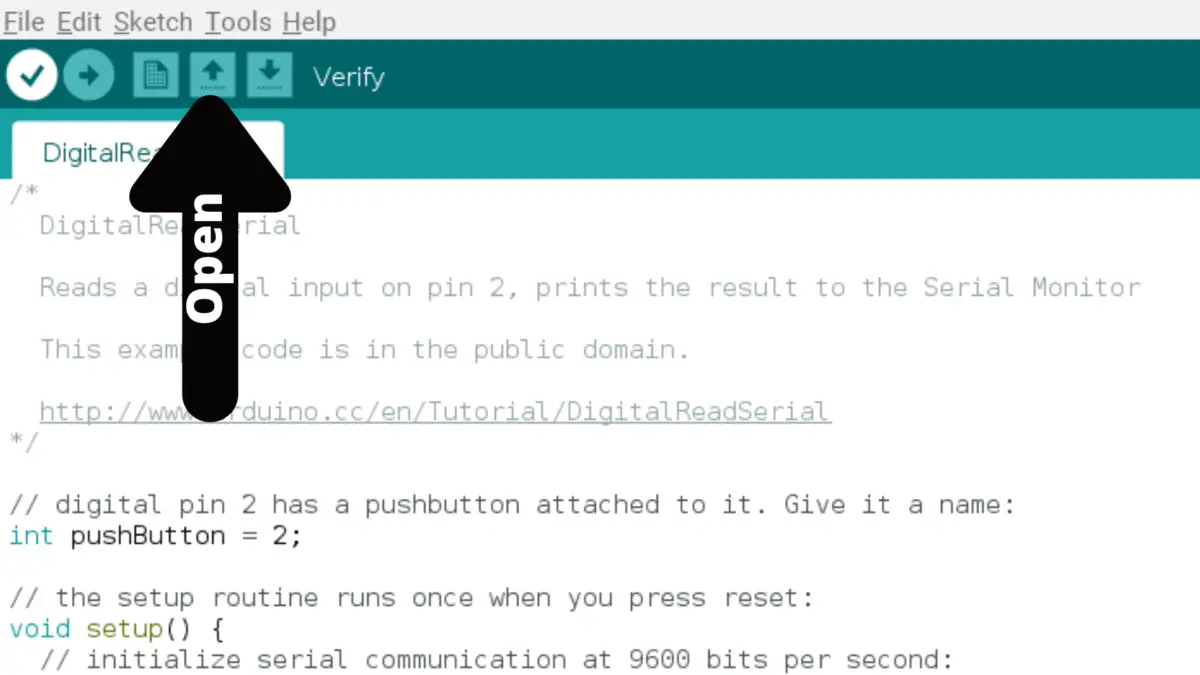
Just remember to save any changes to this file when you are done with it. Who knows when you might need it again in the future.
Save Button
This is the fifth button on the top left corner of the IDE and it has a down arrow icon. This saves your sketch in case you need it in the future.
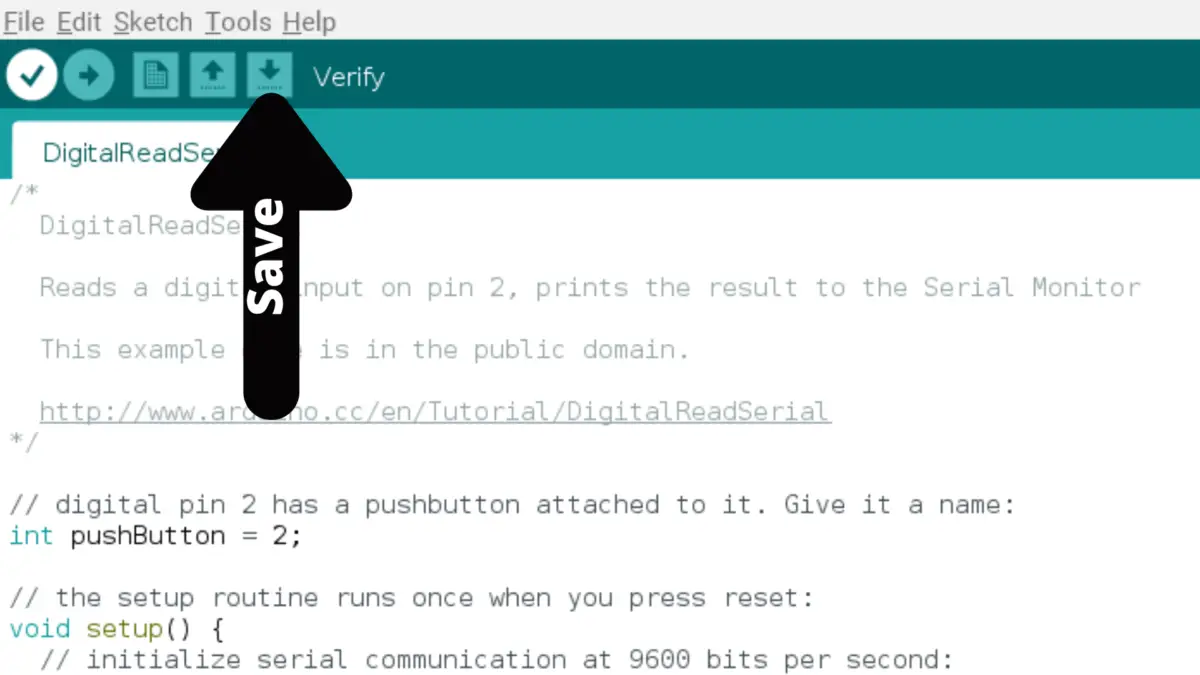
You should make a habit of consistently saving your code, just in case you forget and accidentally close out of your IDE. On some rare occasions, you might accidentally power off your device while working or Windows might force an update on you, which causes you to lose your work.
Serial Monitor
This can be found on the top right corner of the screen and it has a magnifying glass icon.
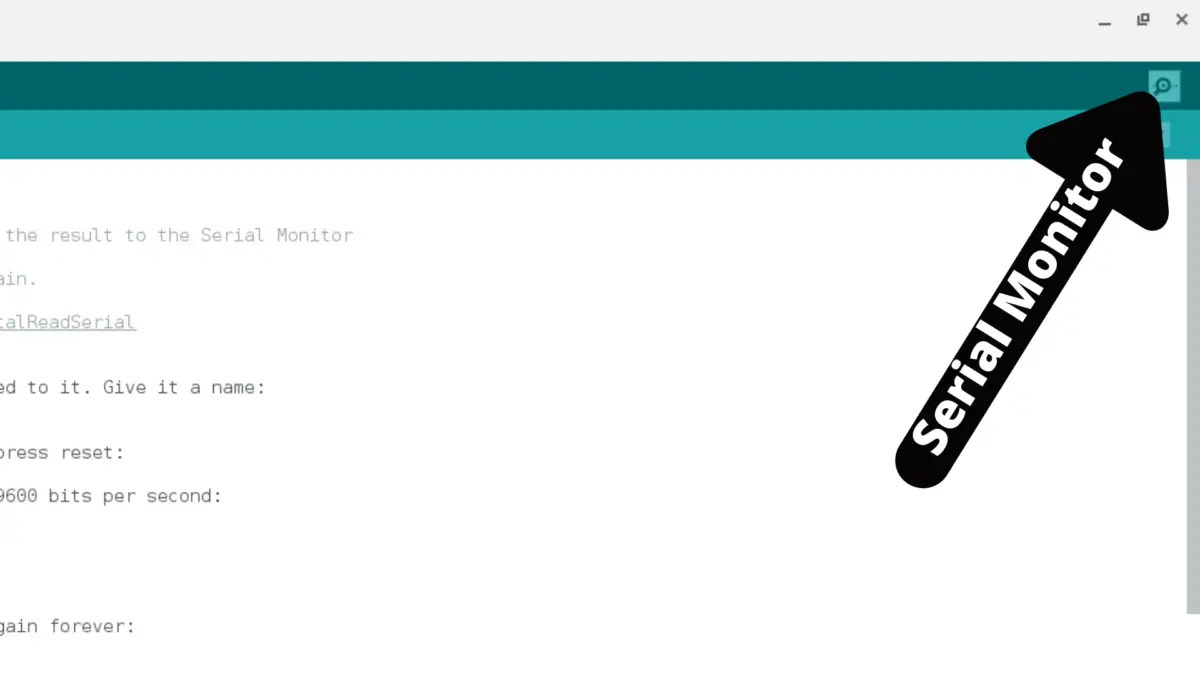
This basically shows you the communication between your Arduino and your computer.
To use this correctly and see something on the monitor, you need to connect your Arduino to your computer and upload code containing “Serial.begin(9600);” and/or “Serial.println();”.
Message Bar
It’s the long blue bar near the bottom of your IDE. It’s basically where the white screen (where you code) and the black screen (the console) meet.
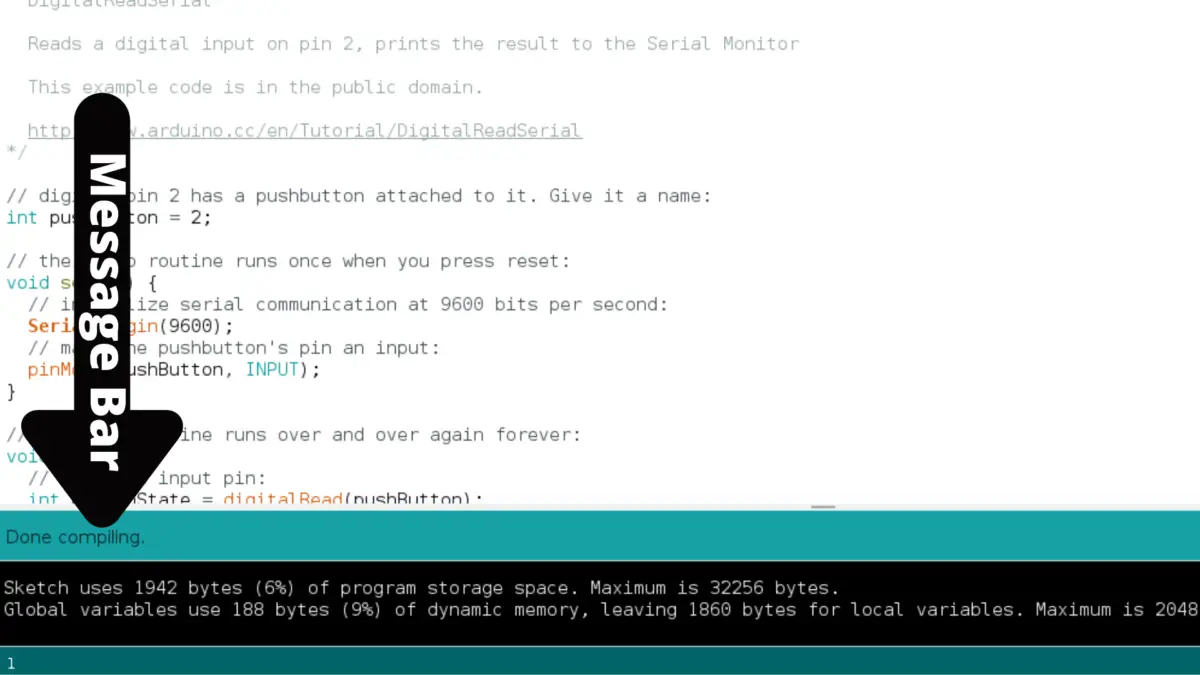
If you just opened your IDE up, you might not see it. Once you start verifying your code or uploading your code, messages like “Done compiling” will show up here.
Console
This is the black space at the very bottom of your IDE. People might call the error section because the console displays error messages.
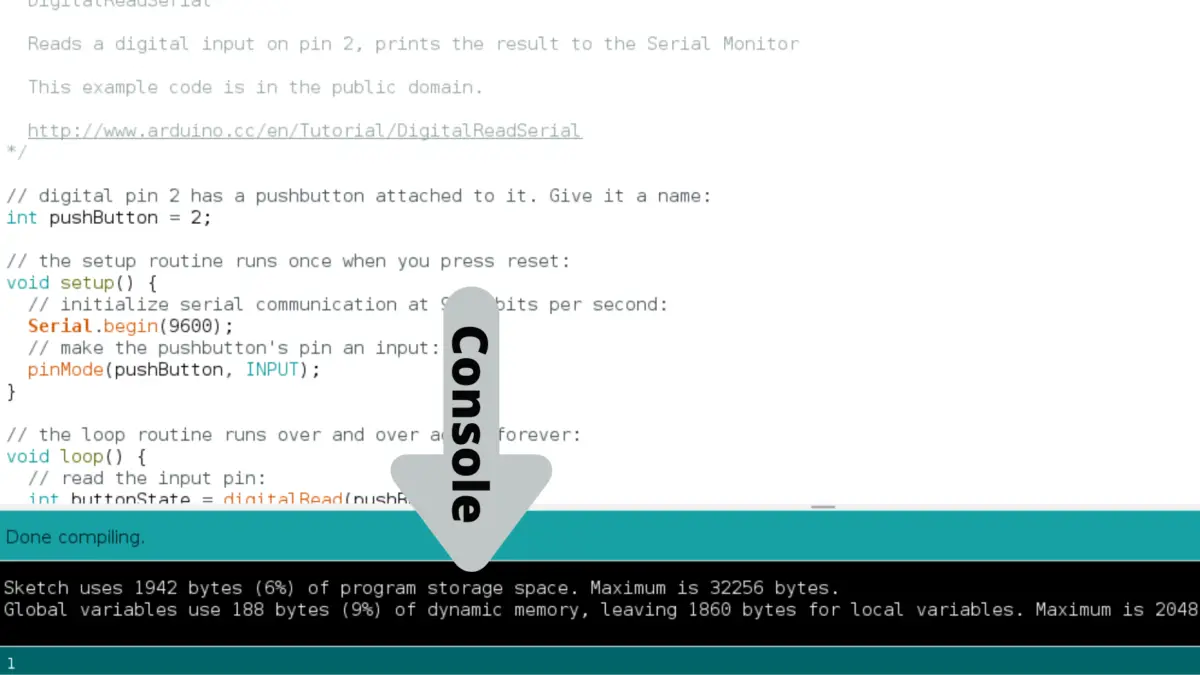
It is very detailed because it tells you what line the error is in, the file it’s in, and the function it’s in.
In some instances, you cannot completely rely on your console. You must search around the line where the supposed error is because you’ve might’ve made an undetected error leading up that line.
Other Small Features
At the very bottom, left corner of your IDE, you will see a number in white. This tells you the line number your cursor is blinking at. This can be useful if the Arduino IDE doesn’t show your line numbers on the left side of your code.
Lastly, you will notice some more white letters in the bottom right corner. This gives some more information such as the name of the Arduino board you’re using and the serial port.
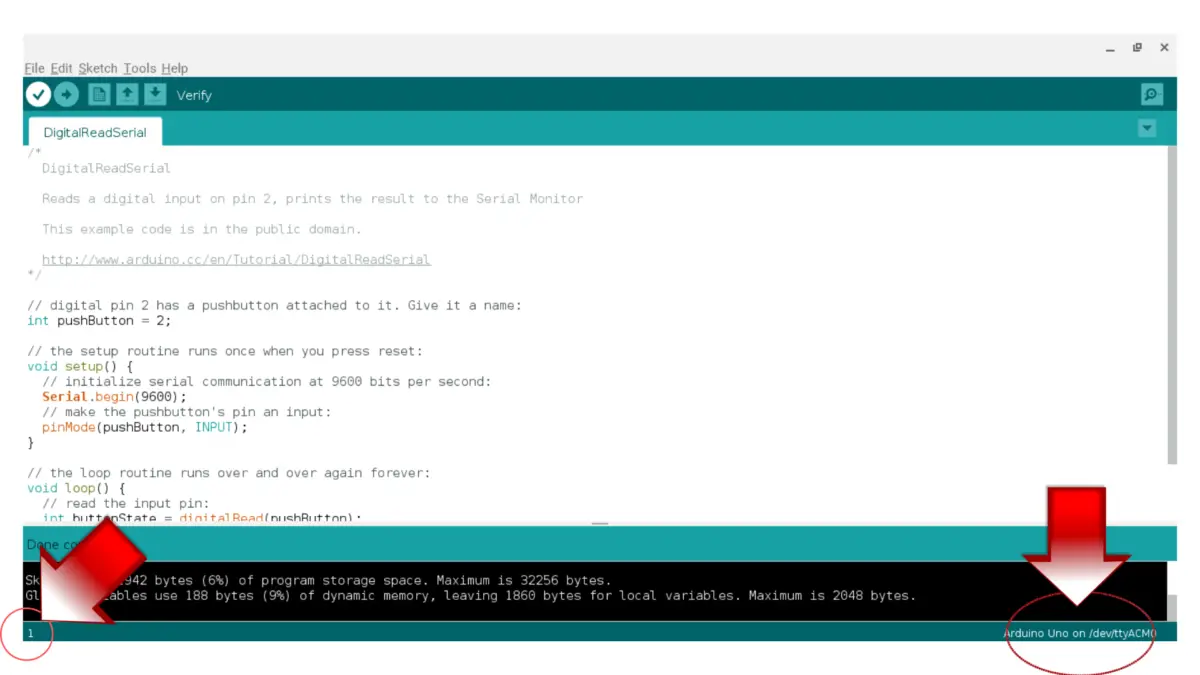
If the information is incorrect, you can always change these two by clicking on the word “Tools” on the very top bar and moving your cursor down to where it says “Board” or “Port”.
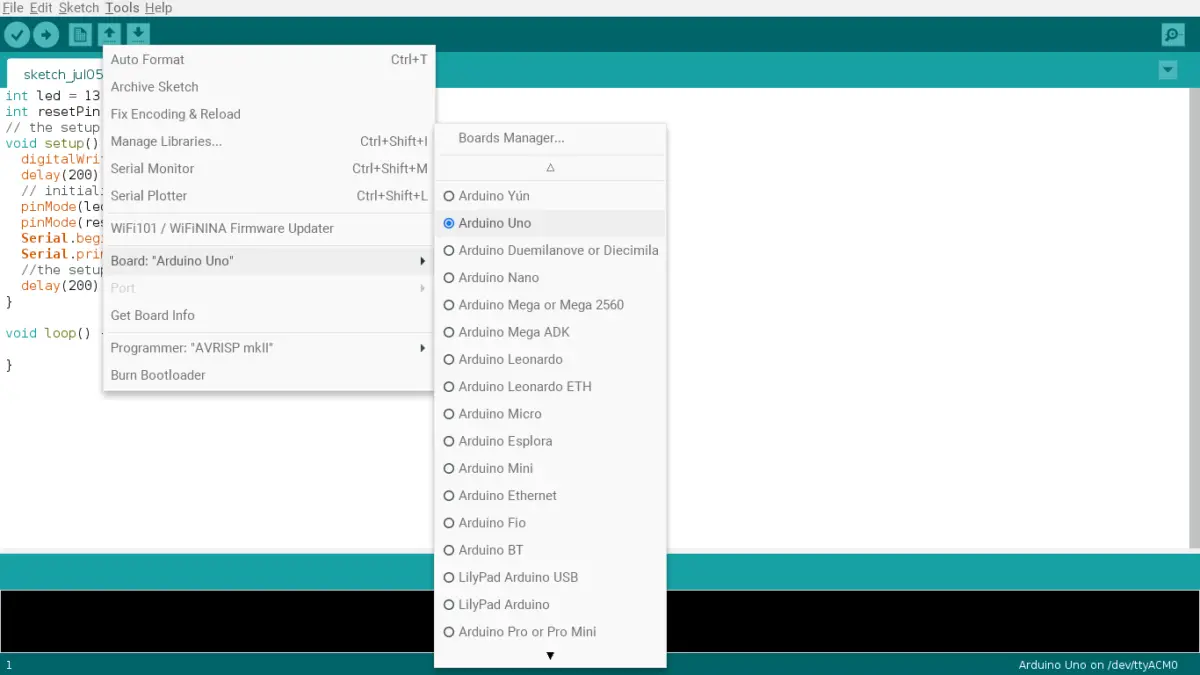
If your Arduino board and port don’t match with what you’ve identified in the IDE, then your Arduino won’t be detected. That means you can’t upload code to it.
If you are having troubles with your computer detecting your Arduino, check out my guide on resolving Arduino detection problems. I also recommend this for those who don’t have this problem so they can be prepared when they encounter it.
Top 6 Tips For Programming in Arduino IDE
Tip #1: Give Good Descriptive Names For Variables
This tip is VERY important, regardless if you’re a beginner or an expert. Using good variable names will save you time in the future.
If you don’t use good names, you won’t remember what the variable’s function is. Then, you’d have to go back to the top of your code and start working through the logic again.
Moreover, using good names will help others understand what you’re doing.
I had a friend in my computer science class. He loved using silly names in his code like “Billy Bob Joe” or “stuff”. However, it was very frustrating for me and others to understand his code because of his unconventional naming techniques.
The moral of the story is: think of good variable names or else programmers will get annoyed at you.
Tip #2: Verify And Save Your Code
Understandably, you don’t need to save your code when you upload your sketch to your Arduino, but you should make a habit of saving and verifying your code.
I’d recommend verifying and saving code every 3-5 lines that you write out. This is to make sure your code is polished and correct. Moreover, saving your code after verifying it will help you in the future in case you forget to save it.
Verifying frequent is extremely important because if you’ve written many lines of code, you’d have to go hunting and searching for the errors. That’s time-consuming and most of the time, the console won’t point out every error (or even correctly point them out in some cases).
Just make a habit of checking and testing your code before it becomes a much bigger issue to deal with.
Tip #3: Indent Your Code
Proper indentation and the correct use of whitespace are necessary when you are coding. This technique is not required by the machine since it’s only meant to make your code more readable for a human being.
Just like how there are conventions and standards for writing essays (like indenting paragraphs), you need to be accustomed to (or continue practicing) good indentation.
This is especially important if you have a boatload of code. No one wants to try to figure out what your block of un-indented code means, especially if there are if statements inside if statements or loops inside if statements and loops.
I love the Arduino IDE because you can easily format your code by pressing control + T (or command + T).
Tip #4: Use Comments At All Times
For all the code you type out, you MUST COMMENT! Commenting is necessary for your future self and other coders to understand what you are trying to do in your code.
To comment in the Arduino IDE, you can use “//” for single-line comments or “/**/” for multiple lines of code. See the example below:
//comments for a single line

/*
 * comments for many lines insert here
 * and here
 * and here
*/
I understand that beginners don’t want to do this (since that’s how I felt when I was a beginner).
I remember writing code when I first started, and I didn’t comment. A few weeks later when I came back to it, I forgot everything about what my code did, even though I was the one who wrote it! I was especially frustrated with my past self for not taking the time to write a few, descriptive words.
Tip #5: Utilize Functions To Reuse Code
This tip should be pretty self-explanatory. If you’re like me, you don’t want to write out the same (or similar code) repeatedly. That’s why I choose to create a function to store code, and then call it later when I need it.
The IDE has some pretty unique built-in functions (which means you don’t need to code it, but you need to know how they work). For instance, there’s the digitalRead() function, the analogWrite() function, and the map() function.
Tip #6: Use Loops!
Loops like for loops or while loops are very useful since they save you time and effort. Let’s take a look at the following code:
// would you rather write this, or

void setup() {

  // Set the mode of the LED pins as OUTPUTS.
  for (int thisPin = 6; thisPin < 12; thisPin++) {

    pinMode(thisPin, OUTPUT);

  }

} // close setup

// would you rather type all of this out?

void setup() {
    pinMode(6, OUTPUT);
    pinMode(7, OUTPUT);
    pinMode(8, OUTPUT);
    pinMode(9, OUTPUT);
    pinMode(10, OUTPUT);
    pinMode(11, OUTPUT);

} //close setup
Although loops may sometimes take a little brainpower to figure out, using it will ultimately benefit you in the future.
Using loops also reduces errors because you have to write less code, which means the probability of you screwing up (like forgetting a semicolon) diminishes.
If you need to completely stop your program, check out my guide on stopping an Arduino from running. It contains 6 tested methods, and I’ve included some tips from my own experience.
Summary – tl;dr (Too Long; Didn’t Read)
Here are the key takeaway points you should keep in mind after reading this article:
- The Arduino IDE is completely safe because Arduino regularly updates it
- In your Arduino IDE, you’ll most commonly use the void loop() and void setup() functions
- void loop() will repeat actions that you want repeated
- void setup() will setup the pins and initialize them so that you can use them in the loop
- The Arduino IDE has the following buttons at the top of its screen:
- Verify button: this will check your code
- Upload button: this will simultaneously check your code and upload it to your Arduino
- New page button: this will open a new page for you to write code in
- Open button: this will open a saved file
- Save button: this will save your code in a file for future use
- My 6 tips when programming in the Arduino IDE are:
- Give good descriptive names for variables
- Verify and save your code
- Properly indent your code
- Always use comments
- Reuse code by storing them in functions
- Use loops
In the end, you should have a pretty good IDE-a of what your Arduino IDE does and how you can use it properly!
Now here are the downloadable cheat sheets I promised: