Does Your Arduino Not Let You Open Device? Fix It With This!
I’ve encountered lots of programming errors before in my coding projects. Yet, when I made the switch to Arduino and started to program in the IDE, I encountered a “can’t open device” error message. I was confused about what it meant and couldn’t understand words like avrdude or ser_open.
Thankfully, after I did some research and fixed my own issue, I want to now share my experience and help you resolve this problem by first answering the question:
What Does The Error Message “avrdude: ser_open(): can’t open device ” \.\COM3” mean?
This error message basically means that the AVRDUDE cannot find the file you want to upload, so it will have a problem uploading your sketch (or code) to the Arduino board.
To fix this, you’ll need to set your COM port to the correct one in your Arduino IDE and/or enable the “Show verbose output during compilation” in the Preferences in your IDE.
If you don’t know what I mean by these two things, I’ll explain them in the next section.
How To Fix This Issue
The first solution is to specify the correct COM port in your IDE or else the AVRDUDE won’t connect to your Arduino board to upload your code.
What is a COM port?
A COM (which stands for communication) port an Input/Output (I/O) interface that allows a serial device (like an Arduino) to be connected to a computer. It is also known as a serial port.
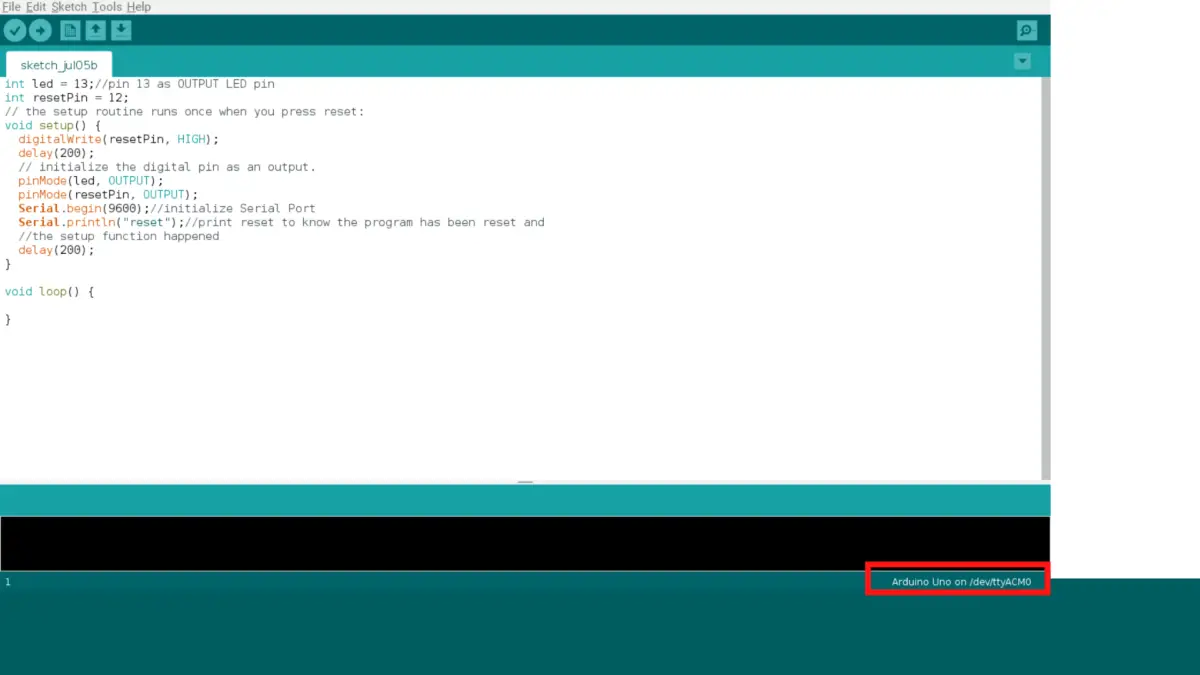
You can tell which COM port you’ve connected by looking at the bottom right of the Arduino IDE
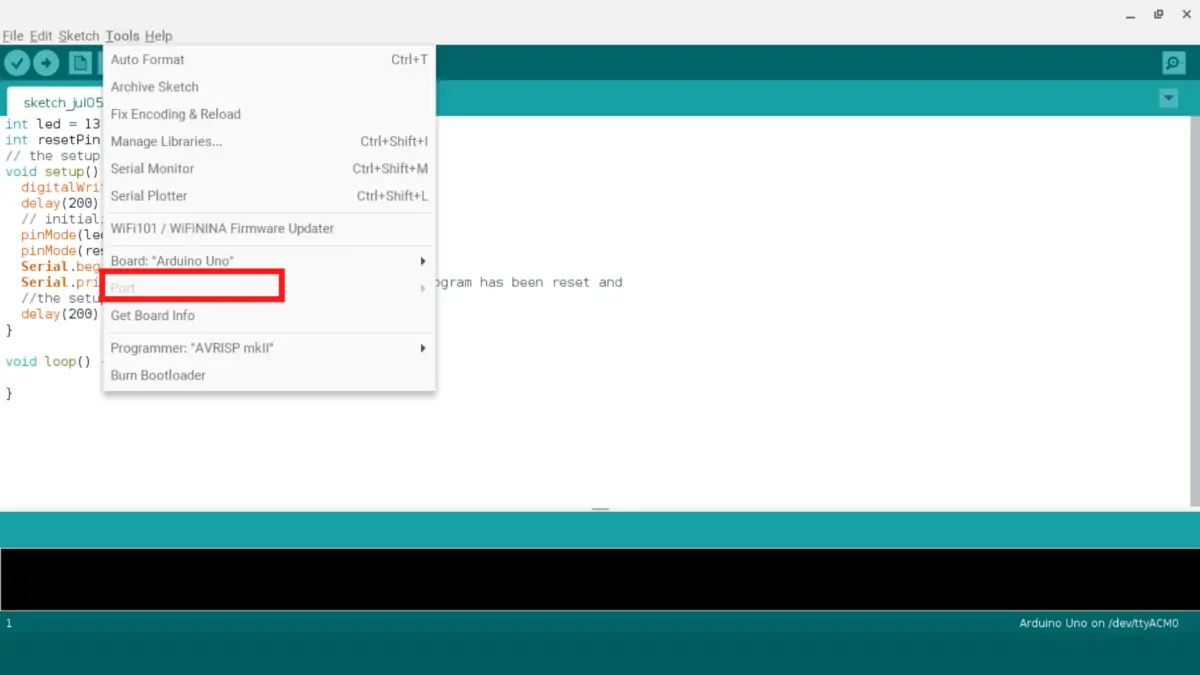
To change your COM port, go to your Arduino IDE, click on “Tools”, click on “Port”, then choose the correct one that’s compatible with your Arduino. After that, your Arduino should be detected.
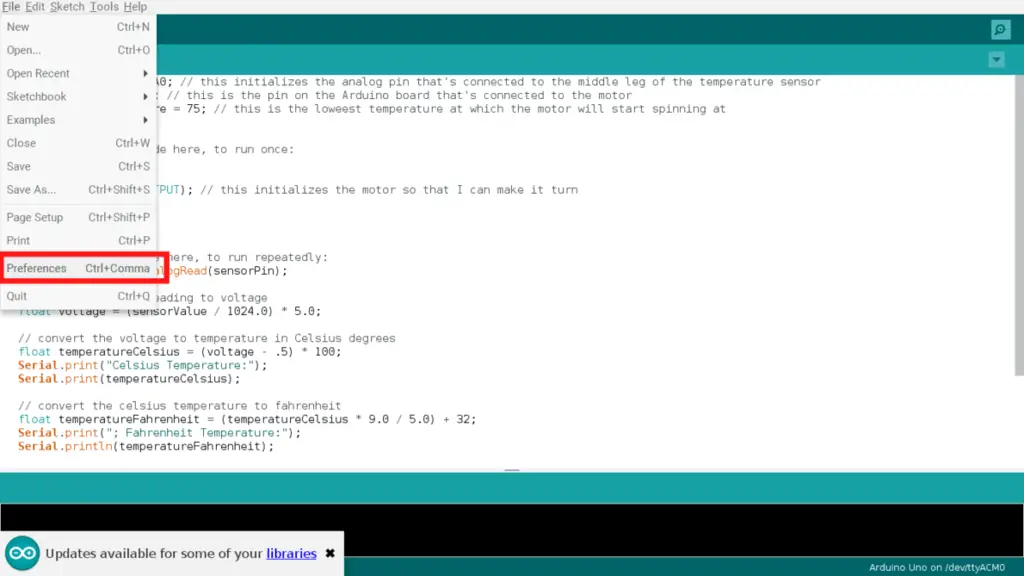
The second solution is to enable the “Show verbose output during compilation” in the Preferences in your IDE.
To access your Preferences, you’ll need to go to your File menu, and click on the Preferences. If you want to get there faster, use the keyboard shortcut CTRL + COMMA.
After that, look for “Show verbose output during” and check the “compilation” checkbox. While you’re at it, you should also check the upload checkbox just to be on the safe side.

As you can see, AVRDUDE plays a big role in this, so you may be wondering:
What Is AVRDUDE?
AVRDUDE stands for (AVR Downloader/UploaDEr) and it’s a software that works with the bootloader to upload your sketch (which is your code) to your Arduino board so that it can run it.
If you didn’t know, AVRDUDE is only a small piece of the puzzle. It plays a role in the toolchain that uploads your code to your Arduino board. How it works is this:
When you upload your sketch to your Arduino board, a toolchain consisting of software tools gets implemented. These tools work together to achieve a single goal: converting your code into something that the Arduino board can understand.
There’s a lot that happens behind the scenes after you click on the ‘verify’ and ‘upload’ buttons in the Arduino IDE (Integrated Development Environment), so I will give you the basic overview of the toolchain.
Firstly, you would write your code in the Arduino IDE (basically like a text editor), which uses the programming language C++. This has a file extension of .ino. The code in the sketch is only human-readable, meaning that the Arduino hardware doesn’t understand it.
Because it can only read machine code, the next tool you’d use is called a compiler. When you press the verify button, it compiles the code, rearranges the code, and checks for errors using the compiler software AVR-GCC (the GCC stands for GNU Compiler Collection). Then, the compiler spits out a .hex file that contains all the changes for the Arduino to read.
After that, you click on the ‘upload’ button and the AVRDUDE software starts sending the .hex file to the integrated circuit.
At the same time, a software called the bootloader works with the AVRDUDE to transmit that file through the USB cable and onto the flash memory of the Arduino.
The bootloader comes pre-loaded onto the Arduino board’s integrated circuit, and it’s very useful. Without it, you would need an external hardware to load the file to the circuit.
Let’s summarize what just happened:
1. You write the code in the Arduino IDE.
2. Verifying it converts the sketch into a .hex file using AVR-GCC.
3. Uploading it to the hardware requires both the AVRDUDE and bootloader.
Let’s use an analogy to make this whole toolchain idea digestible (this word is foreshadowing the analogy!). Pretend we are making a pizza. To make it we need different ingredients and tools. For instance, the ingredients could be pizza dough, tomato sauce, cheese, pepperoni, etc. The tools you could use include a rolling pin, an oven, a pizza cutter, a peel, etc.
The toolchain in this analogy will create the pizza. Similarly, the manipulation and uploading of the Arduino sketch is the pizza (or the end result) here. The AVR-GCC, bootloader, AVRDUDE, and Arduino IDE are the tools synonymous with pizza ingredients and tools. They help us get to our results.
Summary – tl;dr (Too Long; Didn’t Read)
Here are the key takeaway points you should know after reading this article:
- The error message “avrdude: ser_open(): can’t open device ” \.\COM3” means that the AVRDUDE cannot detect your Arduino board so it cannot upload code to it.
- AVRDUDE is basically a software that works with your bootloader to upload your sketch to your board.
- It plays a big role in the toolchain uploading code to your Arduino board. When you press the upload button, AVR-GCC will convert it to a .hex file so that it’s machine readable and then the bootloader on the Arduino and the AVRDUDE will pass it through to the Arduino board.
- The two solutions to this problem is:
- Check your COM port and make sure the appropriate one is chosen.
- Check in your Preferences to make sure that compilation is checked off (it’s next to the “Show verbose output during” line).
Are you still having issues with uploading code to your Arduino? Then you should definitely go check out my Arduino compiling issues guide since it contains a lot of tips and tricks for resolving these sorts of issues!
Hopefully, my solutions to the “can’t open device” problem work for you and can open up new possibilities for you!