Common Arduino Library Problems Guide & Popular Libraries
When I used to work with Arduino libraries frequently, I downloaded a lot of them for different projects. It got pretty crowded in my Arduino IDE (Integrated Development Environment), which was problematic because it took me a long time to find the library I needed.
That’s why I wanted to remove the ones I don’t use anymore to keep my library neat and organized. Now, that I’ve been through many iterations of this process, I would like to help guide you through this relatively simple procedure.
My first act is to give you the solution to the problem “How do I uninstall an Arduino library?”:
To uninstall an Arduino library, you need to go to your “Preference” section of the IDE, browse through the sketchbook folder, click on the library folder, and delete the undesired library.
If you need more clarification, I will explain it further in my next section.
Because I want to better prepare you for your adventure with the Arduino library, I’d like to include some common library problems and solutions you may encounter. As a bonus, I’ll throw in a dissection of a library to help you better understand what it is, and I’ll go over some of the popular libraries.
How To Uninstall Arduino Library
You can get to the “Preference” by using the keyboard shortcut ctrl + , or by going to the Files menu and clicking on the Preference, which is the second to last one.
Then, go to the sketchbook location section, and click browse to find your library.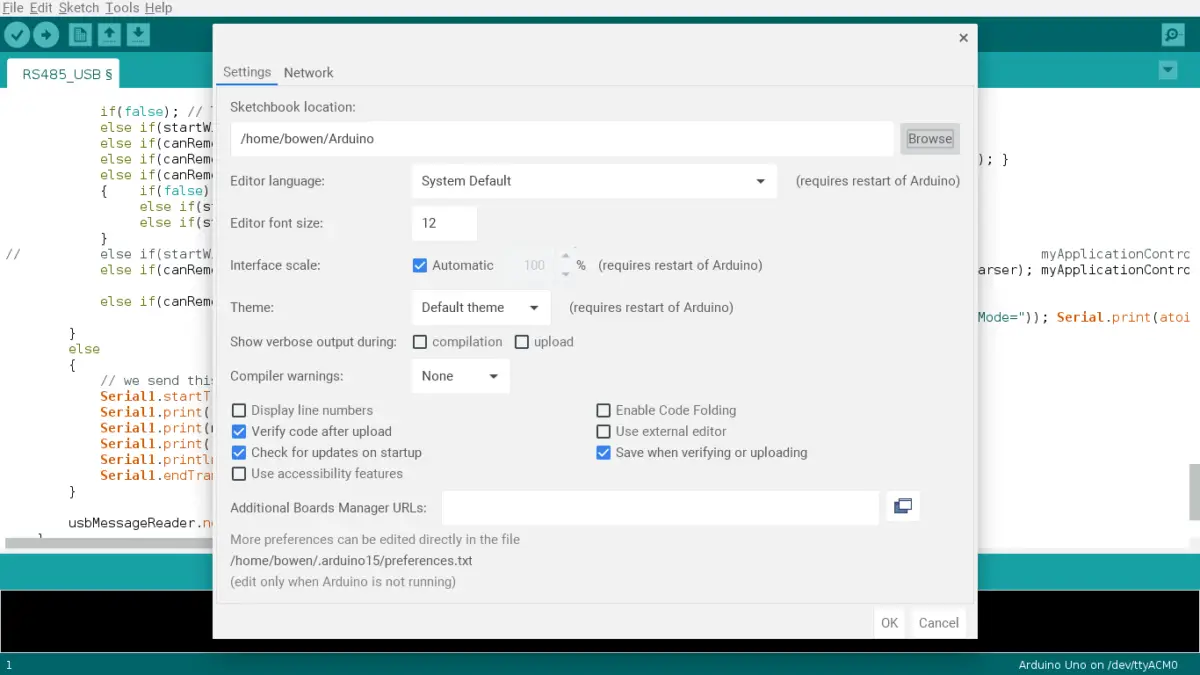
Find the libraries folder, and click on the library you want to delete. Right-click on it and hit the delete option.
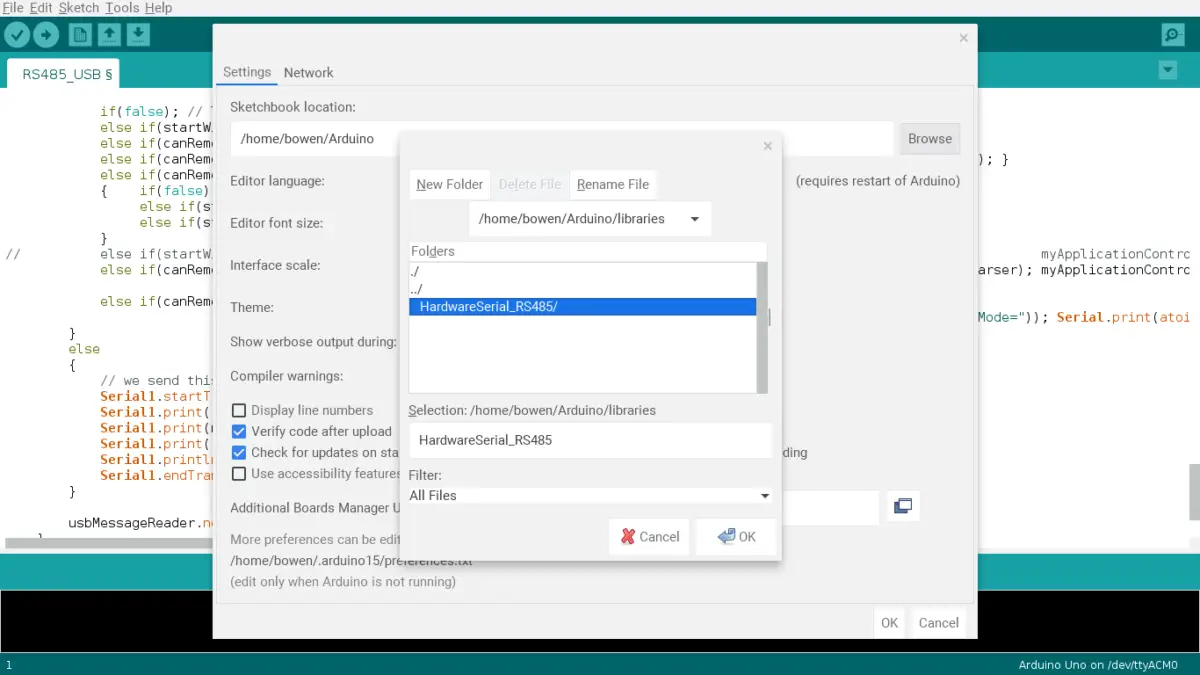
An alternate option is directly going to your files if you know where your library is stored. Then, delete it as you would for any other file.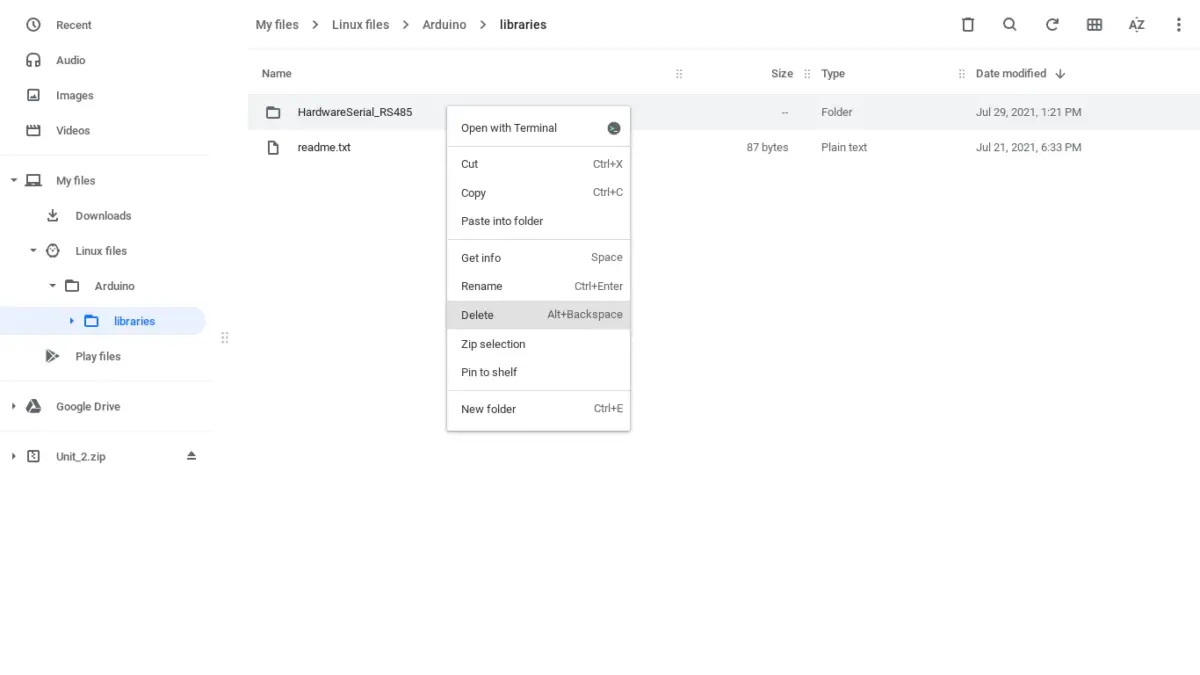
Anatomy Of An Arduino Library
When developers create a library, they must include two different files: the header file and the source code file. There can be additional files, which is helpful but they’re not mandatory.
Header File
The header file is basically a GPS; it shows the location of the library and tells the sketch (which contains code you wrote) which library it can pull the function(s) from. This file ends with a .h.
When you are using the library, you have to first let the sketch know, so it can pull the library. You would do this by starting your code with “#include < ‘your library’s name’.h >”. For example:
#include <Adafruit_SleepyDog.h> // <-- This is what you type in first

// You don't need to pay attention to the rest of this code

void setup() {
      // Make sure to reset the watchdog before the countdown expires or
      // the Arduino will reset!
      int countdownMS = Watchdog.enable(4000);

//insert your project's setup code here
}
void loop(){
    // insert your project's loop code here
}
Source Code File
The second necessary file is the source code file. This file contains all the functions for the library, and the file ends in .cpp (this stands for C++).
Note: You have to make sure the names of your .cpp and .h files are the same as the name of the folder containing them (or else you will run into a compiling problem when using the library).
Other Files/Folders You May See
Some libraries also include an examples folder, which is very helpful. It contains example code that implements the functions in the library you are using.
You may also see a keyword file, which is a text file that contains all the keywords with the different colors associated with it when you call it in the IDE.
Common Arduino Library Problems (With Solutions)
1. You didn’t install the library
For those new to Arduino or new to using the Arduino library, you may sometimes forget to install it in the first place.
I’ve done this before. Sometimes, I got too caught up in finishing my code and neglect to install it.
Solution: Make a habit of installing a library you’re going to use before you start programming.
2. The .cpp and .h files are not matching the folder name
As I’ve mentioned previously, you will have compiling issues when your header and source code files are mismatched with the name of the folder it’s contained in.
Sometimes, downloading a library from the Internet can result in this inconsistent naming issue.
Solution: Whenever you’re downloading libraries, make sure to check the .cpp and .h files to make sure that they have the same names as the folder containing them.
3. You didn’t restart your Arduino IDE after you installed the library
This is another common problem when installing libraries. When you just installed a new library, you MUST close the Arduino IDE and open it back up again. The IDE won’t recognize newly installed libraries without going through this tedious process.
I am guilty of this myself since I always get too excited when installing and using a library. I get too caught up in using the library that, by the time I get to verifying or uploading my code, I get a disappointing error message.
Solution: Make a habit of closing the Arduino IDE and reopening it before working on your new library.
4. You used the wrong library name when calling it in your code
Many times, when users are in a rush, are fatigued, or are inattentive to their work, they’ll let the occasional spelling mistake slip. Maybe it’s an extra letter (or letters) or sometimes it’s the lack of a letter (or letters).
That’s why it’s important to double-check your work against the actual spelling of the library name. Pay extra attention to capital letters since they also matter!
Solution: Just copy and paste the name of the library instead of typing it all out. You’ll make fewer mistakes that way.
5. You downloaded too many versions of the same library.
This may or may not be a common mistake, but either way, the IDE will try to use all the versions of the same library if you have multiple.
Even though this doesn’t seem like much of a big deal, you will see compiling errors if you implement this.
Solution: Delete the extra libraries or move them outside of your sketchbook.
Note: Simply changing the names of the multiples won’t actually resolve the problems. It has to be moved or deleted.
6. You need to install other libraries
Some libraries have library dependencies, which means that they require you to install other libraries to work. For instance, the Adafruit Graphic Display requires you to install the Adafruit GFX library.
Solution: Research what other library (or libraries) your current library needs and install them.
7. You don’t have all the pieces and parts of the library to use it
When you download the library, you must have all the components it’s supposed to have. An incomplete library cannot get the job done, just like how your phone won’t completely work if it’s missing vital parts.
Solution: Make sure to let the library finish downloading. Don’t interrupt its progress, and do not remove or change any files in the library afterward.
Most Popular Libraries
The most popular library is the Adafruit Circuit Playground since it has over 238,344 downloads. Other popular libraries (which are based on the number of user downloads) are as followed:Rank Library Number of
Downloads1 Adafruit Circuit Playground 238,344 2 Adafruit DHT Sensor 161,727 3 Arduino JSON 99,450 4 Servo 84,872 5 SD 82,894 6 Adafruit GFX 79,774 7 Adafruit NeoPixel 59,342 8 Liquid Crystal l2C 57,582 9 MFRC522 55,322 10 Blynk 48,414
Now, I’m going to discuss what each of these libraries does for those who are interested.
1. Adafruit Circuit Playground
The Adafruit Circuit Playground library contains all the code necessary to work with the Circuit Playground device designed by Adafruit.
This means that if you want to use this library, you’d need to buy a compatible device, which costs around $25.
The board has a small circular design and is designed for beginners.
2. Adafruit DHT Sensor
The purpose of this library is to measure temperature and humidity at a low price point. To sense the temperature, it relies on its device counterpart, which uses the thermistor. The humidity is detected by the capacitive humidity sensor.
These sensors give a digital output, so you don’t need to use any analog pins. However, as simple as it may seem to use, the capturing of data requires precision.
3. Arduino JSON
The Arduino JSON (JavaScript Object Notation) library is simple to learn and use. It is good for serialization, deserialization, MessagePack, fixed allocation, zero-copy, streams, filtering, etc.
4. Servo
This library works with a hobby RC servo motor. Its gear and shaft allow precision control.
However, the servo motor itself can only turn between 0 to 180 degrees.
This library is simple to use and is preinstalled in your Arduino IDE.
5. SD
The SD library is another library that’s preinstalled in your Arduino IDE, and it lets users read and write SD cards.
Users would want to use SD cards to store memory or gain more access to memory because their Arduino board doesn’t have enough memory to upload the sketch.
If you want to learn more about Arduino memory and how you can use it to your advantage, go read my 2 part memory guide! The first guide will give you awesome memory optimization tips, and the second one will show you how to add memory to an SD card.
6. Adafruit GFX
The Adafruit GFX library allows you to use graphics with different display types. You can create cool designs, but the library cannot be used by itself.
What I mean is that you’ll also need a second library to pair with the Adafruit GFX. The second library is for the hardware display device that the GFX library will be working with.
7. Adafruit NeoPixel
You can use the Adafruit NeoPixel on any Arduino board, and it controls LED pixels and strips that are based on a single wire.
Basically, it lights up different LEDs (light-emitting diode) with different colors (RGB, which stands for Red Green Blue) and different levels of brightness.
8. Liquid Crystal l2C
The Liquid Crystal l2C library is used with the l2C display LCD (liquid crystal display).
The most common LCD is the 16×2 LCD screen and it has the I2C interface. The 16×2 means that it can display 2 lines, and each line can only hold up to 16 characters.
I’ve used an LCD before in a Crystal Ball project I created. Whenever I shook the project, a different answer (that’s preprogrammed and vague) would pop up on the LCD.
Sadly, it is not compatible with all Arduino boards. You can only use it with the
- Micro
- Leonardo
- Yun
- Mega
- Nano
- Uno R3
9. MFRC522
Even though this library name looks like somebody came up with it by randomly pressing keys on a keyboard, it actually works with any MFRC522 module, which means a device that has the MFRC522 chip.
Some of the devices with the MFRC522 chip can be used to communicate with each other.
10. Blynk
The Blynk library is great for communication between your project and your smartphone. You can build a smartphone app that is compatible with the project.
It is compatible with WiFi, BLE, Bluetooth, Ethernet, GSM, USB, Serial, and you can it on any board.
It can be used on the IoT (which stands for the Internet of Things) platform, and you can use the cloud to connect your hardware.
Projects you can use the Blynk library in may include a weather station that relies on the Internet or an LED that can be controlled from your phone. For more Blynk project ideas, go to my Reference section and click on the “Blynk Projects” link.
Summary – tl;dr (Too Long; Didn’t Read)
Here are the key takeaway points you should keep in mind after reading this article:
- To delete an Arduino library, you’ll need to follow the process:
- Go to “Preference”
- Browse through the sketchbook folder
- Click on the library folder
- Delete the undesired library
- An Arduino library has a header file and a source code file
- Some common library problems include:
- You didn’t install the library
- The .cpp and .h files are not matching the folder name
- You didn’t restart your Arduino IDE after installing the library
- You used the wrong library name
- You installed multiple versions of the same library
- You need to install other libraries
- You don’t have all the components of the library to use it
- The 10 most popular libraries are:
- Adafruit Circuit Playground
- Adafruit DHT Sensor
- Arduino JSON
- Servo
- SD
- Adafruit GFX
- Adafruit NeoPixel
- Liquid Crystal I2C
- MFRC522
- Blynk
In the end, I hope you’re ready to start a new chapter of your Arduino adventure by implementing these library tips!
If you want more library tips, check out my first library guide! It’ll go further into what an Arduino library is, and it will help you choose what library to use.
References
To make sure my loyal readers receive the best content possible, I go through the following source(s):