Best Way To Program For Beginners: Arduino Programming Guide
When I started my Arduino journey, I quickly concluded that learning and using the programming language was going to be my strong suit. I’ve had two years of experience with HTML, CSS, and JavaScript, so I wasn’t daunted by C++.
Still, I had to learn the proper conventions and built-in functions, but it didn’t take too long because there were a lot of similarities between them. Now, I’ve decided to make this guide to help you learn to program much more efficiently and effectively.
I’ll be going over the best way to write programs (in my opinion), the basics of creating and uploading a sketch, what happens when you upload a sketch, programming basics, and common problems (and solutions) you may encounter when coding.
Best Way To Write and Upload Sketch To Arduino
When working with Arduino, you need to write and upload code to it.
This is a necessary step, so here is my preferred method of doing it:
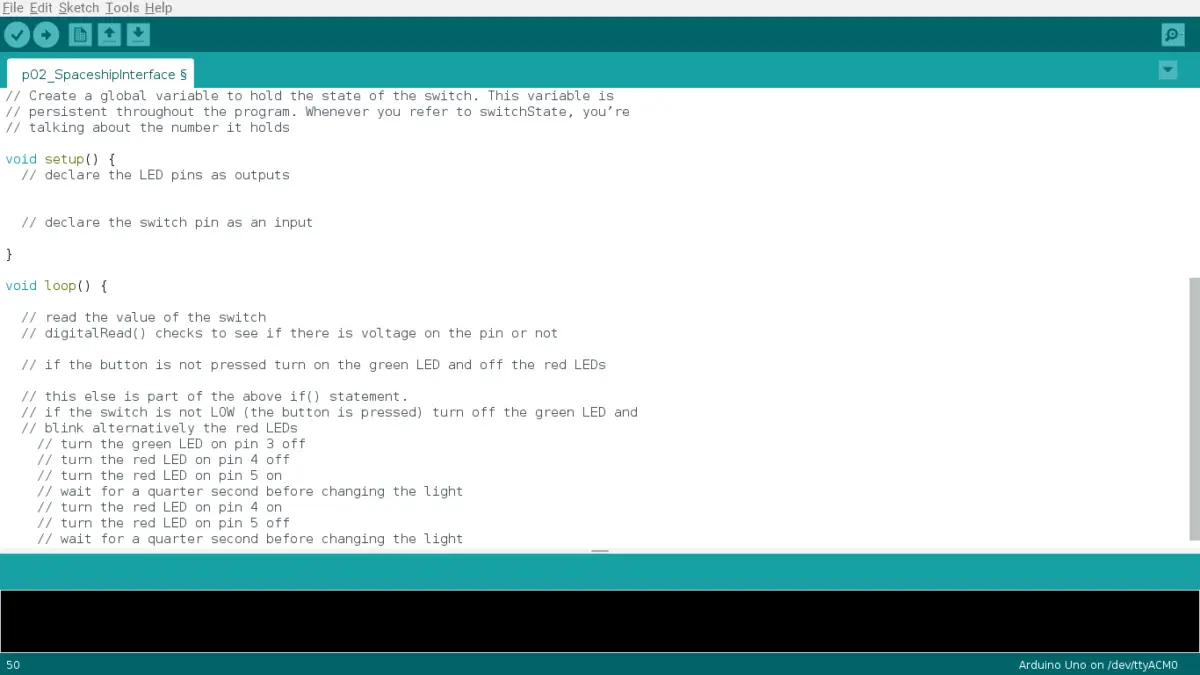
- Open up the Arduino IDE.
- Note: if you don’t have it installed, click on this link to get it installed: arduino.cc.
- Make a new sketch.
- You should already have a setup() function and a loop() function in the sketch. The setup() only runs once and “sets up” everything. The loop() runs repeatedly and quickly.
- Install any library (or libraries) you are going to use.
- It’s a big pain in the butt to start uploading your code and see an error message reminding you that you didn’t include any library when you called it.
- Start writing code.
- You could start declaring variables, calling libraries, making for or while loops, creating other functions in addition to the loop() and setup(), etc.
- Connect your Arduino board to your computer.
- You would use a USB (Universal Serial Bus) cable and plug one end into the Arduino’s USB port and the other end to your computer’s USB port.
- Verify and upload your program to the Arduino board.
- You should also save your code if it’s important (it usually is).
There are a few instances where your IDE won’t work because it’s not updated.
If you want a more in-depth solution to updating your drivers and your Arduino, check out my guide on updating your Arduino.
Uploading a sketch to your Arduino involves many players, so some of you may wonder:
What Happens When You Upload Code To Arduino Board?
When you upload your sketch to your Arduino board, a toolchain consisting of software tools gets implemented. These tools work together to achieve a single goal: converting your code into something that the Arduino board can understand.
There’s a lot that happens behind the scenes after you click on the ‘verify’ and ‘upload’ buttons in the Arduino IDE (Integrated Development Environment), so I will give you the basic overview of the toolchain.
Firstly, you would write your code in the Arduino IDE (basically like a text editor), which uses the programming language C++. This has a file extension of .ino. The code in the sketch is only human-readable, meaning that the Arduino hardware doesn’t understand it.
Because it can only read machine code, the next tool you’d use is called a compiler. When you press the verify button, it compiles the code, rearranges the code, and checks for errors using the compiler software AVR-GCC (the GCC stands for GNU Compiler Collection). Then, the compiler spits out a .hex file that contains all the changes for the Arduino to read.
After that, you click on the ‘upload’ button and the AVRDUDE (AVR Downloader/UploaDEr) software starts sending the .hex file to the integrated circuit.
At the same time, a software called the bootloader works with the AVRDUDE to transmit that file through the USB cable and onto the flash memory of the Arduino.
The bootloader comes pre-loaded onto the Arduino board’s integrated circuit, and it’s very useful. Without it, you would need an external hardware to load the file to the circuit.
Let’s summarize what just happened:
- You write the code in the Arduino IDE.
- Verifying it converts the sketch into a .hex file using AVR-GCC.
- Uploading it to the hardware requires both the AVRDUDE and bootloader.
Let’s use an analogy to make this whole toolchain idea digestible (this word is foreshadowing the analogy!). Pretend we are making a pizza. To make it we need different ingredients and tools. For instance, the ingredients could be pizza dough, tomato sauce, cheese, pepperoni, etc. The tools you could use include a rolling pin, an oven, a pizza cutter, a peel, etc.
The toolchain in this analogy will create the pizza. Similarly, the manipulation and uploading of the Arduino sketch is the pizza (or the end result) here. The AVR-GCC, bootloader, AVRDUDE, and Arduino IDE are the tools synonymous with pizza ingredients and tools. They help us get to our results.
Arduino Programming Basics
Just like how there were many tools used to upload a sketch to the Arduino, controlling an Arduino program to behave a certain way that you want also requires tools. Let’s go over some of the tools that will help you write sketches in the IDE:
Variables
You would use variables to store data and information such as numbers or text. After they are created, they can be changed later on in the program unless you use the keyword “const”. This prevents you from changing the value you initially set and can be very useful if you don’t want to accidentally change a permanent value later on.
You can also insert data types in front of variables when the values involve numbers. This is useful because it can save you memory if you use it properly. See the following table to understand which one you should use.
| Data Type | Bit | Range of Numbers |
|---|---|---|
| bool | 8 | 0 or 1 |
| byte | 8 | 0 to 255 |
| char | 8 | -128 to 127 |
| unsigned char | 8 | 0 to 255 |
| word | 16 | 0 to 65,535 |
| unsigned int | 16 | 0 to 65,535 |
| int | 16 | -32,768 to 32,767 |
| unsigned long | 32 | 0 to 4,294,967,295 |
| long | 32 | -2,147,483,648 to 2,147,483,647 |
| float | 32 | -3.4028235E38 to 3.4028235E38 |
Arrays
Arrays are useful for storing and accessing variables. You’d put a set of empty square brackets (“[]”) after the variable name but before the equal sign to signal that you’re making an array.
Values in arrays can be retrieved with index numbers, but the numbers start a 0. For example, to access the array
stuff[] = [3, 7, 4, 8, 2];
You would type: stuff[3] to get 8, which is the 4 item.
// Here are some different ways to create arrays
  int myInts[6];
  int myPins[] = {2, 4, 8, 3, 6};
  int mySensVals[6] = {2, 4, -8, 3, 2, 5, 9};
  char message[6] = "hello";

// Assign values to array
mySensVals[0] = 10;

// This means that the first value of mySensVals is 10

// Retrieve values from array
x = mySensVals[4];

// x is equal to the 5 item in the array, which is 2.
Loops
Loops are very useful since they can perform repetitive tasks for you and save you time. However, if you implement it incorrectly, then you have to spend more time fixing it.
Most of the time, you would use three types of loops: void loop, while loop, and for loop.
A void loop is used in every sketch as it is the meat. It comes after the void setup, and the loop runs repeatedly and quickly. Here’s an example:
void loop() {
  // put your main code here, to run repeatedly:
}
The second loop commonly used is the while loop. It has an exit condition (unlike the void loop), and you would use this if you didn’t know exactly how many times you want your code to run or when the loop would only occur during certain conditions.
Here’s an example:
nice = 0; // I've declared a global variable

while (nice <= 68) {
  // run the code inside this while loop repeatedly until the variable nice is not the number 68 anymore

  nice ++; // incrementing nice to give me an exit condition or else this while loop will run forever
}
The third useful loop is the for loop. Like the while loop, it has an exit condition. However, you would use this loop if you knew exactly how many times you want your lines of code to run.
It creates a variable, implements a condition involving the aforementioned variable to test, and iterates the variable (meaning it increments or decrements it).
Here’s an example:
// Dim an LED using a PWM pin
int PWMpin = 10;  // LED in series with 470 ohm resistor on pin 10

void setup() {
  // no setup needed
}

void loop() {
  for (int i = 0; i <= 255; i++) {
    analogWrite(PWMpin, i);
    delay(10);
  }
} //code is from the official Arduino website
Mathematical Operations
Mathematical operations are very useful when you want to manipulate numbers. For instance, you can perform simple math calculations or increment and decrement them.
Note: if you store the numbers in const, then you cannot change their value.
Here are some examples you can use in your code:
// Start initializing 2 different numbers
num1 = 3;
num2 = 8;

// Incrementation
num1 ++;

// Decrementation
num2 --;

// Multiplication
num1 * num2;

// Addition
num1 + num2;

// Subtraction
num2 - num1;
Functions
Functions can be great for storing and reusing large chunks of code. When you start coding in the IDE, you’re already using two vital functions: void setup and void loop:
void setup() {
  // put your setup code here, to run once:

}

void loop() {
  // put your main code here, to run repeatedly:

}
If-Else Statements
These statements are great if you need to have your program make a decision and control the flow. The if statement will only occur if there is a true statement. If the statement is false, then whatever code inside the if statement will not execute. Only the code in the else statement would then be performed.
Here’s an example of what I mean:
bool food = true;

if (food == true) {
   // perform the code inside this if statement
}

else {
   // if food is not true, execute whatever code is in here
}

// In this example, food is true, so the if statement will execute and the else statement's code won't be used
Arduino IDE Programming Tips
- Make sure you have an exit condition for your loops or else they will run forever and become very annoying.
If you to learn more about loops and how to use them to your advantage, you should read my guide on using loops in the Arduino IDE.
- Choose the data type that’s small enough to store all the values you need.
- For example, if you’re only using the number 7 (for initializing pin 7 on the Arduino board), use a byte because it’s the smallest data type available for storing the number 7.
- See the table from above under the “Variables” section to help you decide which data types you should be using.
- Use local variables rather than global variables if you can.
- Local variables can only be used in the function they’re declared in. Global variables are declared outside of any functions, so they have a global scope. That means any function following it can call it and use it.
- Consequently, if you only need the variable for one or two specific function, just create the variable inside the functions to save memory.
- Use the PROGMEM keyword if you don’t need to change strings or data in your sketch while it’s running.
- Implement defined constants. Defined constants don’t take up any memory, but the clear problem in using it is that it doesn’t specify a data type.
Summary – tl;dr (Too Long; Didn’t Read)
Here are the key takeaway points you should keep in mind after reading this article:
- My overall process of uploading code to an Arduino is:
- Open up the Arduino IDE
- Make a new sketch
- Install the necessary libraries
- Write a code
- Connect Arduino to computer
- Upload the code
- 2 things happen behind the scenes when you upload code to your Arduino:
- It gets verified and converted into a .hex file using AVR-GCC.
- The AVRDUDE and bootloader are used to upload it to the board
- Variables are things to store information in so that you can retrieve them later in your code
- Arrays are a beefed up version of variables
- Loops can save you time when writing code that repeats
- Functions are great for storing and reusing code
- If-else statements dictate the flow of your code
In the end, I hope this article contained helpful byte-sized pieces of information for you to digest!
References
I’ve used these sources to ensure my material is the best and most relevant.