Best Simple Beginner’s Guide To Arduino Hex Files
What’s the first thing that comes to your mind when you think of ‘hex files’? When I first heard about it, I thought they were files containing curses from witches.
Now that I have more experience with Arduino, I’ve also come to understand more about hex files and what they are. Consequently, I wrote this article to discuss that topic in addition to talking about why hex files are important and how they’re important. For visual learners, I’ve even included helpful screenshots.
But first, let’s answer the first question:
What Is A Hex File For Arduino?
A .hex file is the product of the AVR-GCC compiler software. It contains machine language that the AVR-GCC has compiled from the code you wrote in the Arduino IDE.
As you will see below, Arduino’s programmer cannot understand the code written by humans, so the compiler translates it for the Arduino. Their translations are contained in hex files.
Why Are Hex Files Important?
I’ve talked a lot about how hex files (in addition to other tools) are important my other article on the best way to program in the Arduino IDE. Here is an excerpt:
When you upload your sketch to your Arduino board, a toolchain consisting of software tools gets implemented. These tools work together to achieve a single goal: converting your code into something that the Arduino board can understand.
There’s a lot that happens behind the scenes after you click on the ‘verify’ and ‘upload’ buttons in the Arduino IDE (Integrated Development Environment), so I will give you the basic overview of the toolchain.
Firstly, you would write your code in the Arduino IDE (basically like a text editor), which uses the programming language C++. This has a file extension of .ino. The code in the sketch is only human-readable, meaning that the Arduino hardware doesn’t understand it.
Because it can only read machine code, the next tool you’d use is called a compiler. When you press the verify button, it compiles the code, rearranges the code, and checks for errors using the compiler software AVR-GCC (the GCC stands for GNU Compiler Collection). Then, the compiler spits out a .hex file that contains all the changes for the Arduino to read.
After that, you click on the ‘upload’ button and the AVRDUDE (AVR Downloader/UploaDEr) software starts sending the .hex file to the integrated circuit.
At the same time, a software called the bootloader works with the AVRDUDE to transmit that file through the USB cable and onto the flash memory of the Arduino.
The bootloader comes pre-loaded onto the Arduino board’s integrated circuit, and it’s very useful. Without it, you would need an external hardware to load the file to the circuit.
Let’s summarize what just happened:
1. You write the code in the Arduino IDE.
2. Verifying it converts the sketch into a .hex file using AVR-GCC.
3. Uploading it to the hardware requires both the AVRDUDE and bootloader.
Let’s use an analogy to make this whole toolchain idea digestible (this word is foreshadowing the analogy!). Pretend we are making a pizza. To make it we need different ingredients and tools. For instance, the ingredients could be pizza dough, tomato sauce, cheese, pepperoni, etc. The tools you could use include a rolling pin, an oven, a pizza cutter, a peel, etc.
The toolchain in this analogy will create the pizza. Similarly, the manipulation and uploading of the Arduino sketch is the pizza (or the end result) here. The AVR-GCC, bootloader, AVRDUDE, and Arduino IDE are the tools synonymous with pizza ingredients and tools. They help us get to our results.
How Do You Find A Hex File?
Finding the hex file isn’t too complicated. Here’s my method of obtaining the hex files:
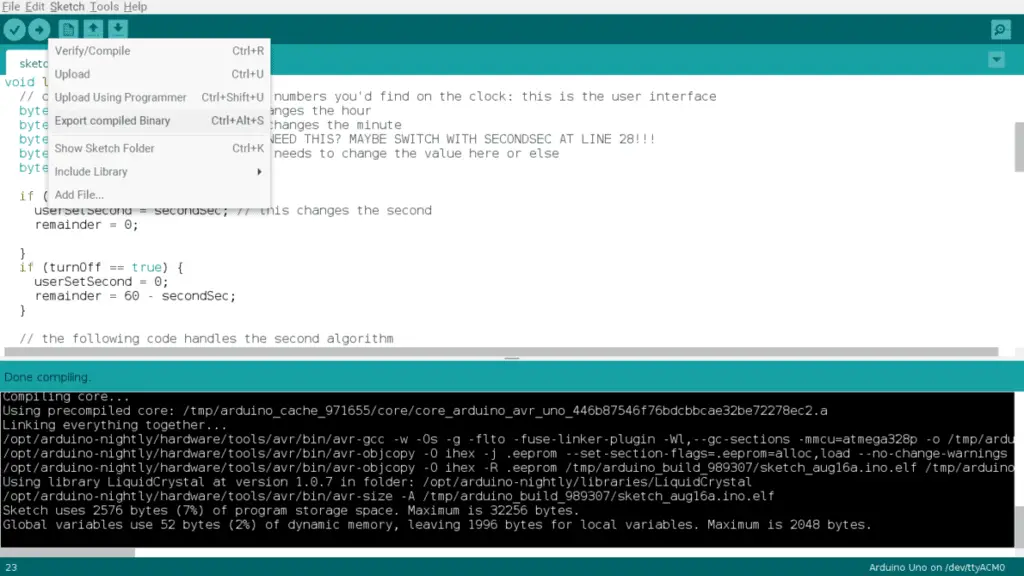
- Go to your Arduino IDE and go to the Sketch menu.
- Next, you can either click on “Export compiled Binary” or use the key shortcut ctrl + alt + S.
- Doing this will compile your sketch. This is great because you don’t have to be connected to your Arduino board to access it.
- Do note that this feature is only accessible for IDEs with the Arduino IDE 1.6.5 version or newer.
- After it’s finished compiling, it will put the .hex file into your sketch directory.
- Then, go back to your Sketch menu and click on “Show Sketch Folder” (or use the key shortcut ctrl + K).
- Doing this will take you to your compiled hex files.
Here are the steps again with pictures:
You will get two different files. One is a hex file with the bootloader and the other one is a hex file without the bootloader. This is what I got when I went through the process:
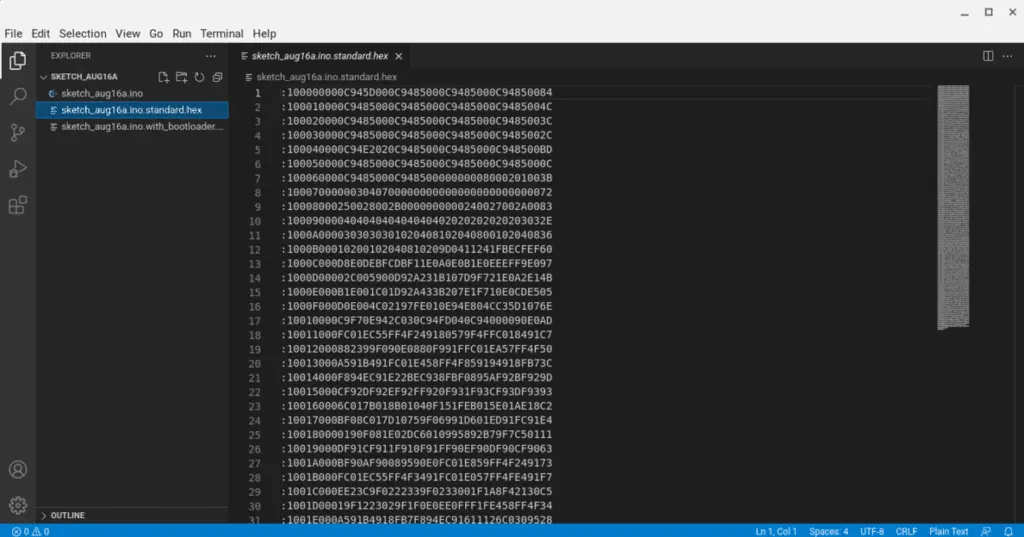
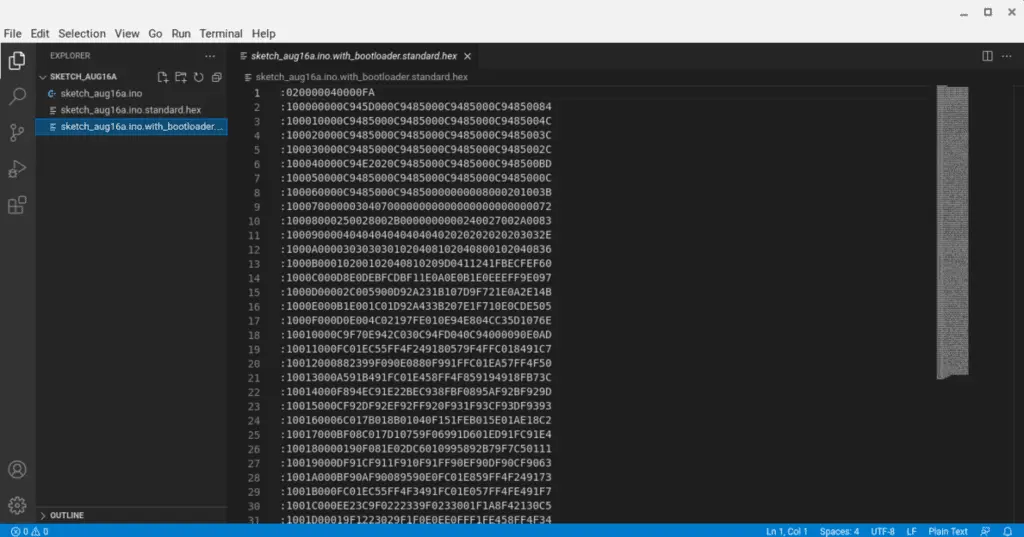
For me, these two files opened up in Visual Studio Code, which is pretty handy.
Did you know you can program your Arduino in Visual Studio Code instead of the Arduino IDE? Check out my post on Arduino IDE alternatives to see the pros and cons of using them. Moreover, I’ll talk about the other 6 IDE alternatives besides Visual Studio Code and their pros and cons too!
Anyways, as you can see, the first image is the hex file without a bootloader and my second image is the hex file with a bootloader. These files contain lines of random letters and numbers smushed together. Even though it’s not understandable to humans, the Arduino board will understand it perfectly.
These files are great if you don’t have an Arduino board on hand. You can compile these and save these files for later. Then, when you have access to your board, you can just upload them using a programmer like AVRISPmkII or Atmel Ice.
Summary – tl;dr (Too Long; Didn’t Read)
Here are the key takeaway points you should keep in mind after reading this article:
- A hex file is the result of the AVR-GCC software. It contains the machine language code of the sketch you compiled
- You can find your hex file by performing the following steps:
- Go to the Sketch menu
- Click on “Export compiled Binary”
- Go back to your Sketch menu
- Click on “Show Sketch Folder”
- Doing this will take you to your compiled hex files.
- The role hex files play in the overall toolchain of uploading your Arduino code is:
- You write the code in the Arduino IDE.
- Verifying it converts the sketch into a .hex file using AVR-GCC.
- Uploading it to the hardware requires both the AVRDUDE and bootloader.
In the end, you should be hex-cited to try these steps above and play around with hex files more!
References
I’ve used the following source(s) to ensure my material is high quality and up to date: